Using Office 365
Supported Account Types SyncSign supports integration for both Microsoft 365 personal users and business (Business Plan) users.
No Manual App Registration The integration between SyncSign Cloud Server and Microsoft 365 Exchange Online does not involve manual application authorization. You do not need to manually register a SyncSign App in Microsoft Entra ID (formerly Azure AD).
Authentication Method Currently, the integration is based entirely on delegated authorization. It utilizes the OAuth Client Credentials authentication type to ensure a secure and reliable connection to your calendar resources.
Before pairing SyncSign with your Office 365 calendar, you must ensure that your calendar supports SyncSign’s functionality by following two simple steps:
First, ensure that you have the appropriate permissions to manage and set the current calendar
How to create a room resource (This step is only for Business/Enterprise users)
Add your room resource in Outlook (Personal users and users who have completed step 1 can click here directly)
Bind Outlook calendar in SyncSign Client (Note that this step differs for General Members and Microsoft 365 Administrators)
If you find that the activity theme shows the creator instead of the activity theme, please click here to modify the room resource configuration.
How to create a room resource
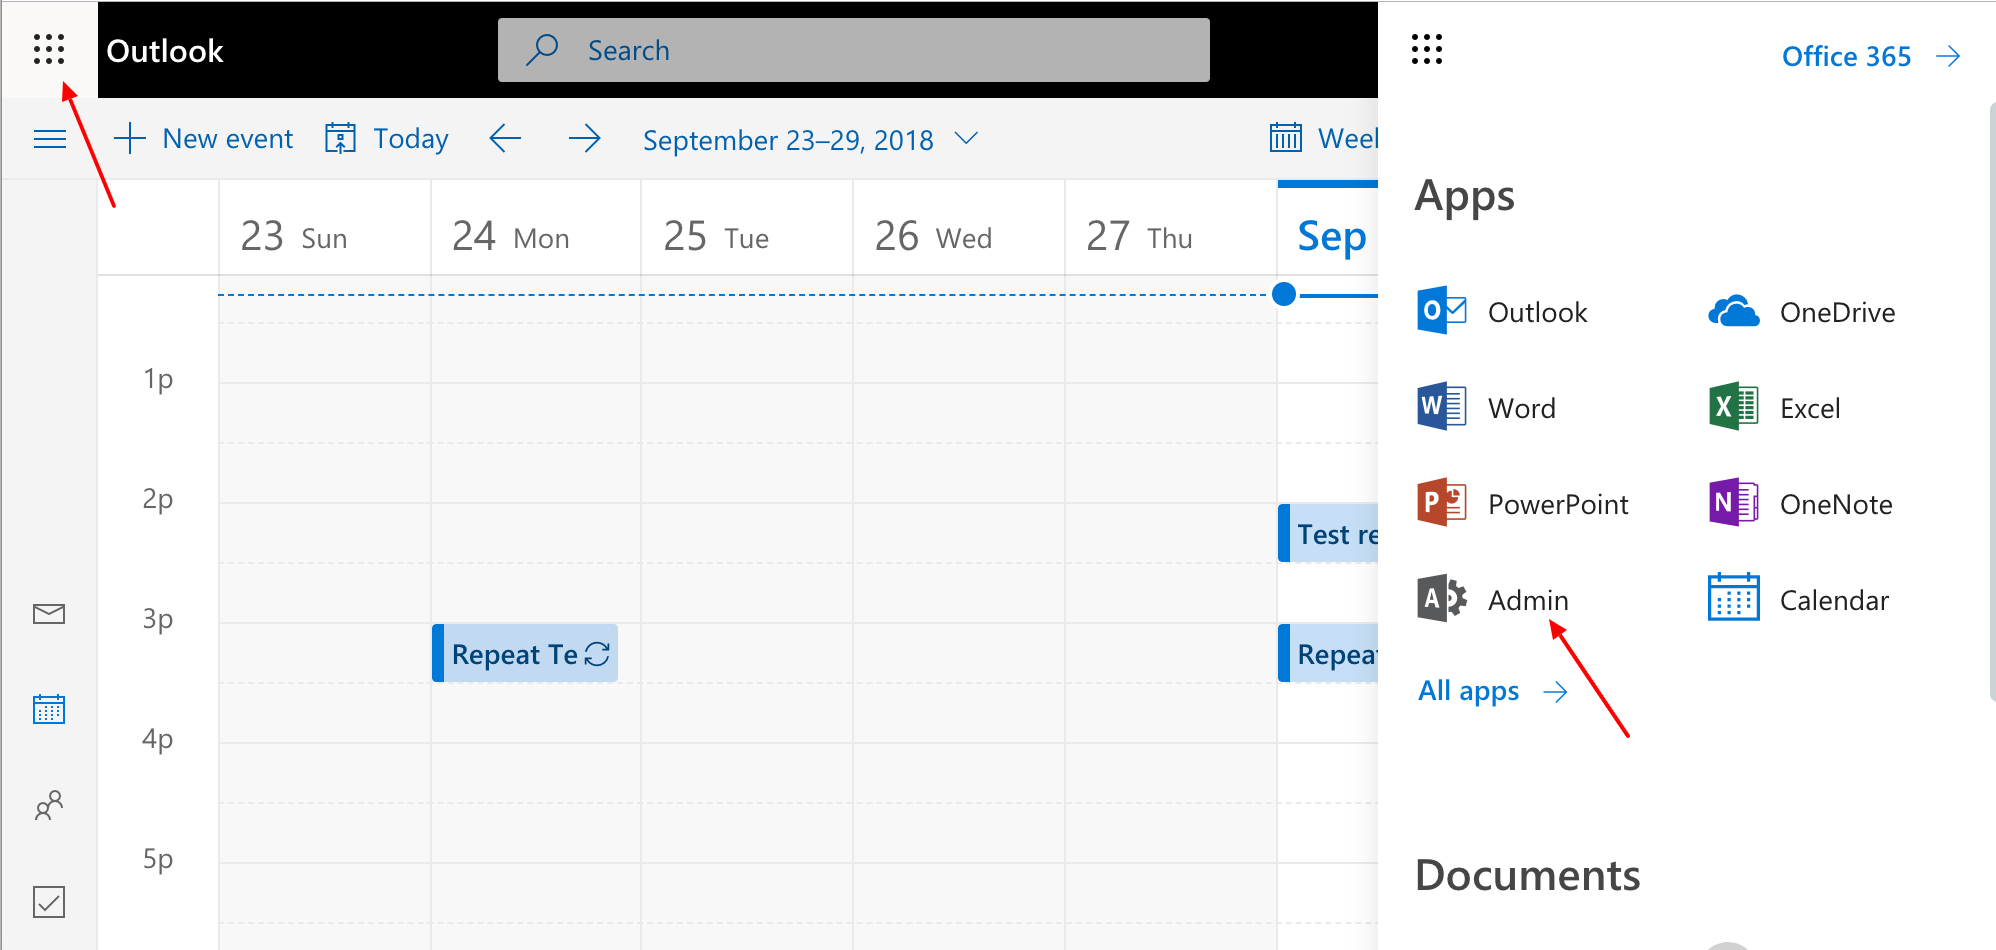
Navigate to Admin from the available apps menu.
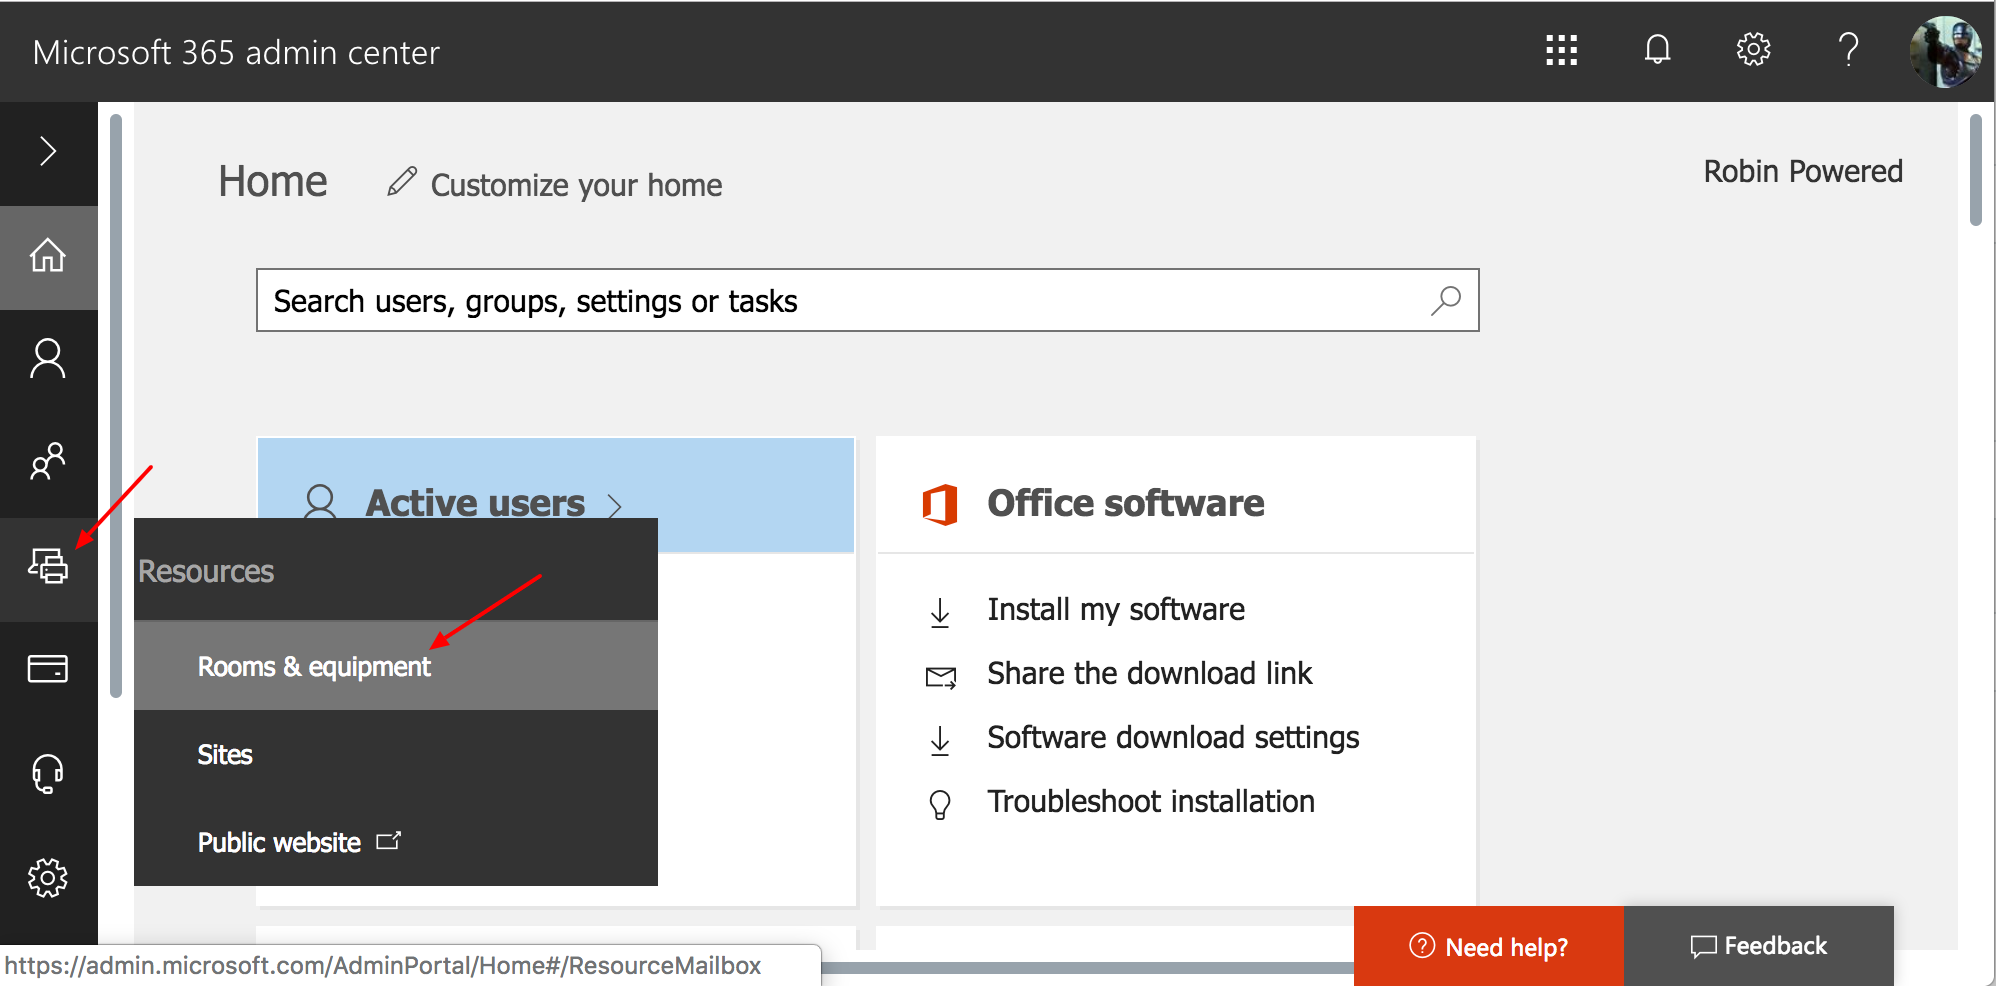
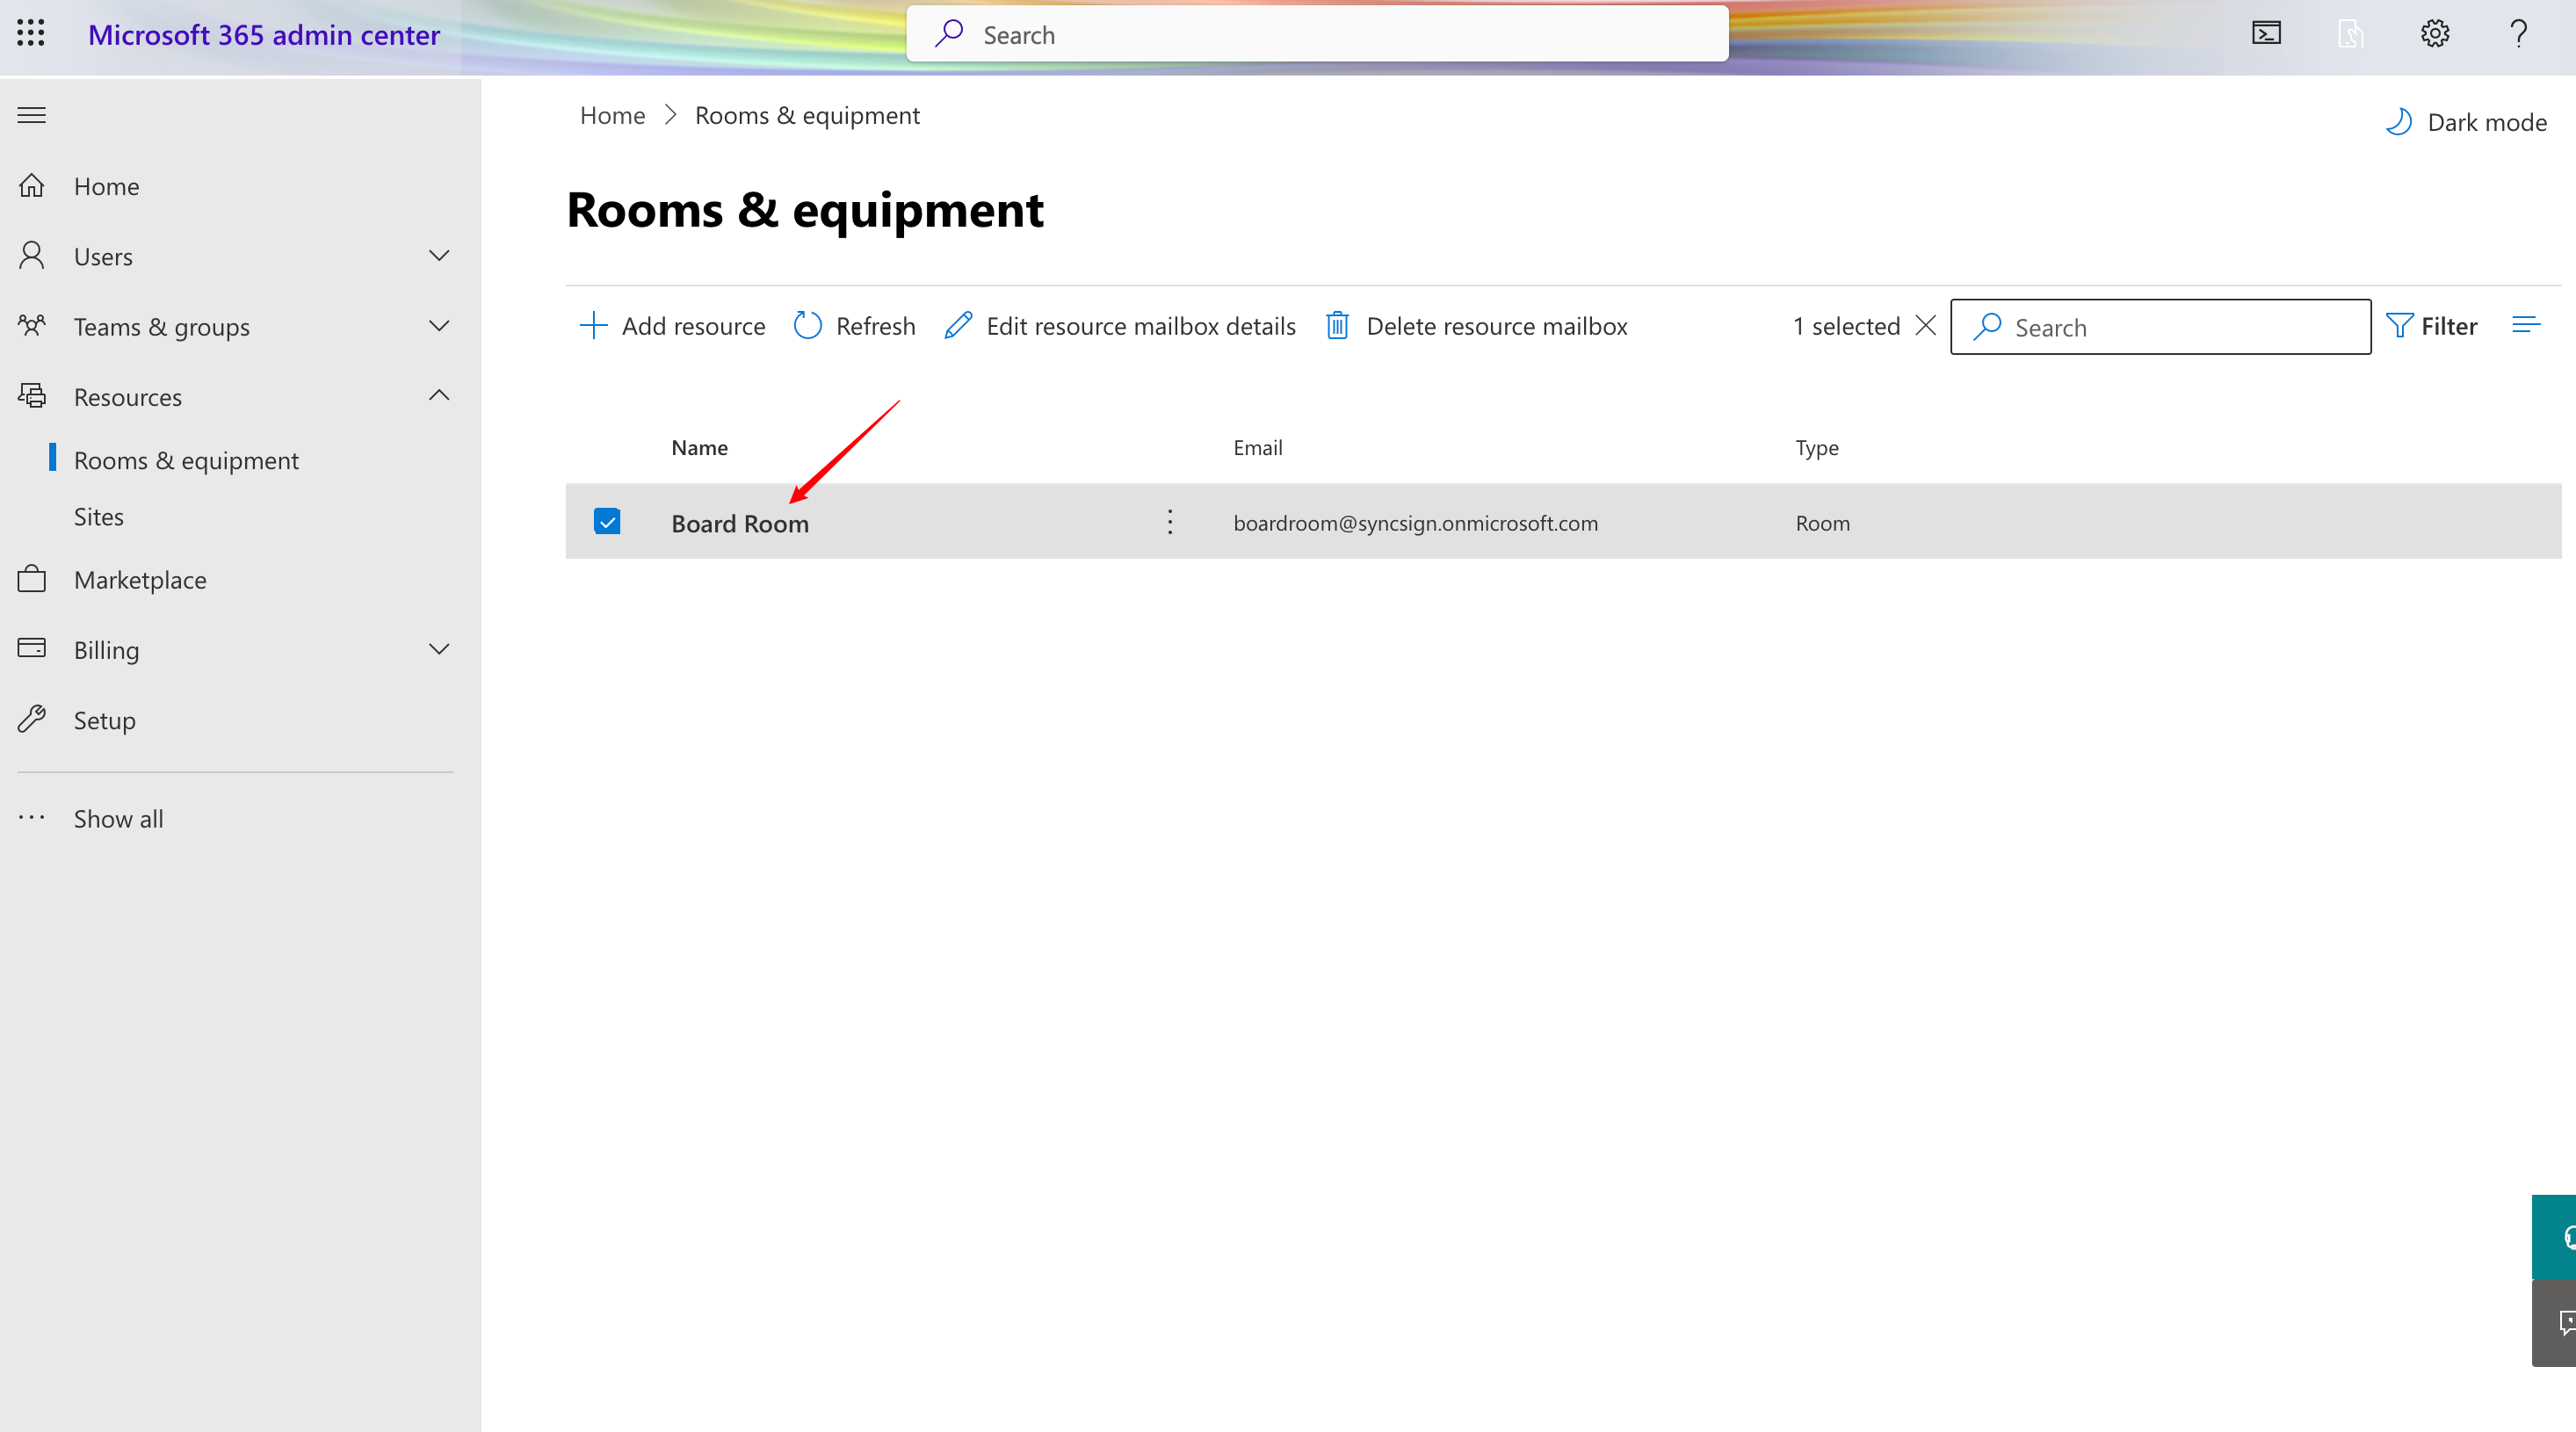
On the left side, select [ Resources ] > [ Rooms & equipment ].
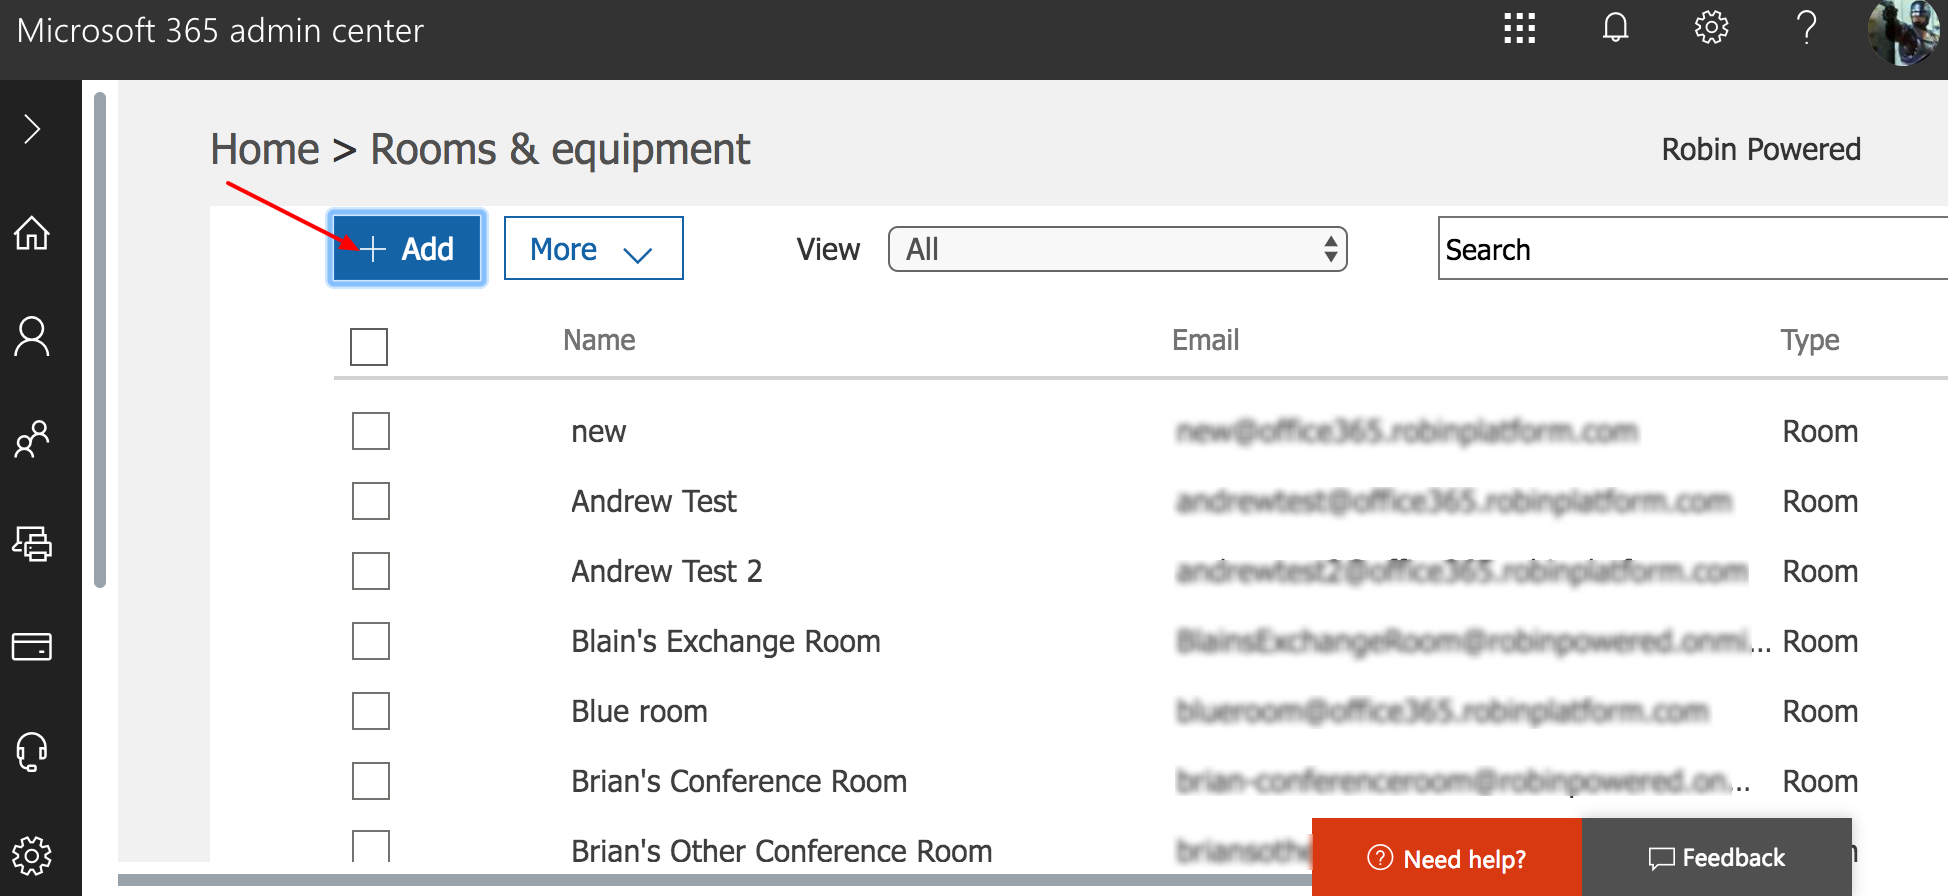
To add a new resource, click the [ + Add ] button.
If a meeting room calendar has already been set up by someone in your organization, you’ll see a list of room names and their associated email addresses. Meeting room calendars in Office 365 are similar to users rather than shared calendars, and each has its own email address for invitations.
Note
Variations in the Admin Panel in Office 365
If you don’t see the Equipment icon on the left-side menu, you might be using Office 365 for Small Business or another variant. The setup process might be slightly different. This Microsoft guide has more information.
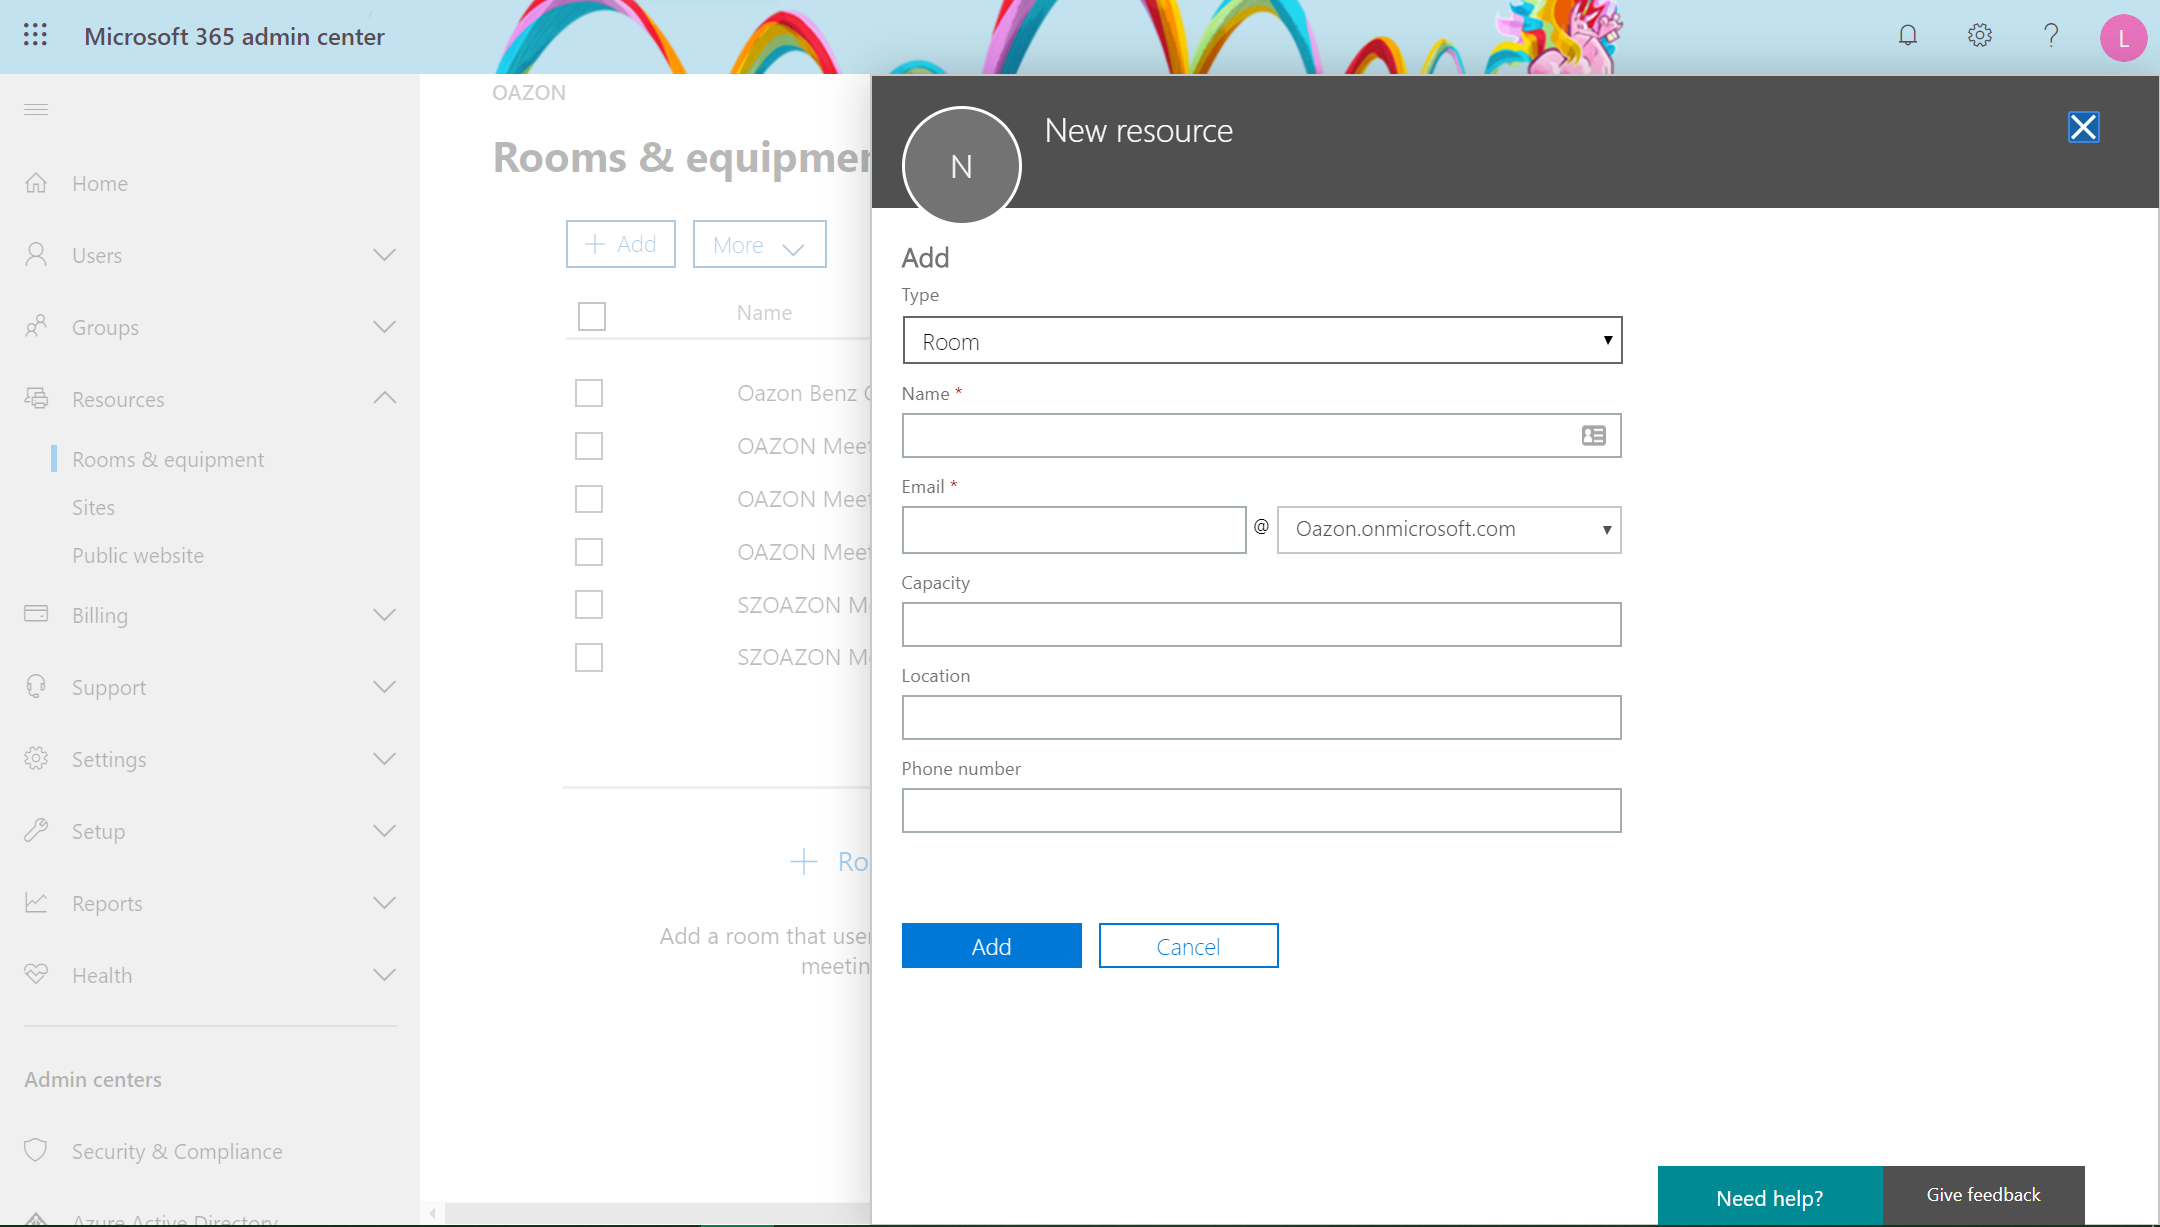
Fill out the details of your meeting room resource. You can include the name of the meeting room you’re adding, your email (or the person who will be associated with the space), the maximum capacity for meeting attendees, the location, and phone number (if applicable). We recommend creating a room resource for each meeting room. Once you finish, click [ Add ] to save your changes.
Repeat the process to create resources for each bookable space in your office.
To add a room resource in Office 365 to SyncSign, you need to assign the correct permissions to users.
To set the correct permissions for a delegated user in Office 365, follow these steps:
Note
Please follow the steps sequentially. Getting the steps wrong will cause you to fail to read rooms or push events successfully.
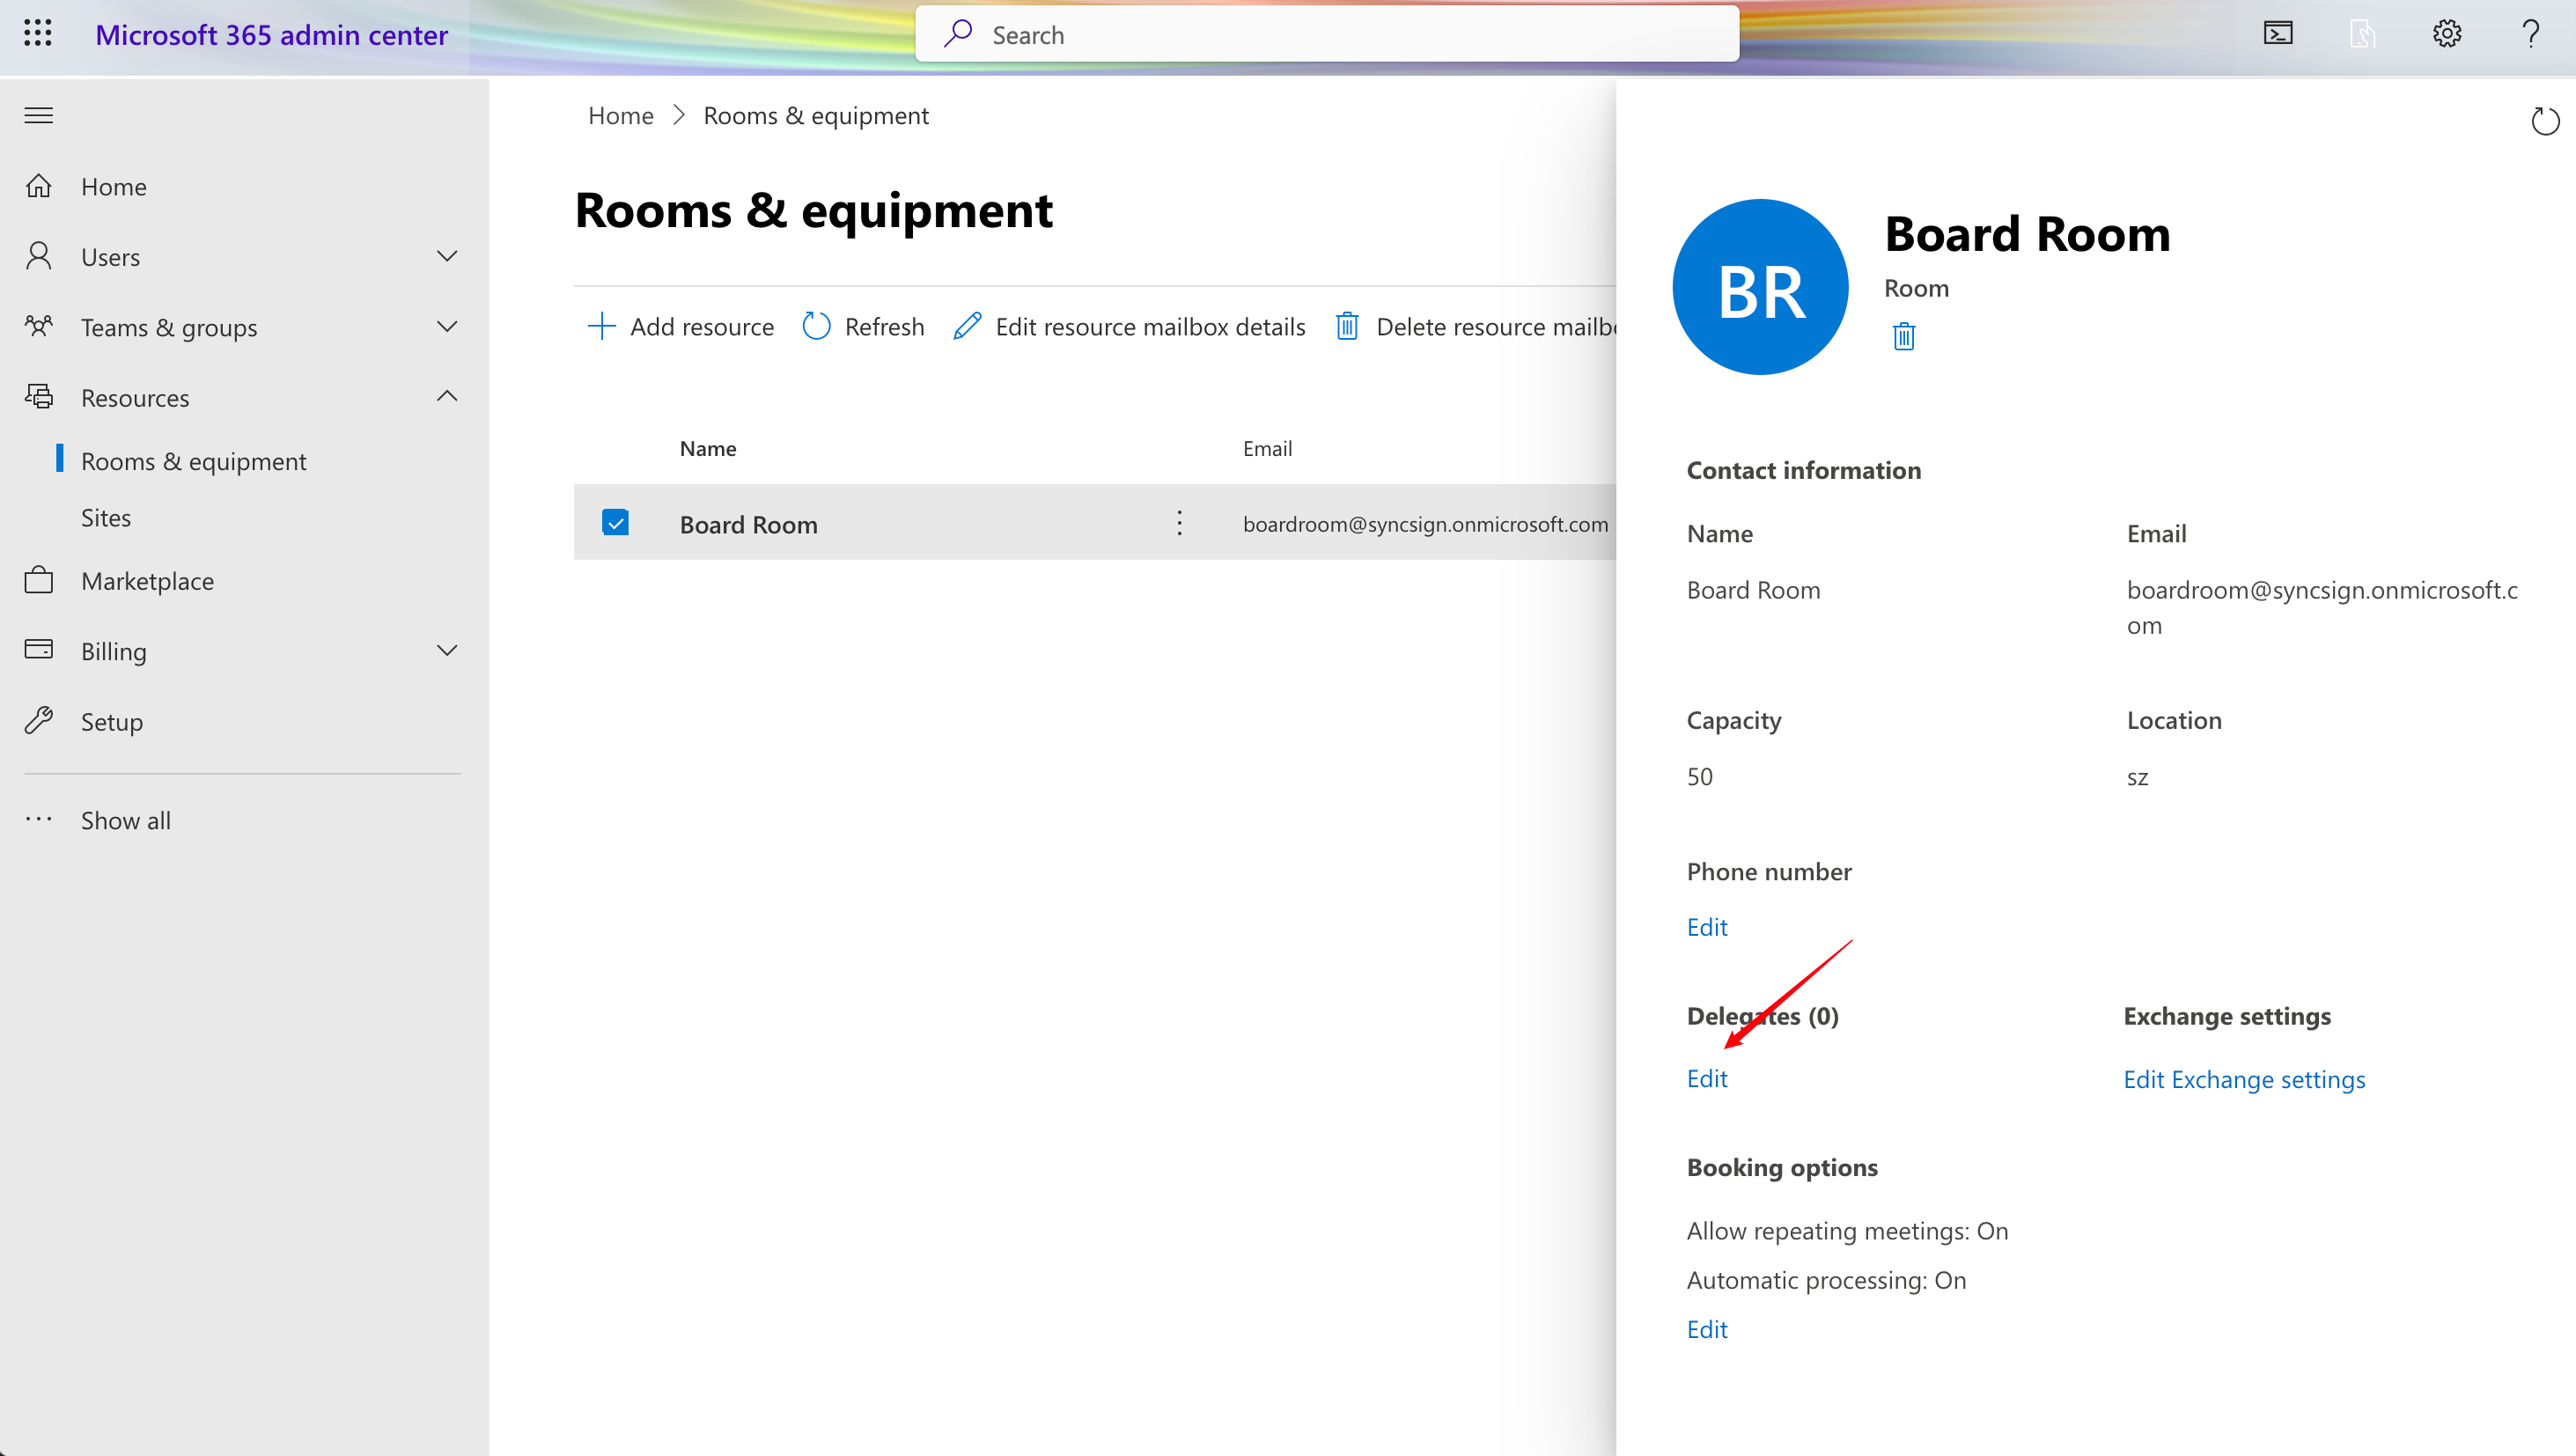
Go to https://admin.microsoft.com/#/ResourceMailbox and locate the room resource you are trying to add to the SyncSign portal
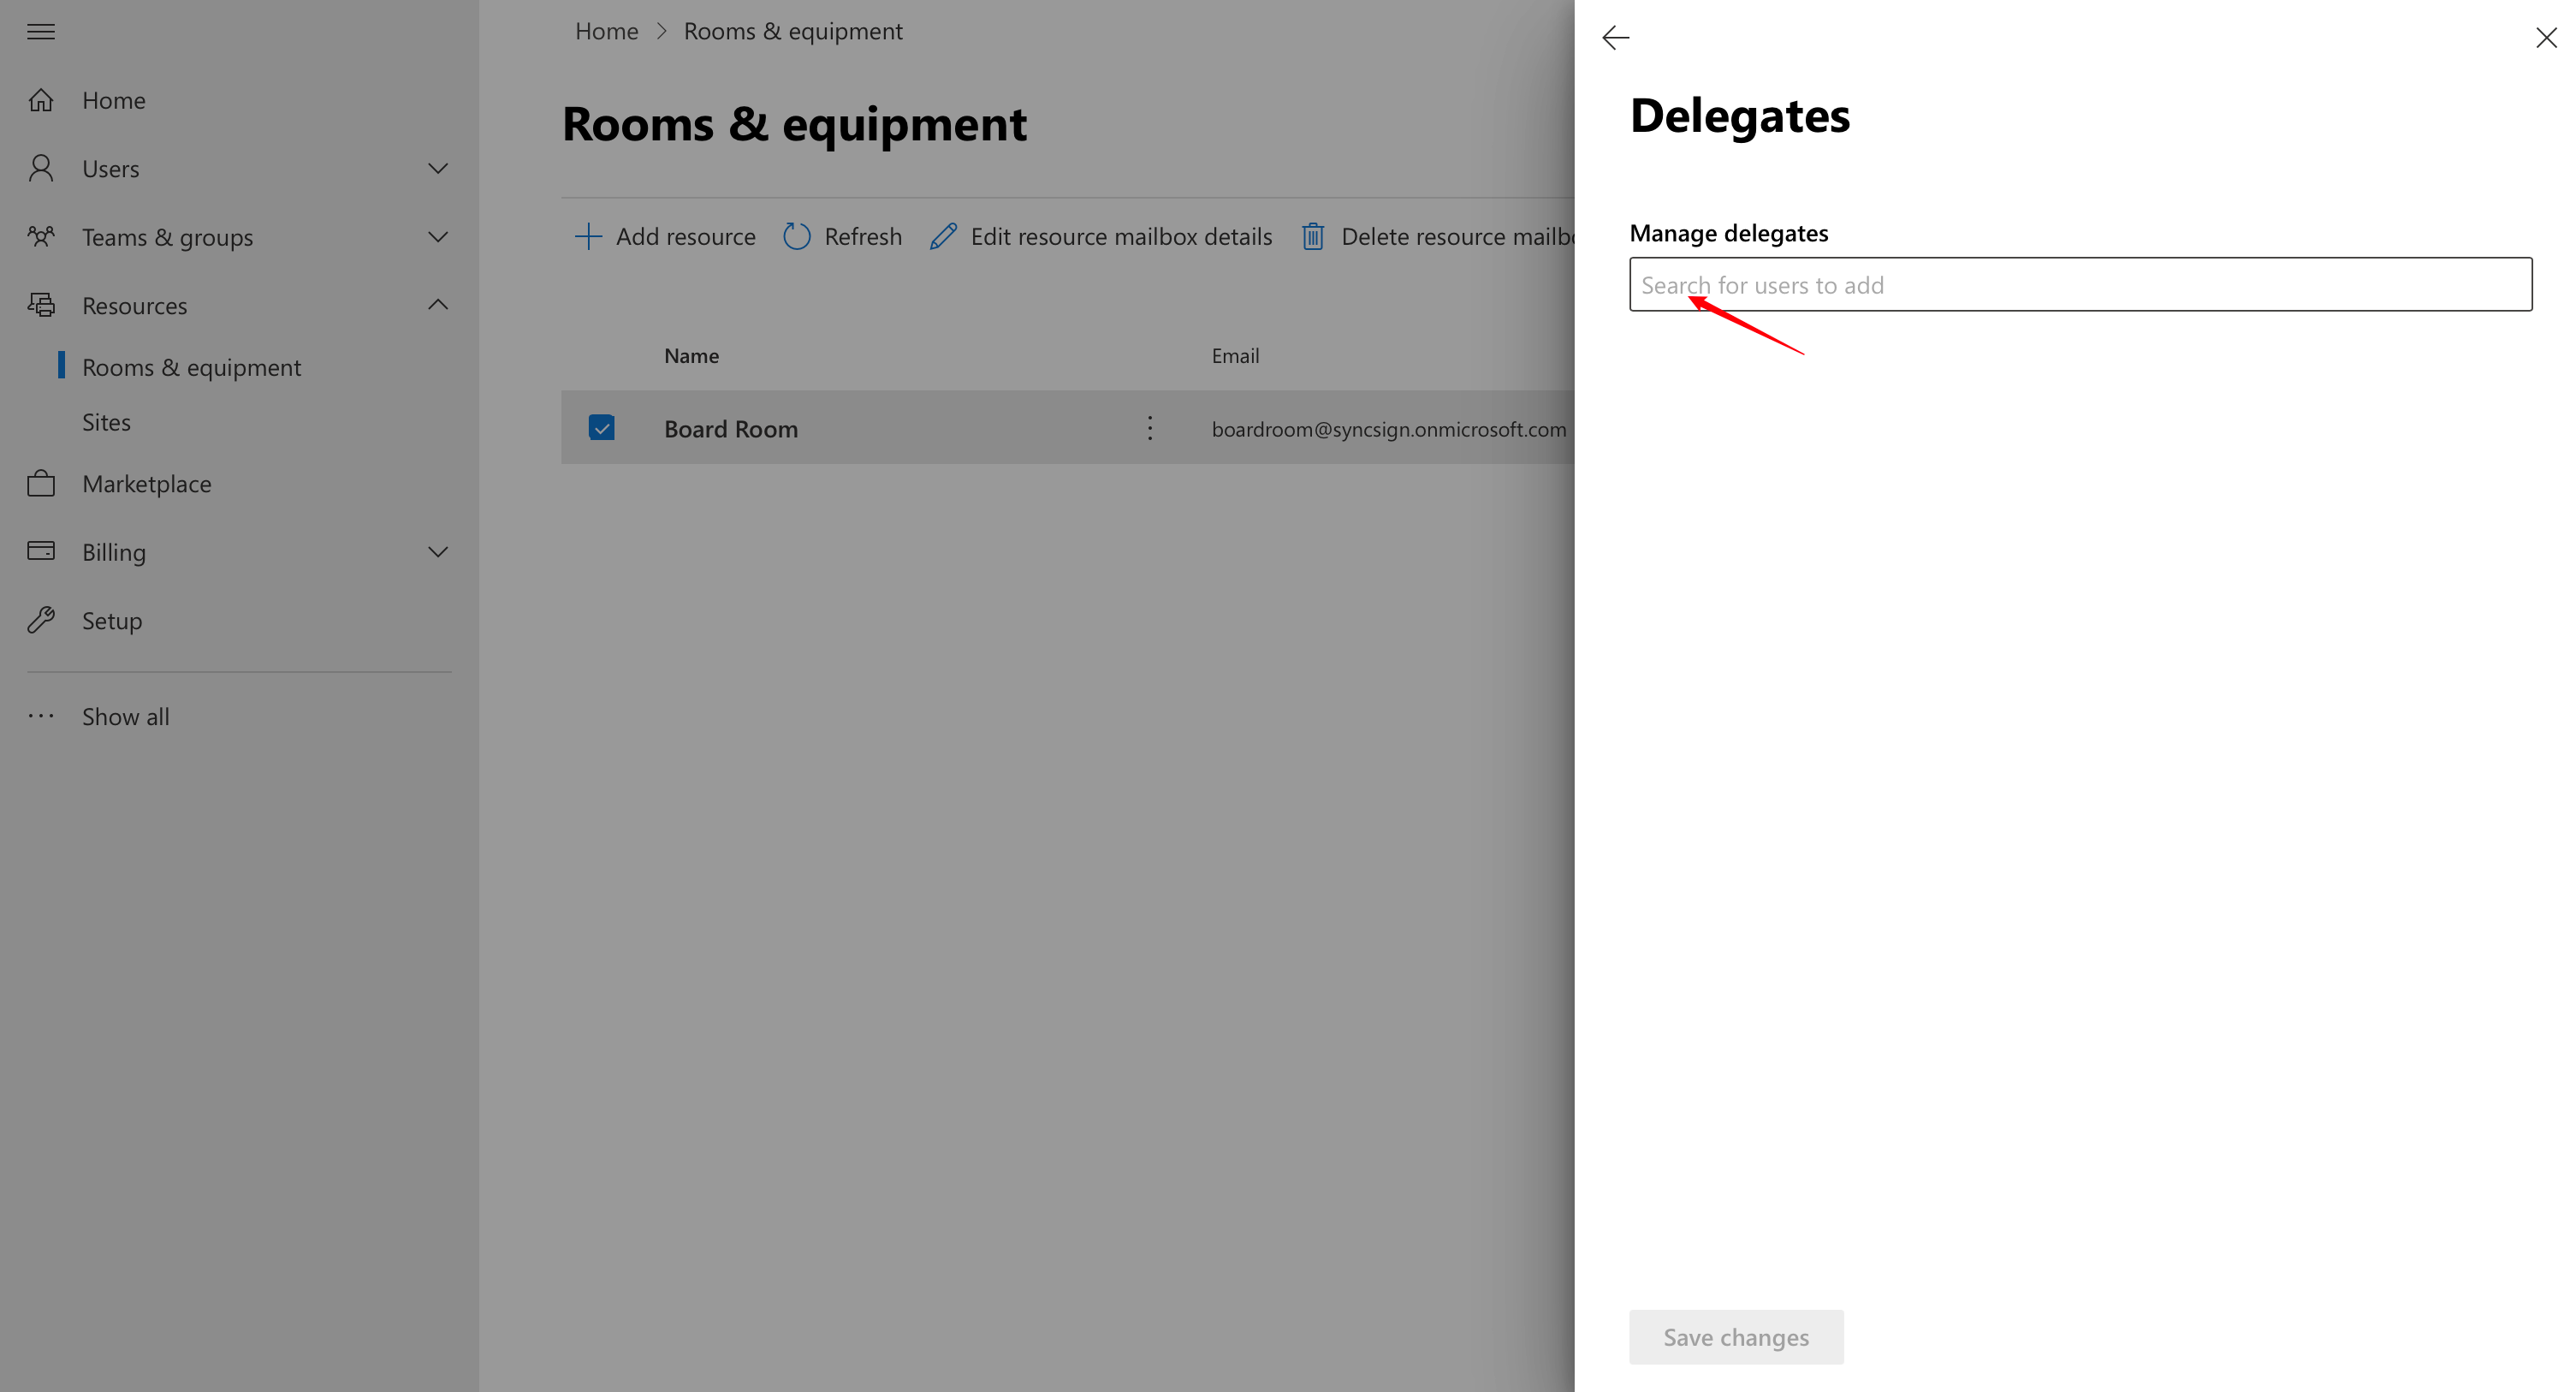
Under Delegates, click on edit and add the Office 365 user you wish for calendar access.
Warning
If you cannot find the user you want to delegate to or if the authorization fails when following the above steps, you can use PowerShell to perform the delegation settings.
The permissions need some time to be assigned in Office 365; therefore, we recommend waiting for 24 hours.
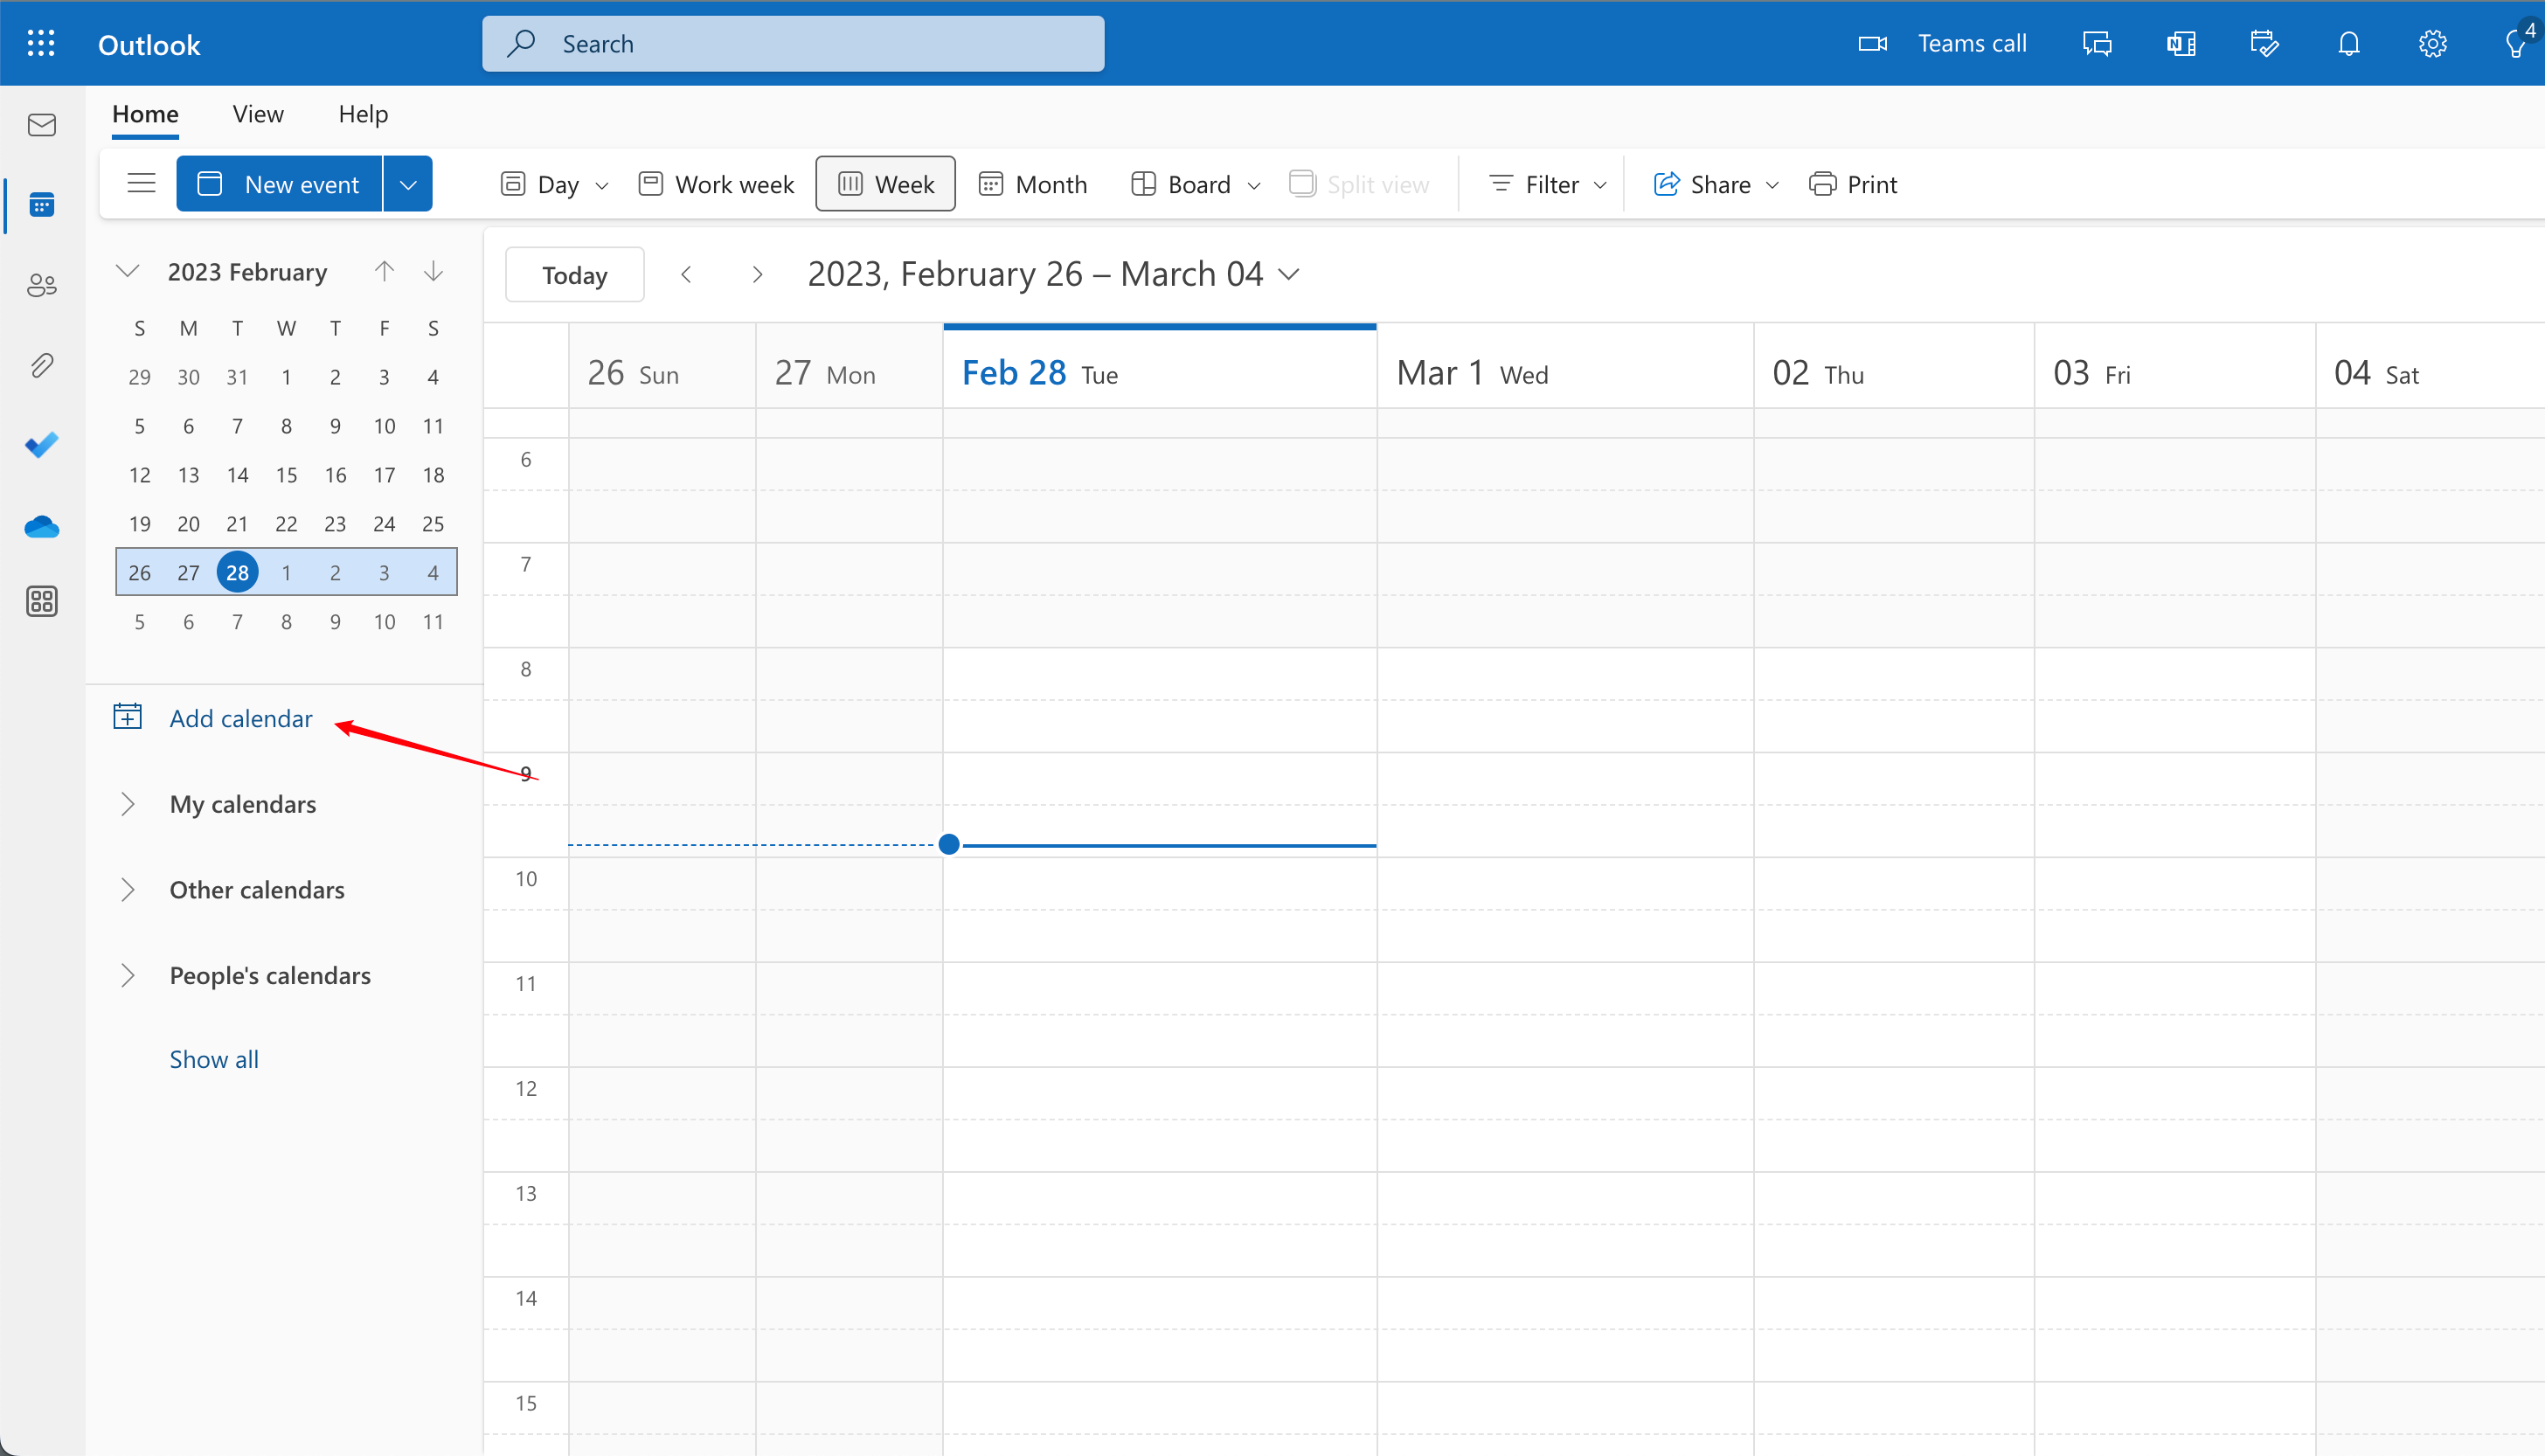
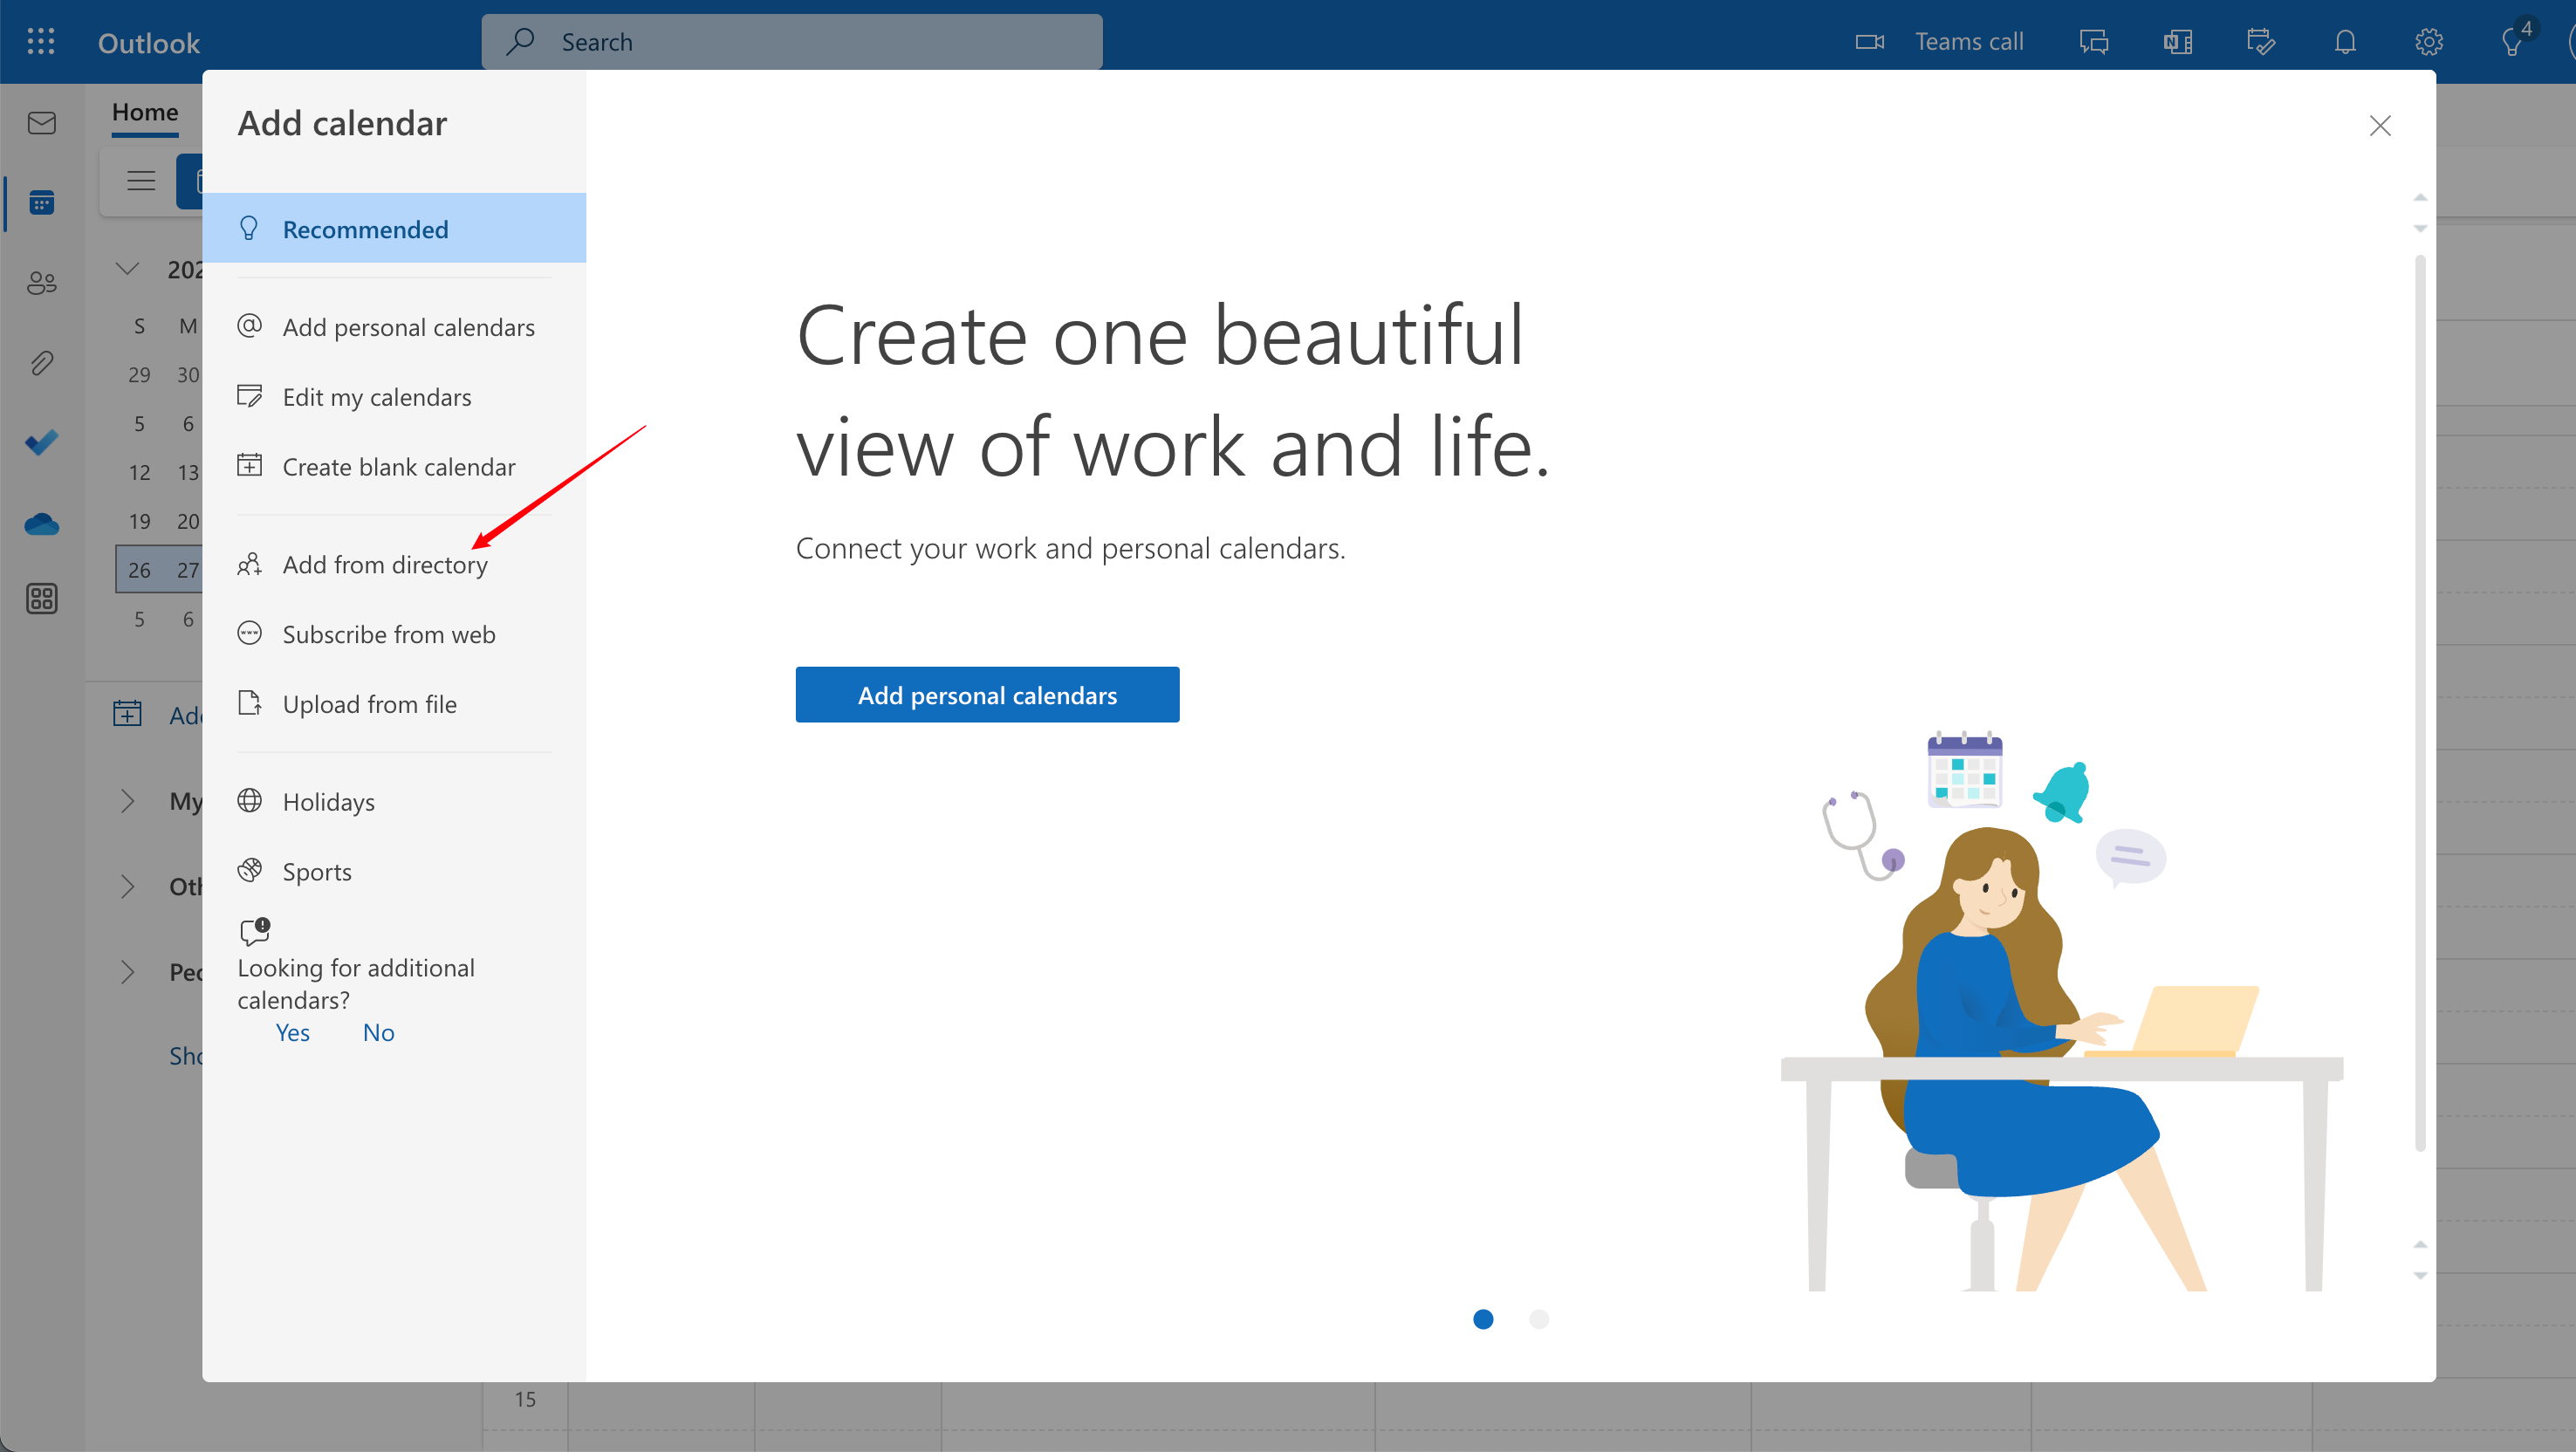
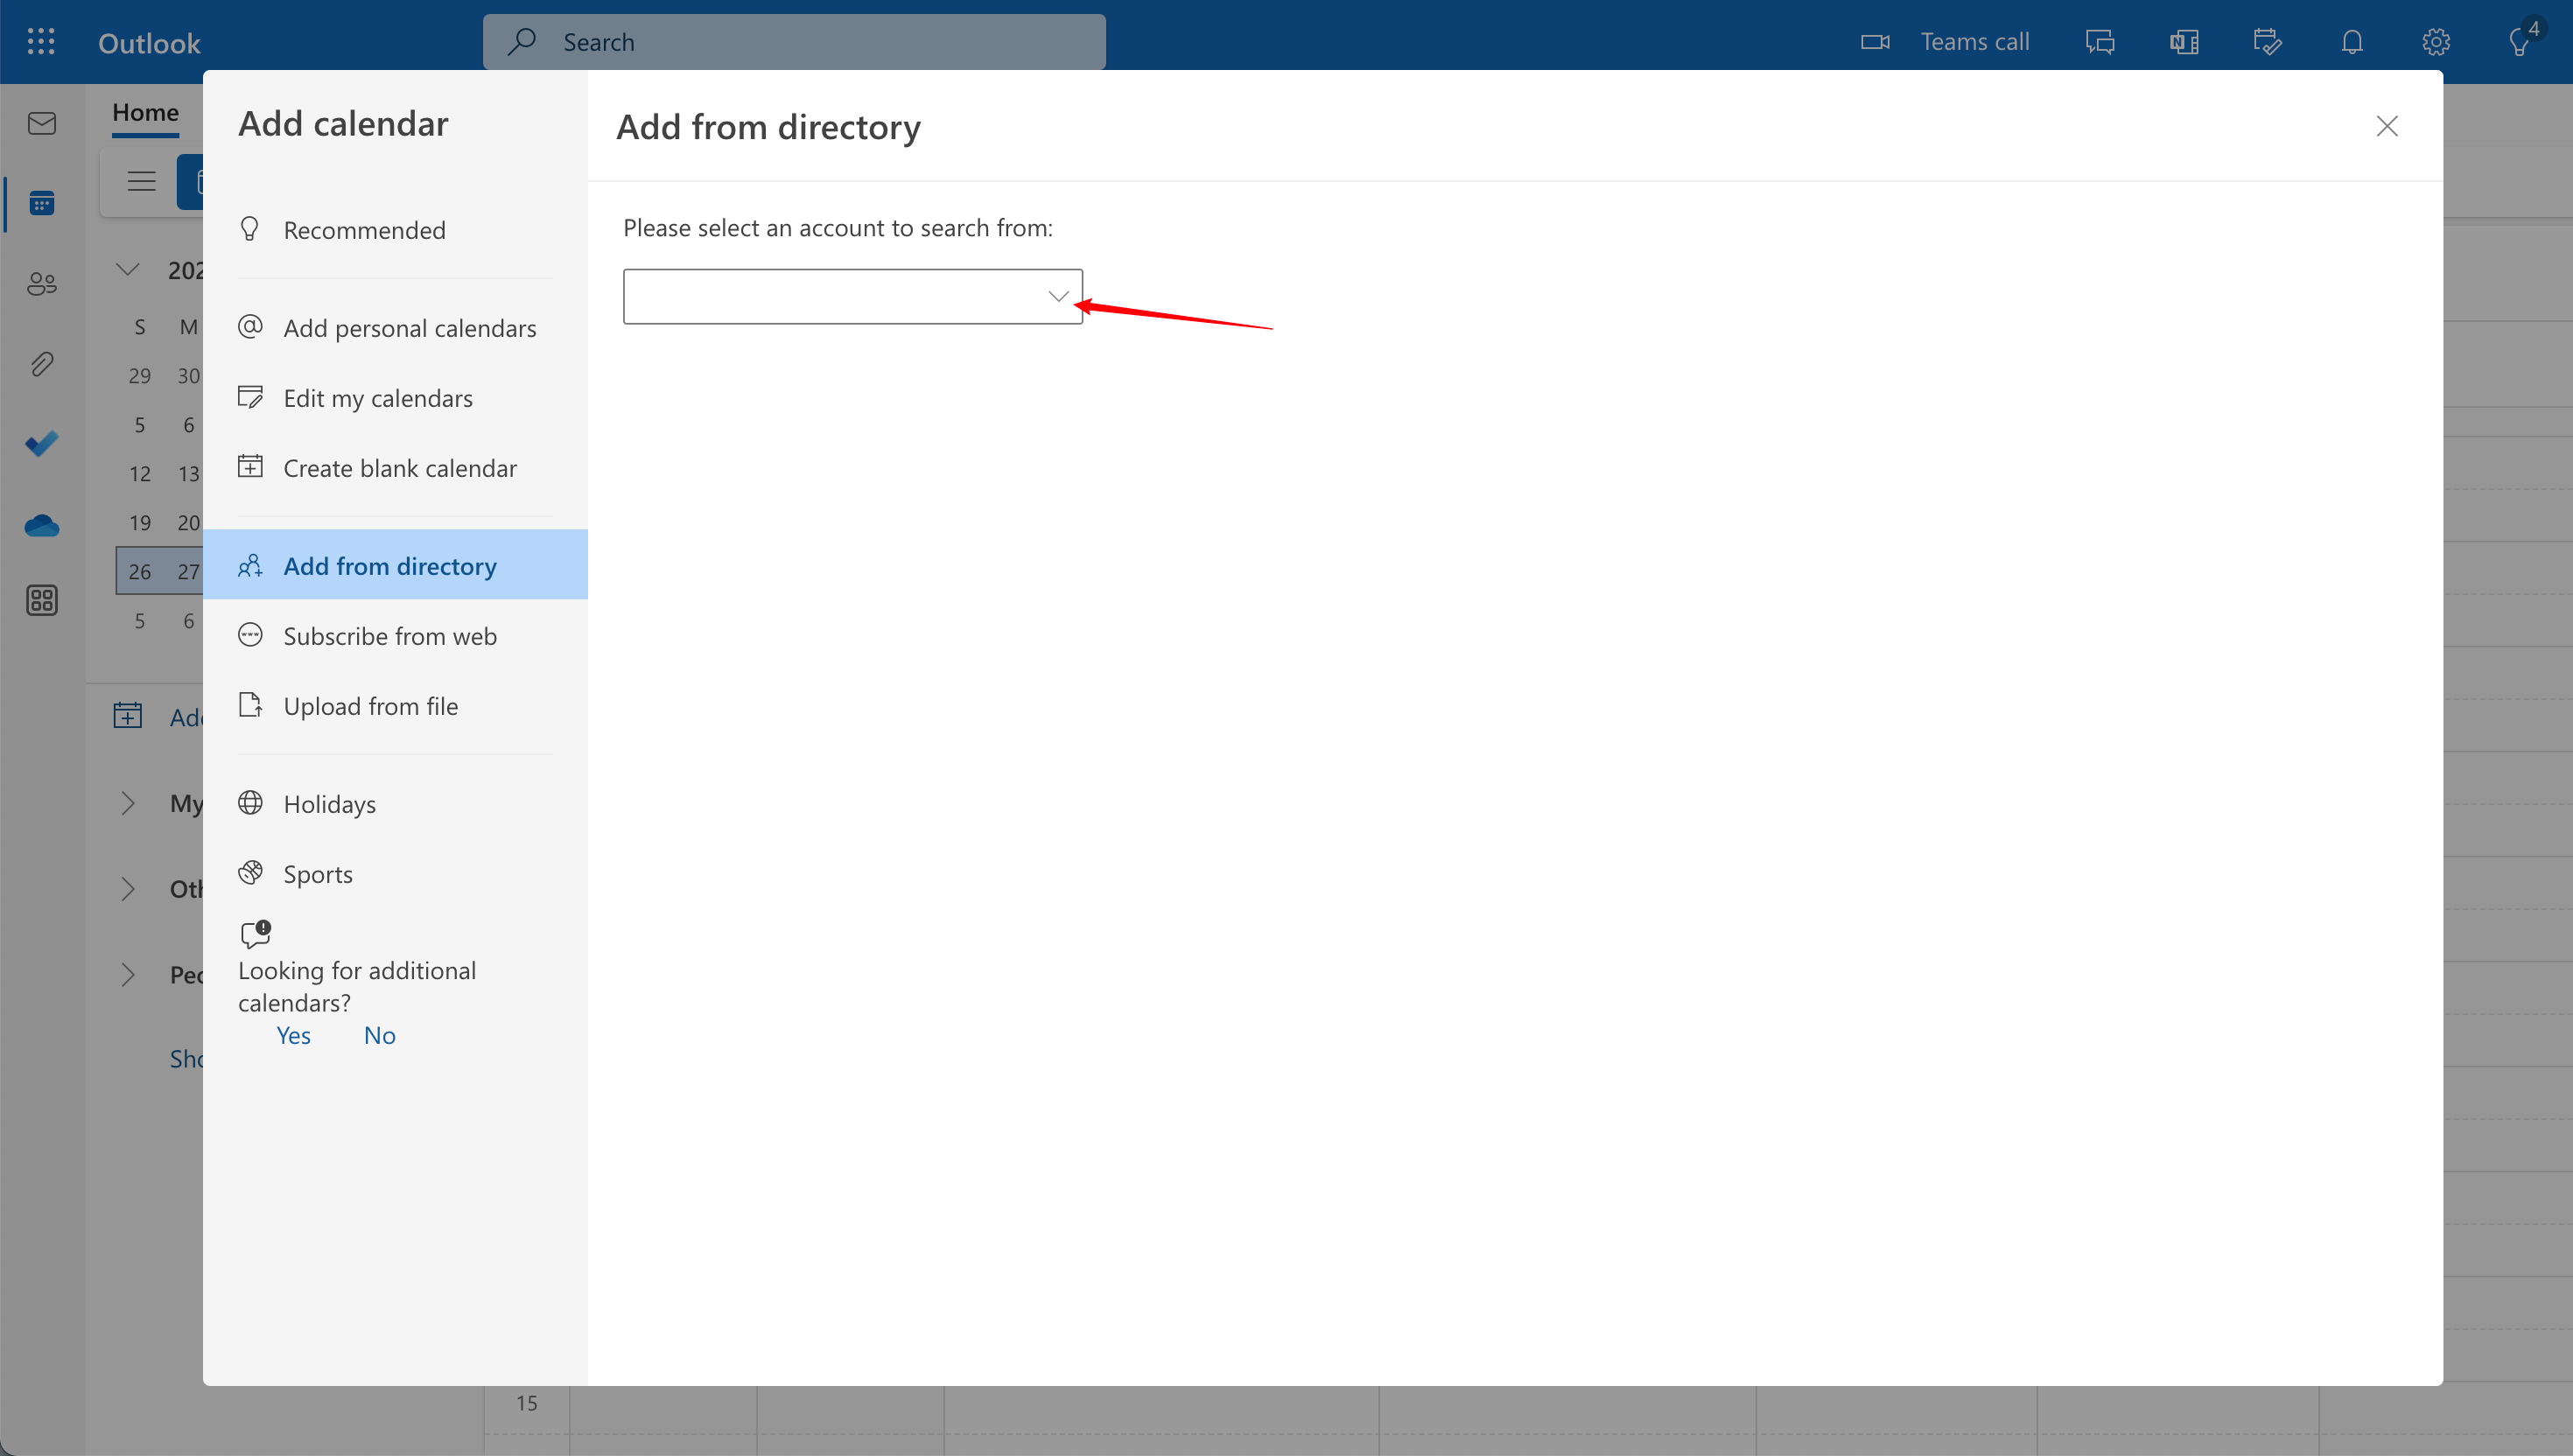
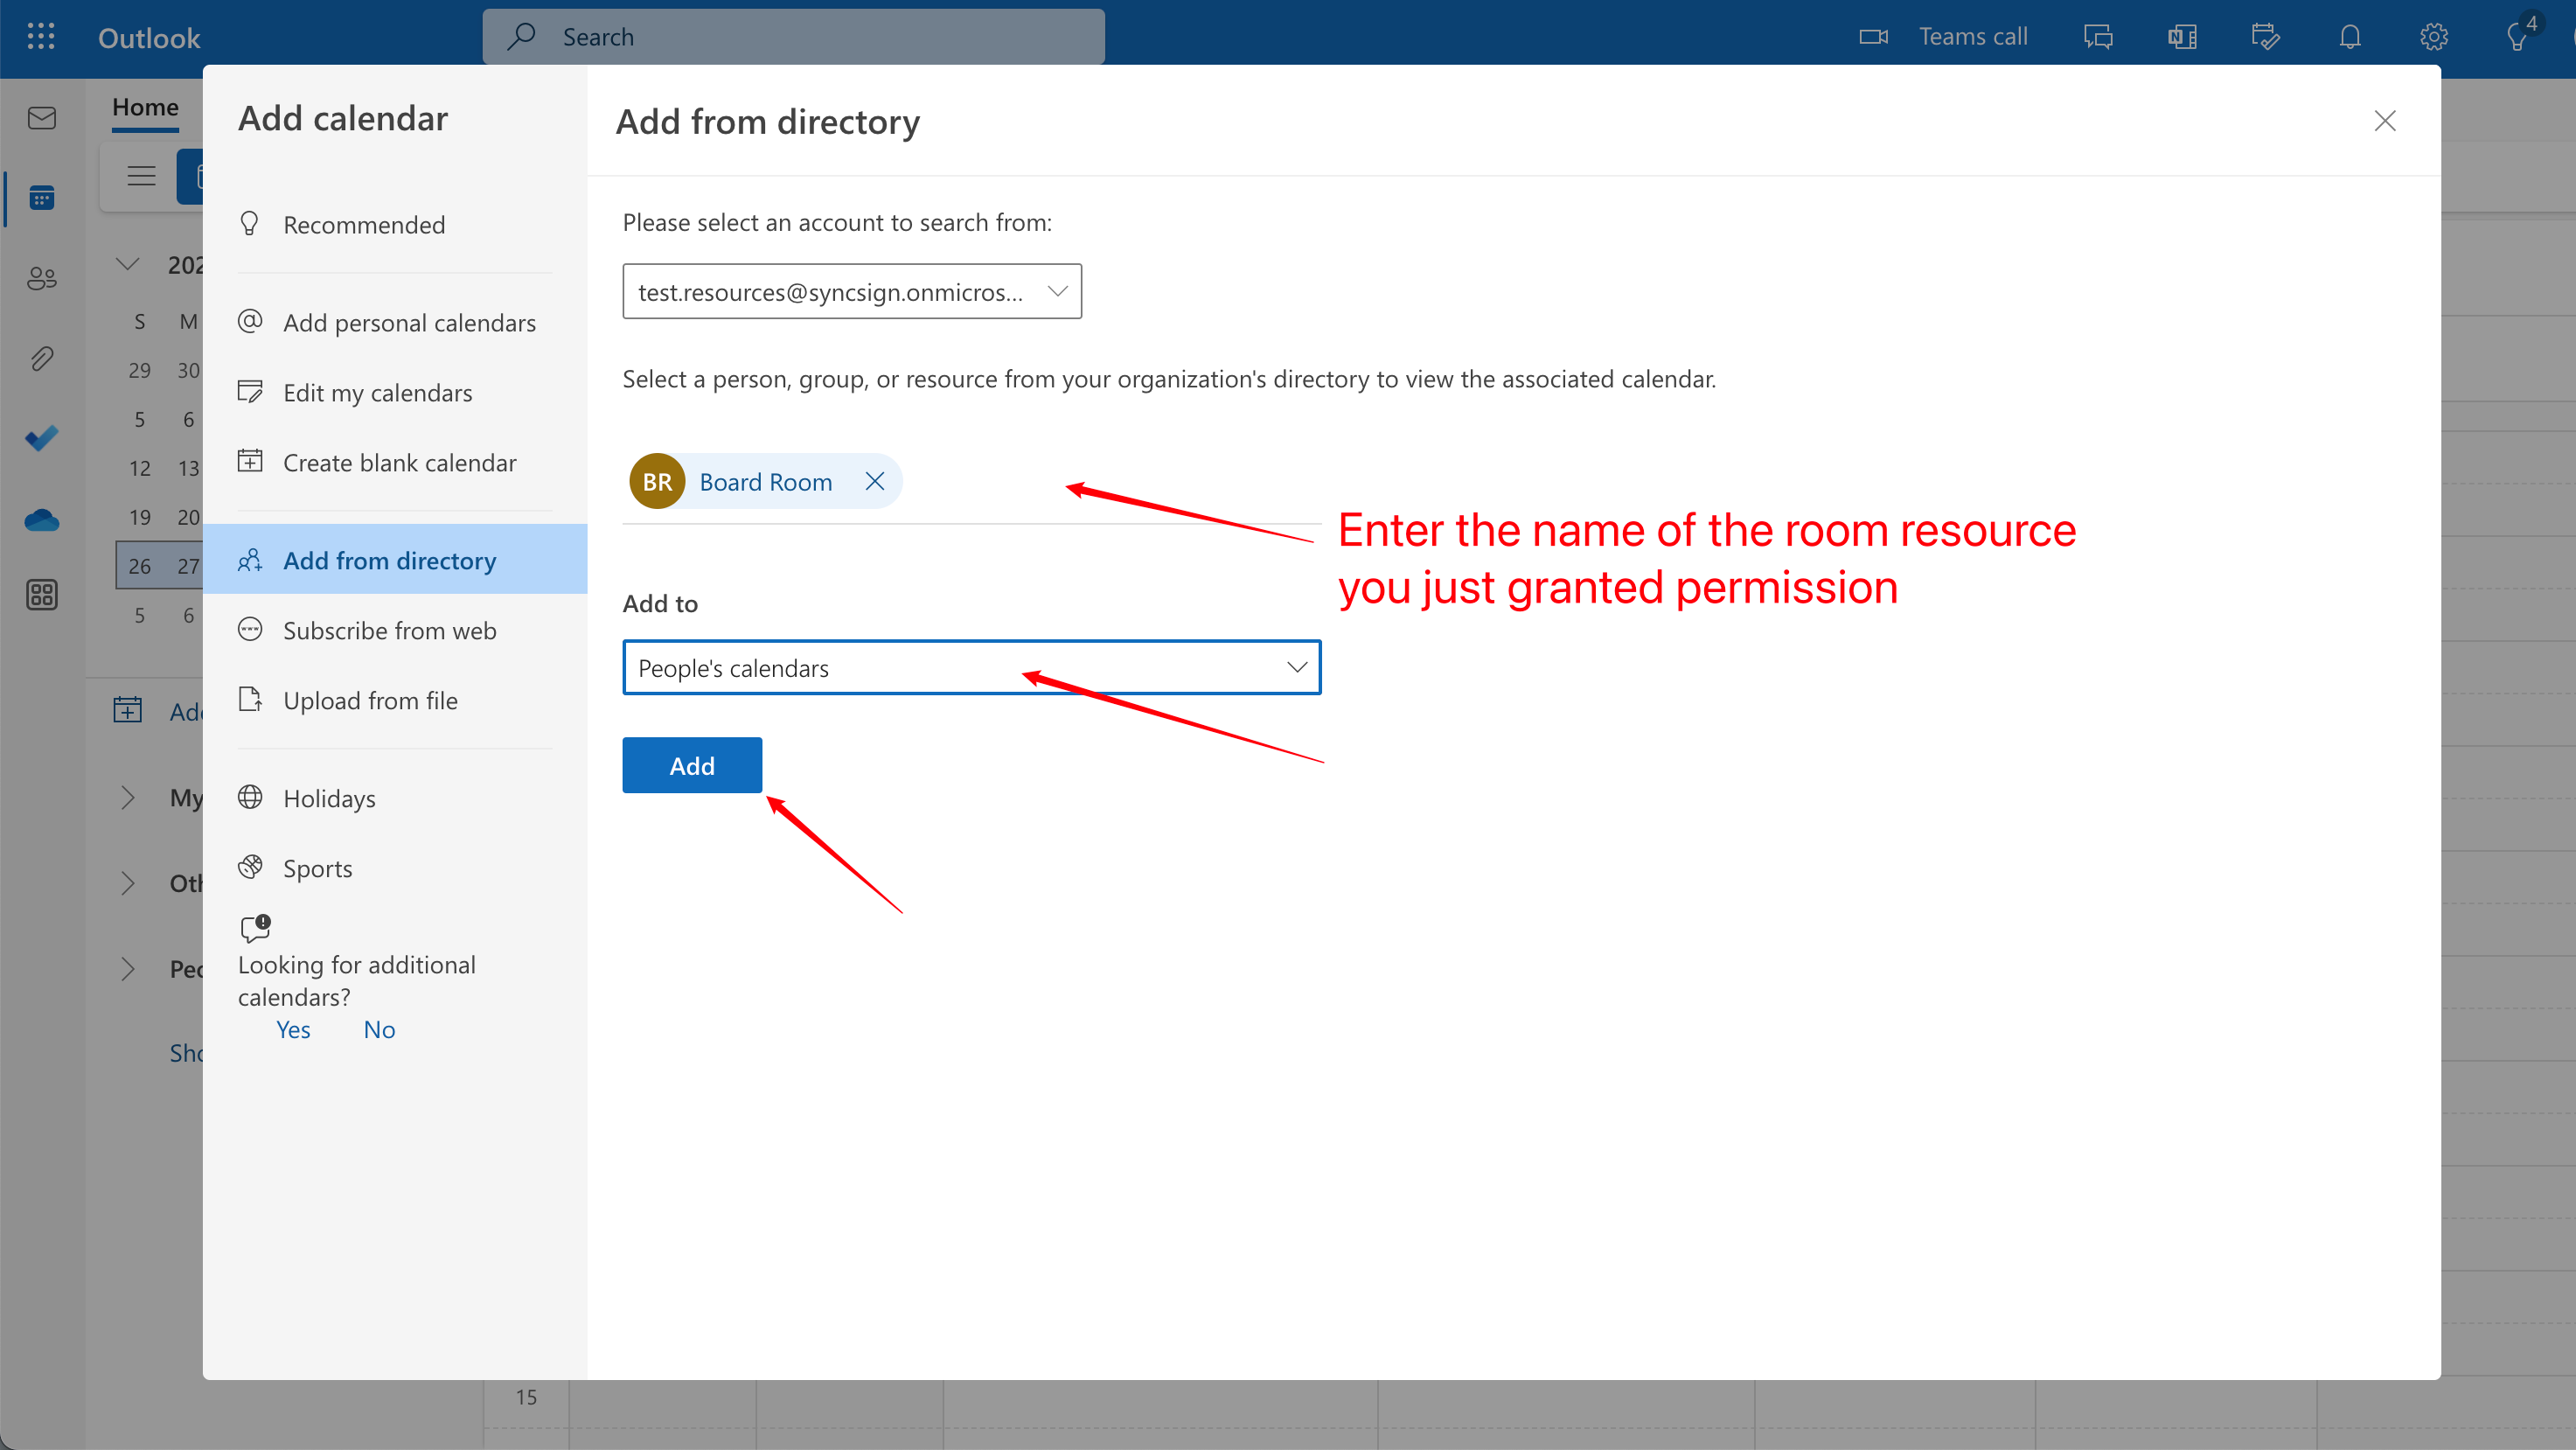
Add your room resource in Outlook
Log in to the Outlook of the delegated user, and add the room resource that has just been granted permission.
Verify Calendar Permissions
Note: This section is applicable to Business/Commercial users only.
Before proceeding to the SyncSign integration, it is highly recommended to verify that the delegated user has the correct permissions to the room calendar.
Log in to Outlook Web App (OWA) using the delegated user’s credentials.
Switch to the Calendar view and select the Room Calendar you previously added.
Test Creation: Try to create a new event directly on the Room Calendar. - If you can create the event successfully, you have the basic write permissions.
Test Modification: Try to edit or delete the event you just created. - If successful, the delegated user has the necessary “Editor” or “Full Access” rights required by SyncSign.
Note
If you encounter permission errors, please verify the delegation settings in the Microsoft 365 Admin Center and wait for the changes to propagate (up to 24 hours). For more information on managing permissions, refer to the official Microsoft documentation: Manage permissions for recipients in Exchange Online.
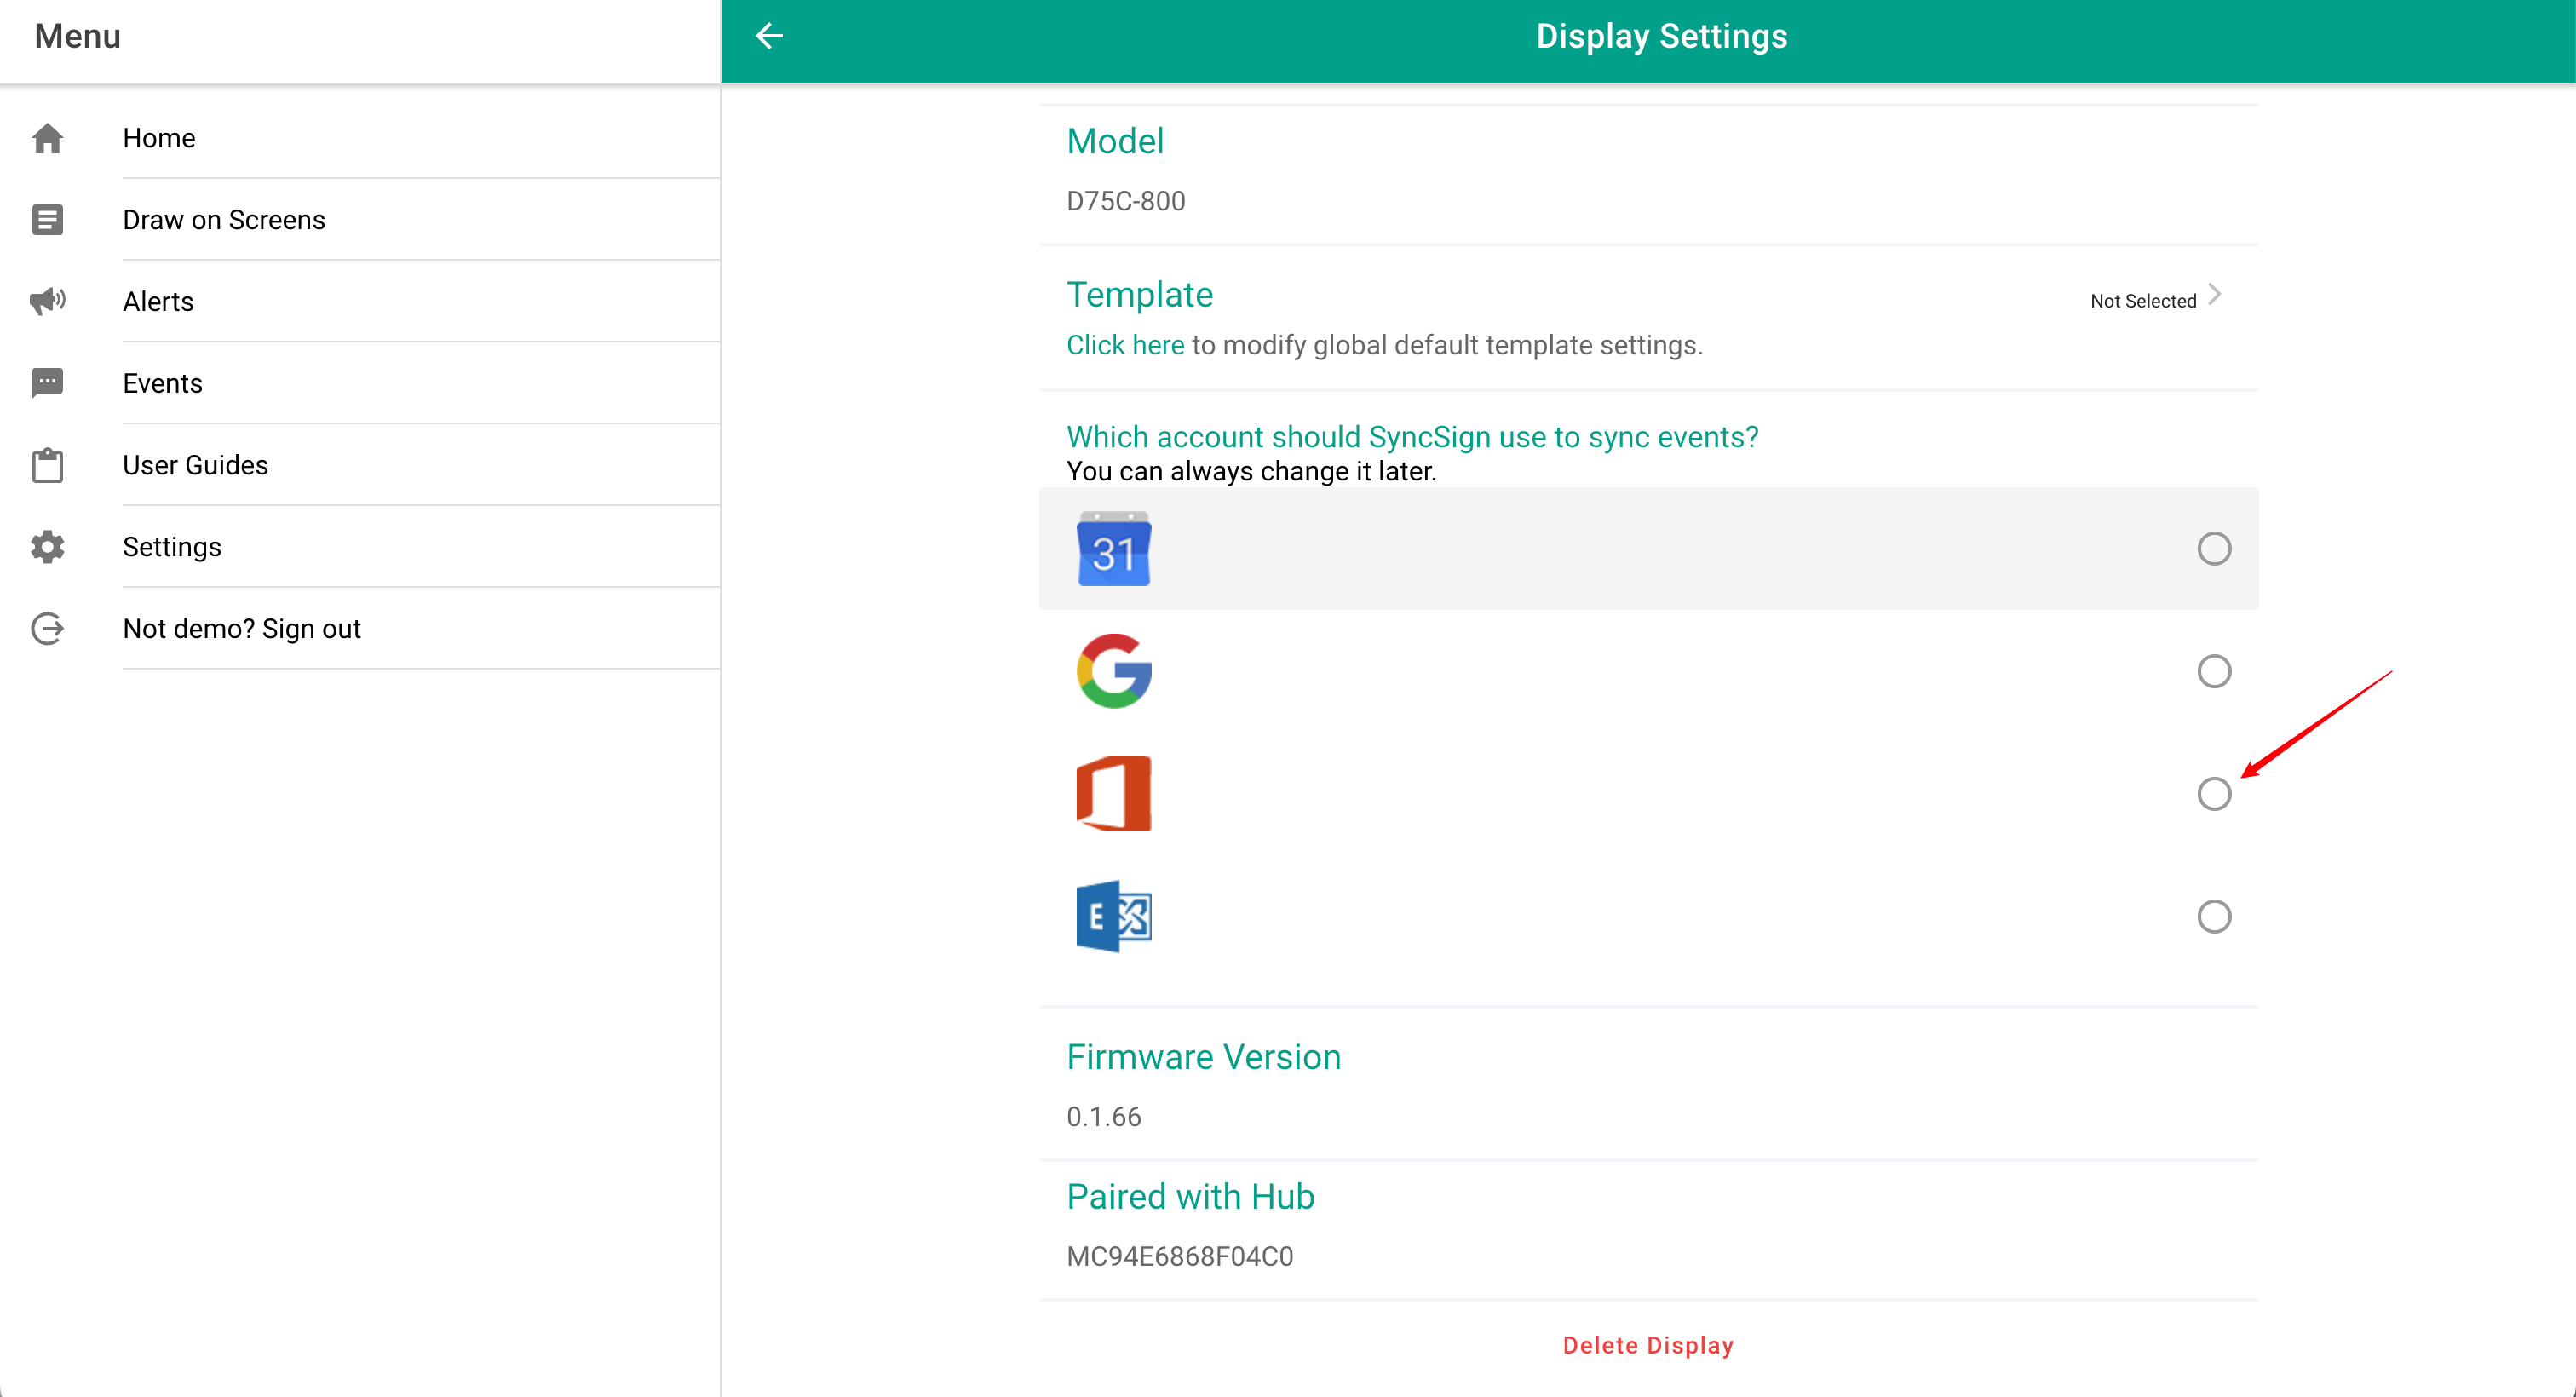
Bind Outlook calendar in SyncSign Client
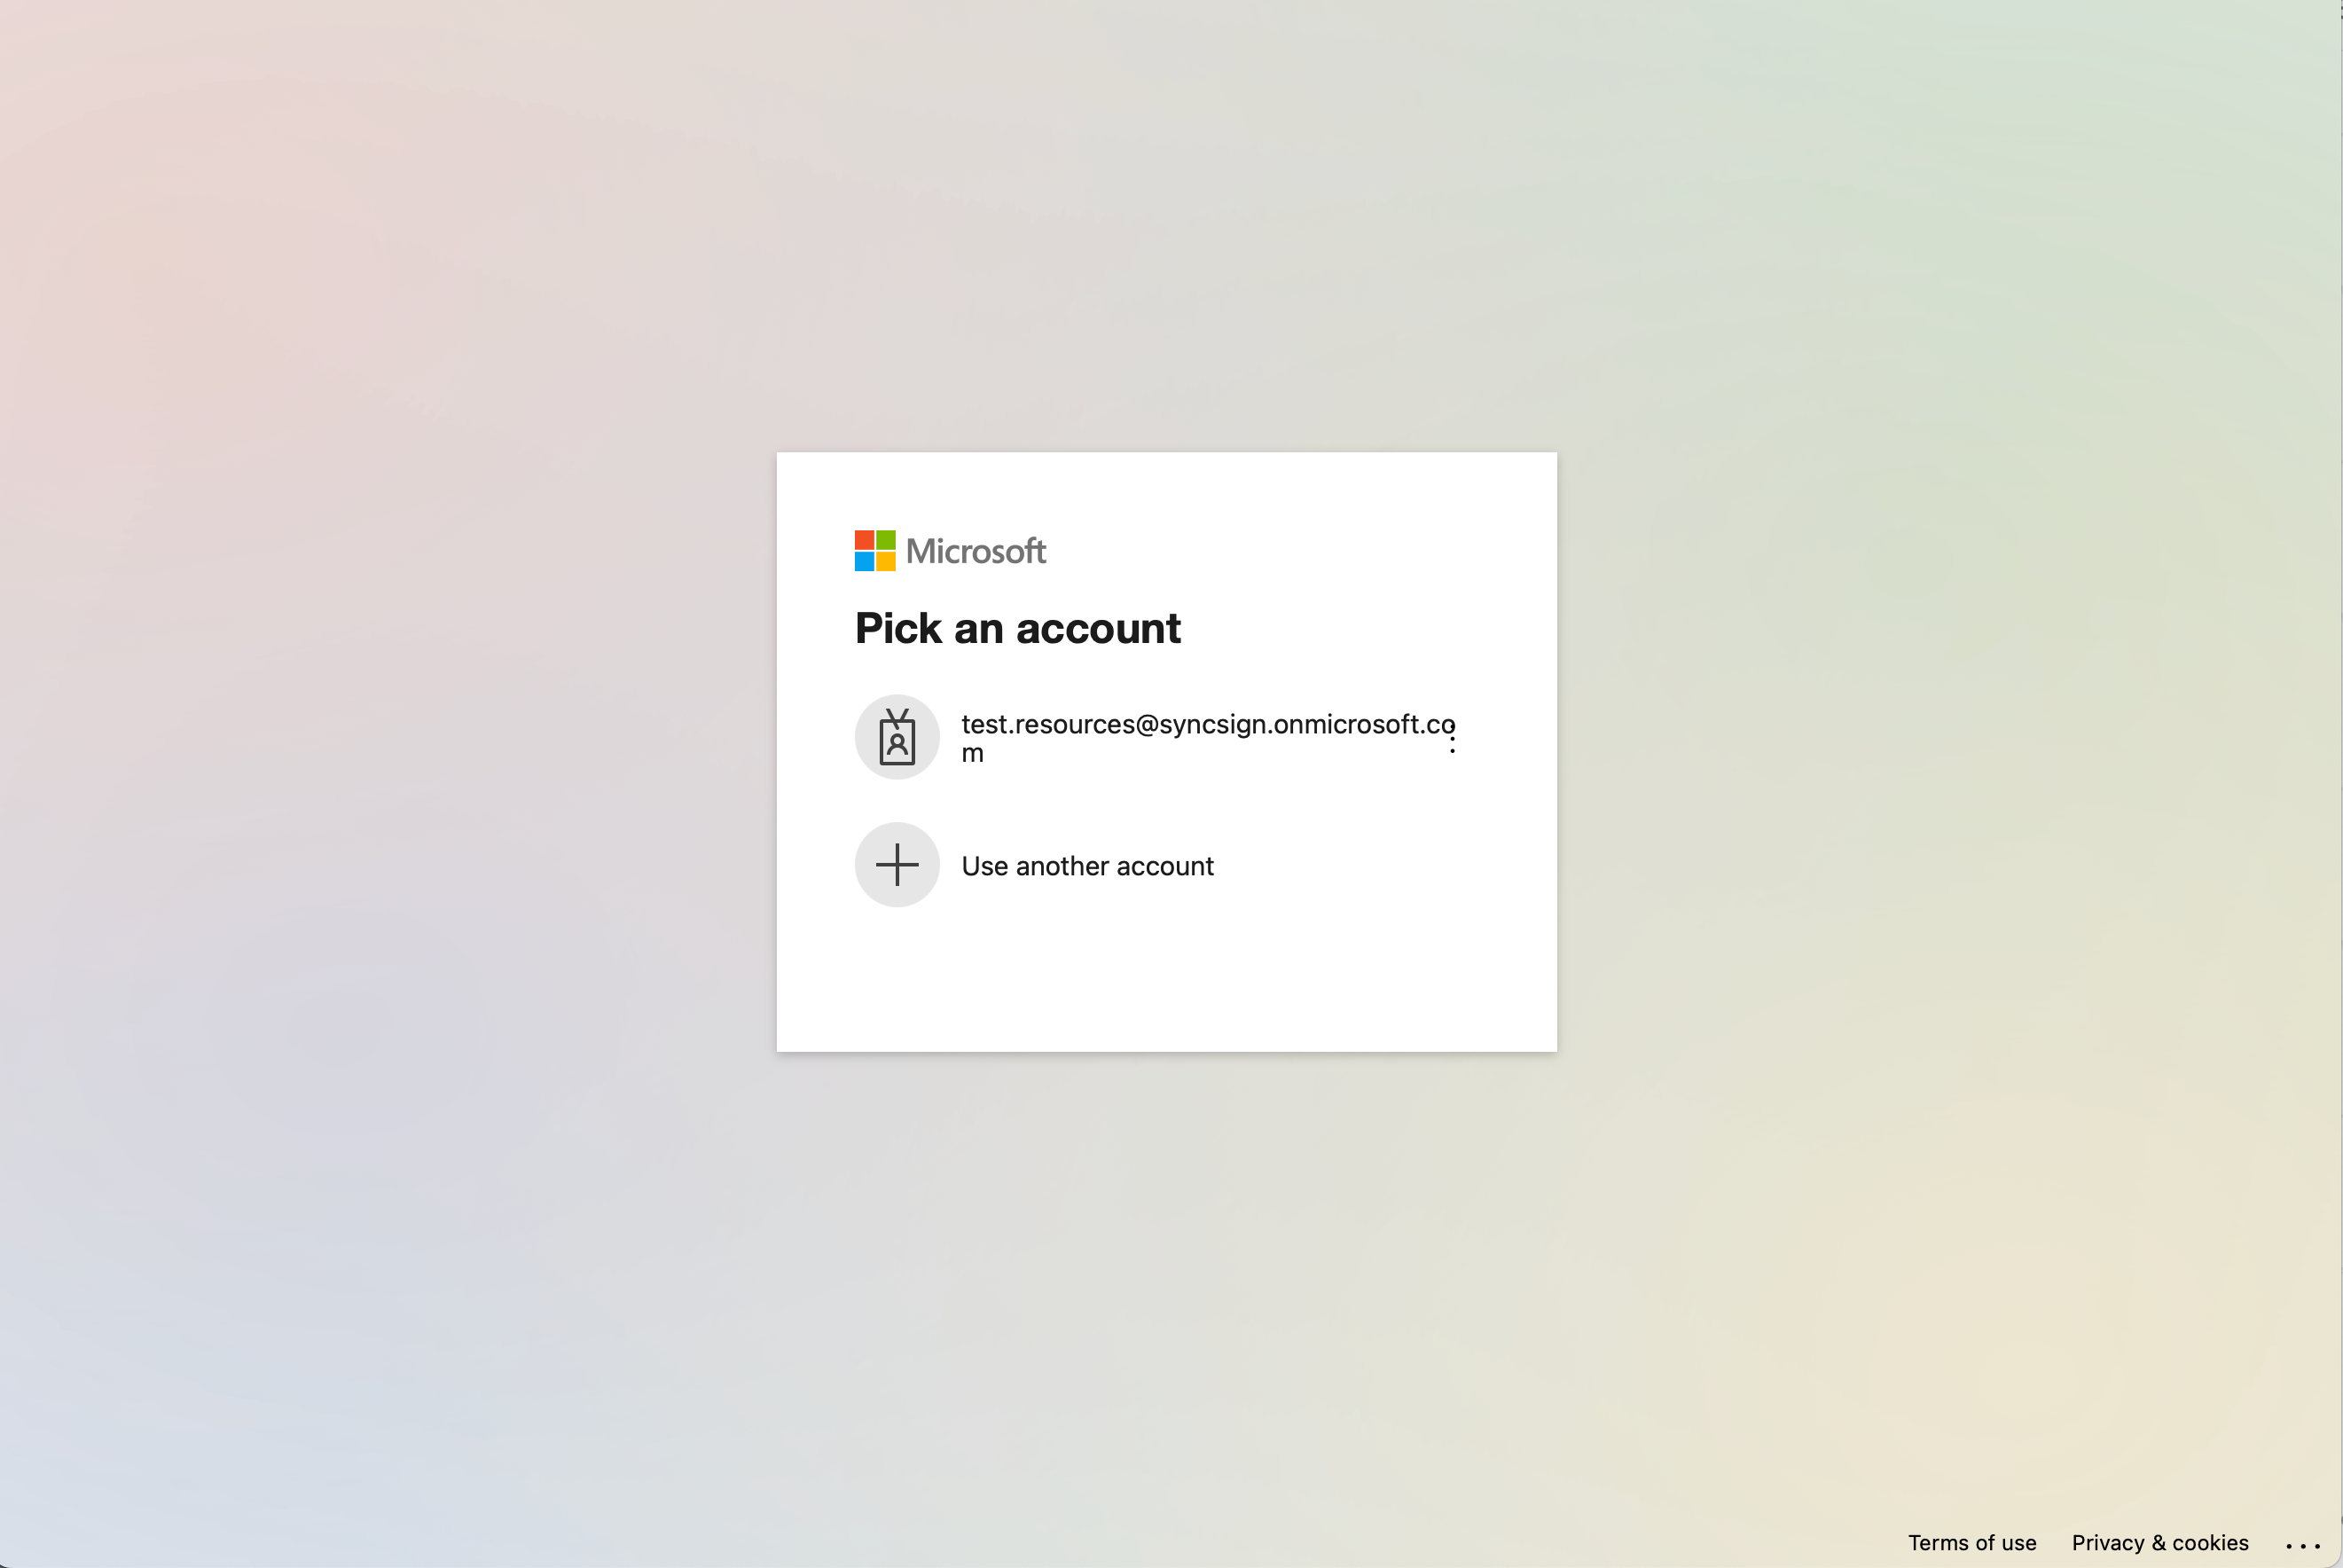
To add the assigned user to SyncSign by moving to the SyncSign Portal go to Settings -> Integration -> Select Delegated User, and log in as an Office 365 user.
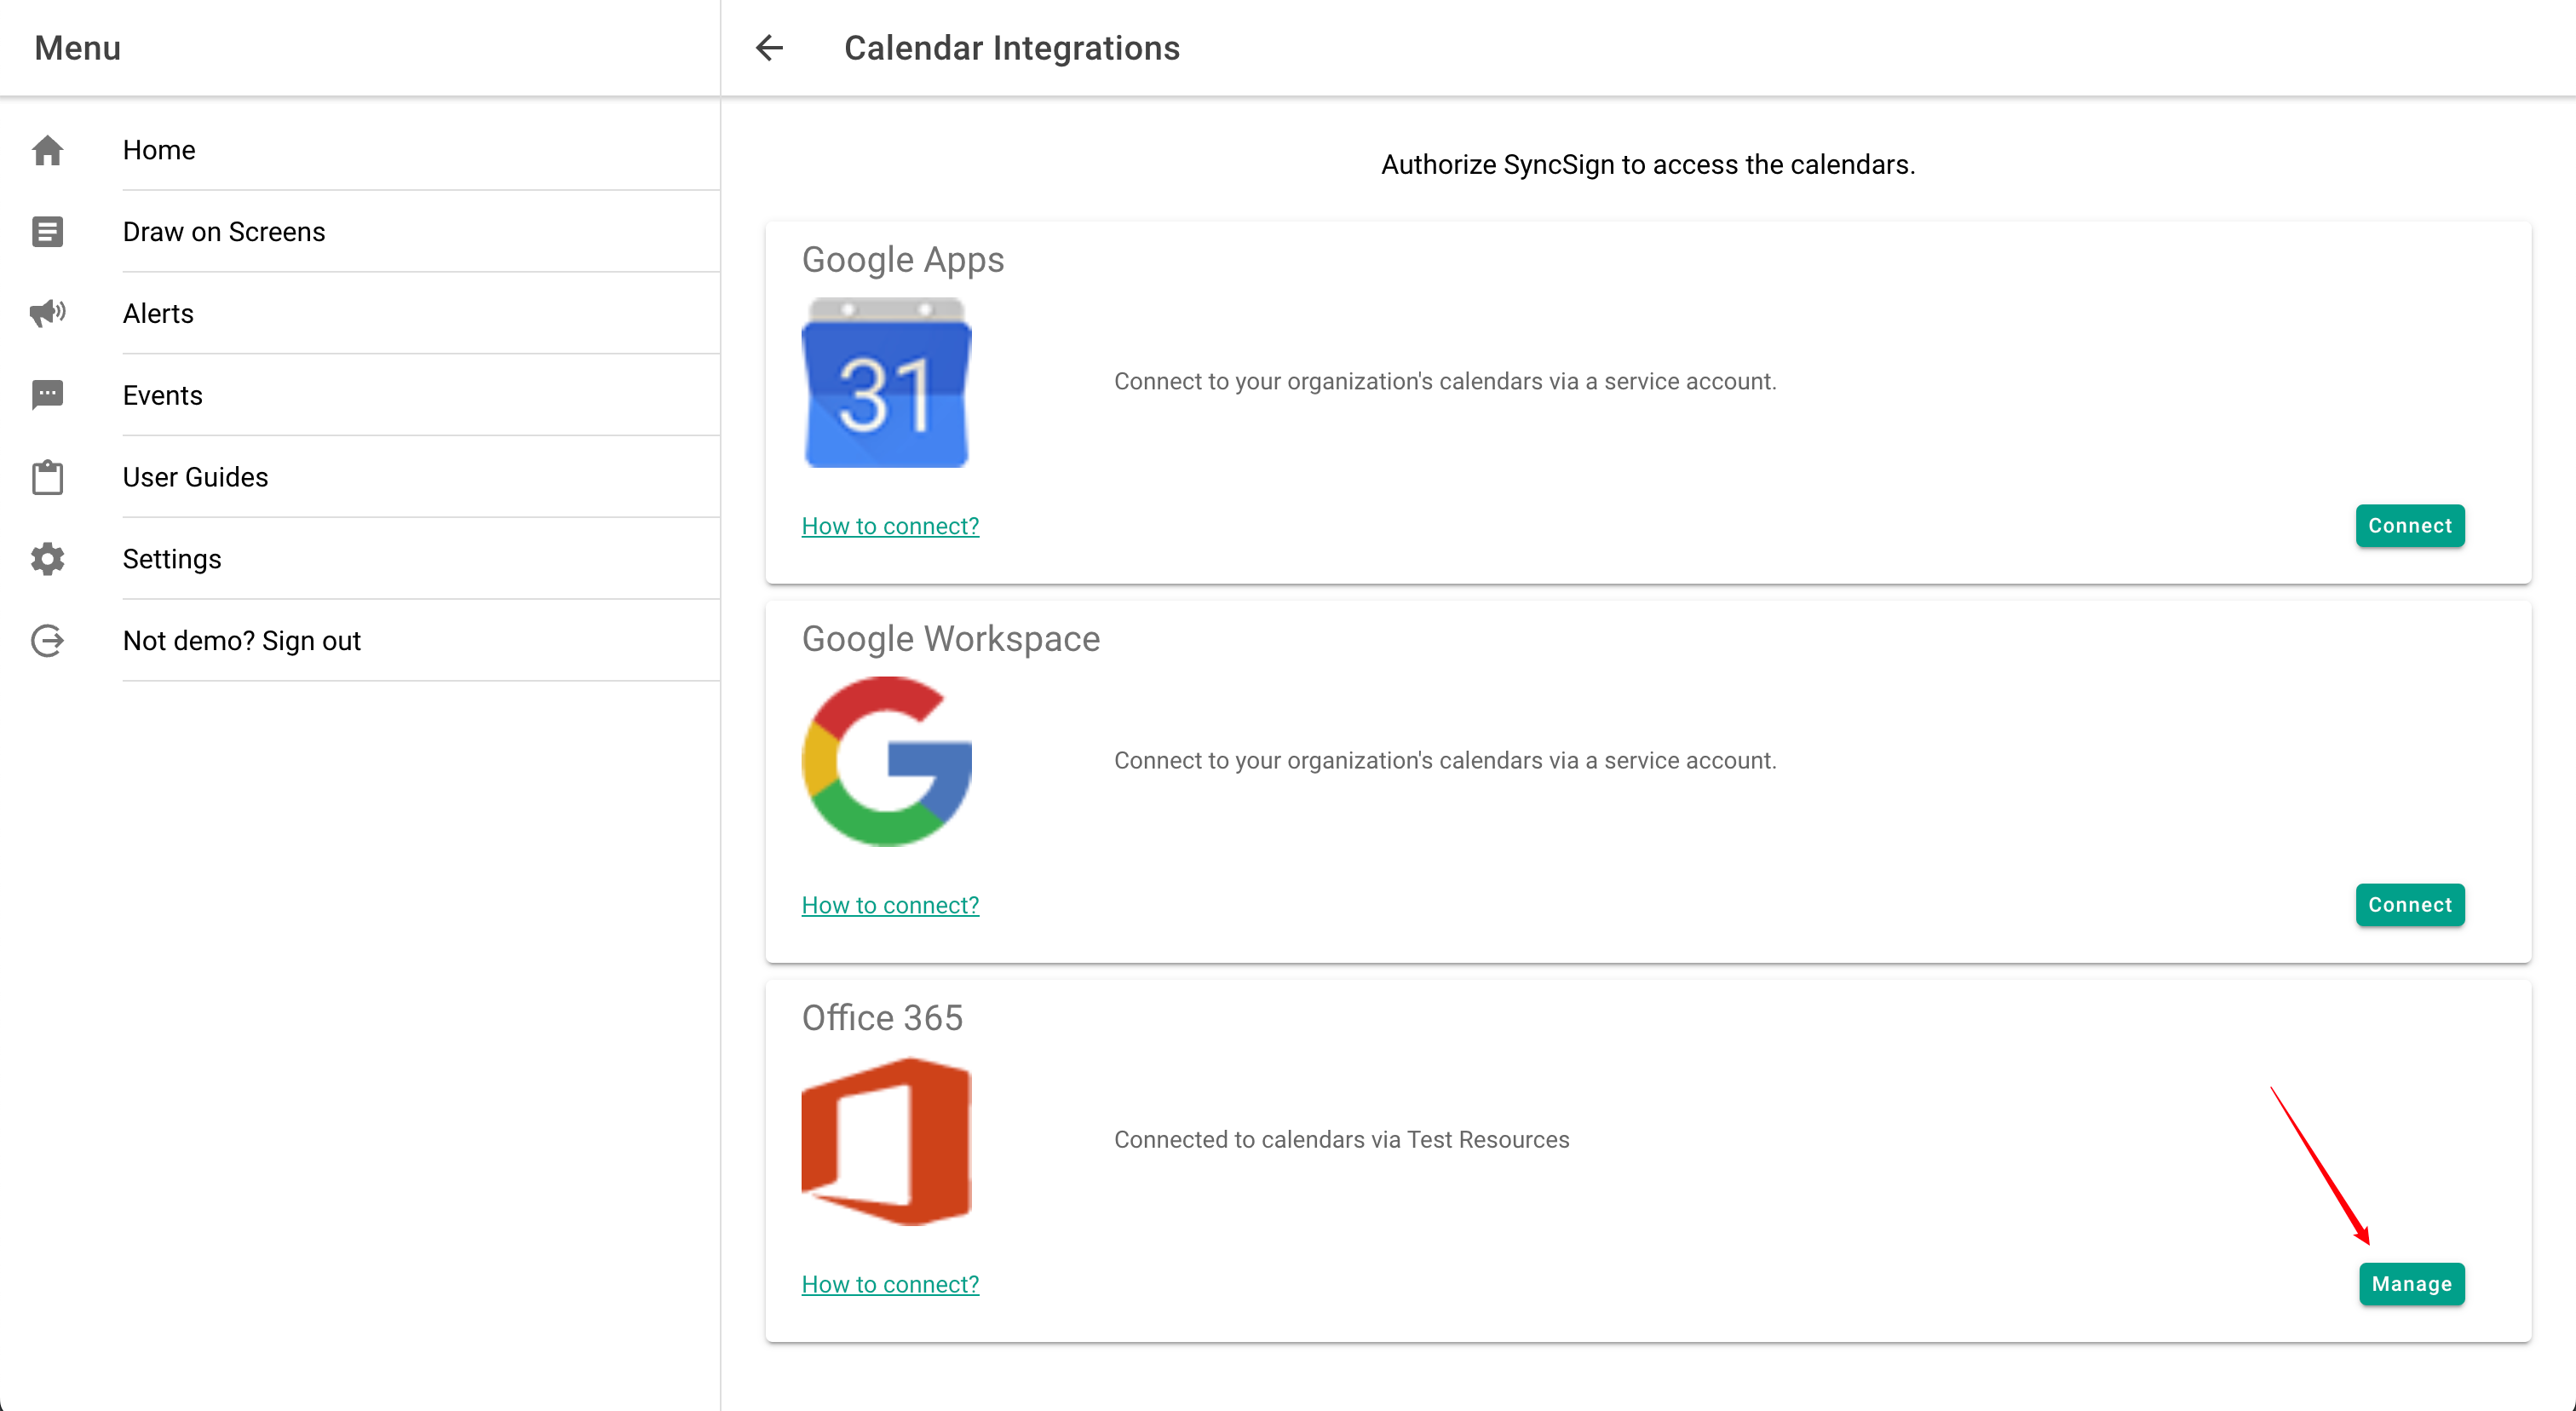
If you are a general member in your organization, please select “Delegated User” authorization method to log in.
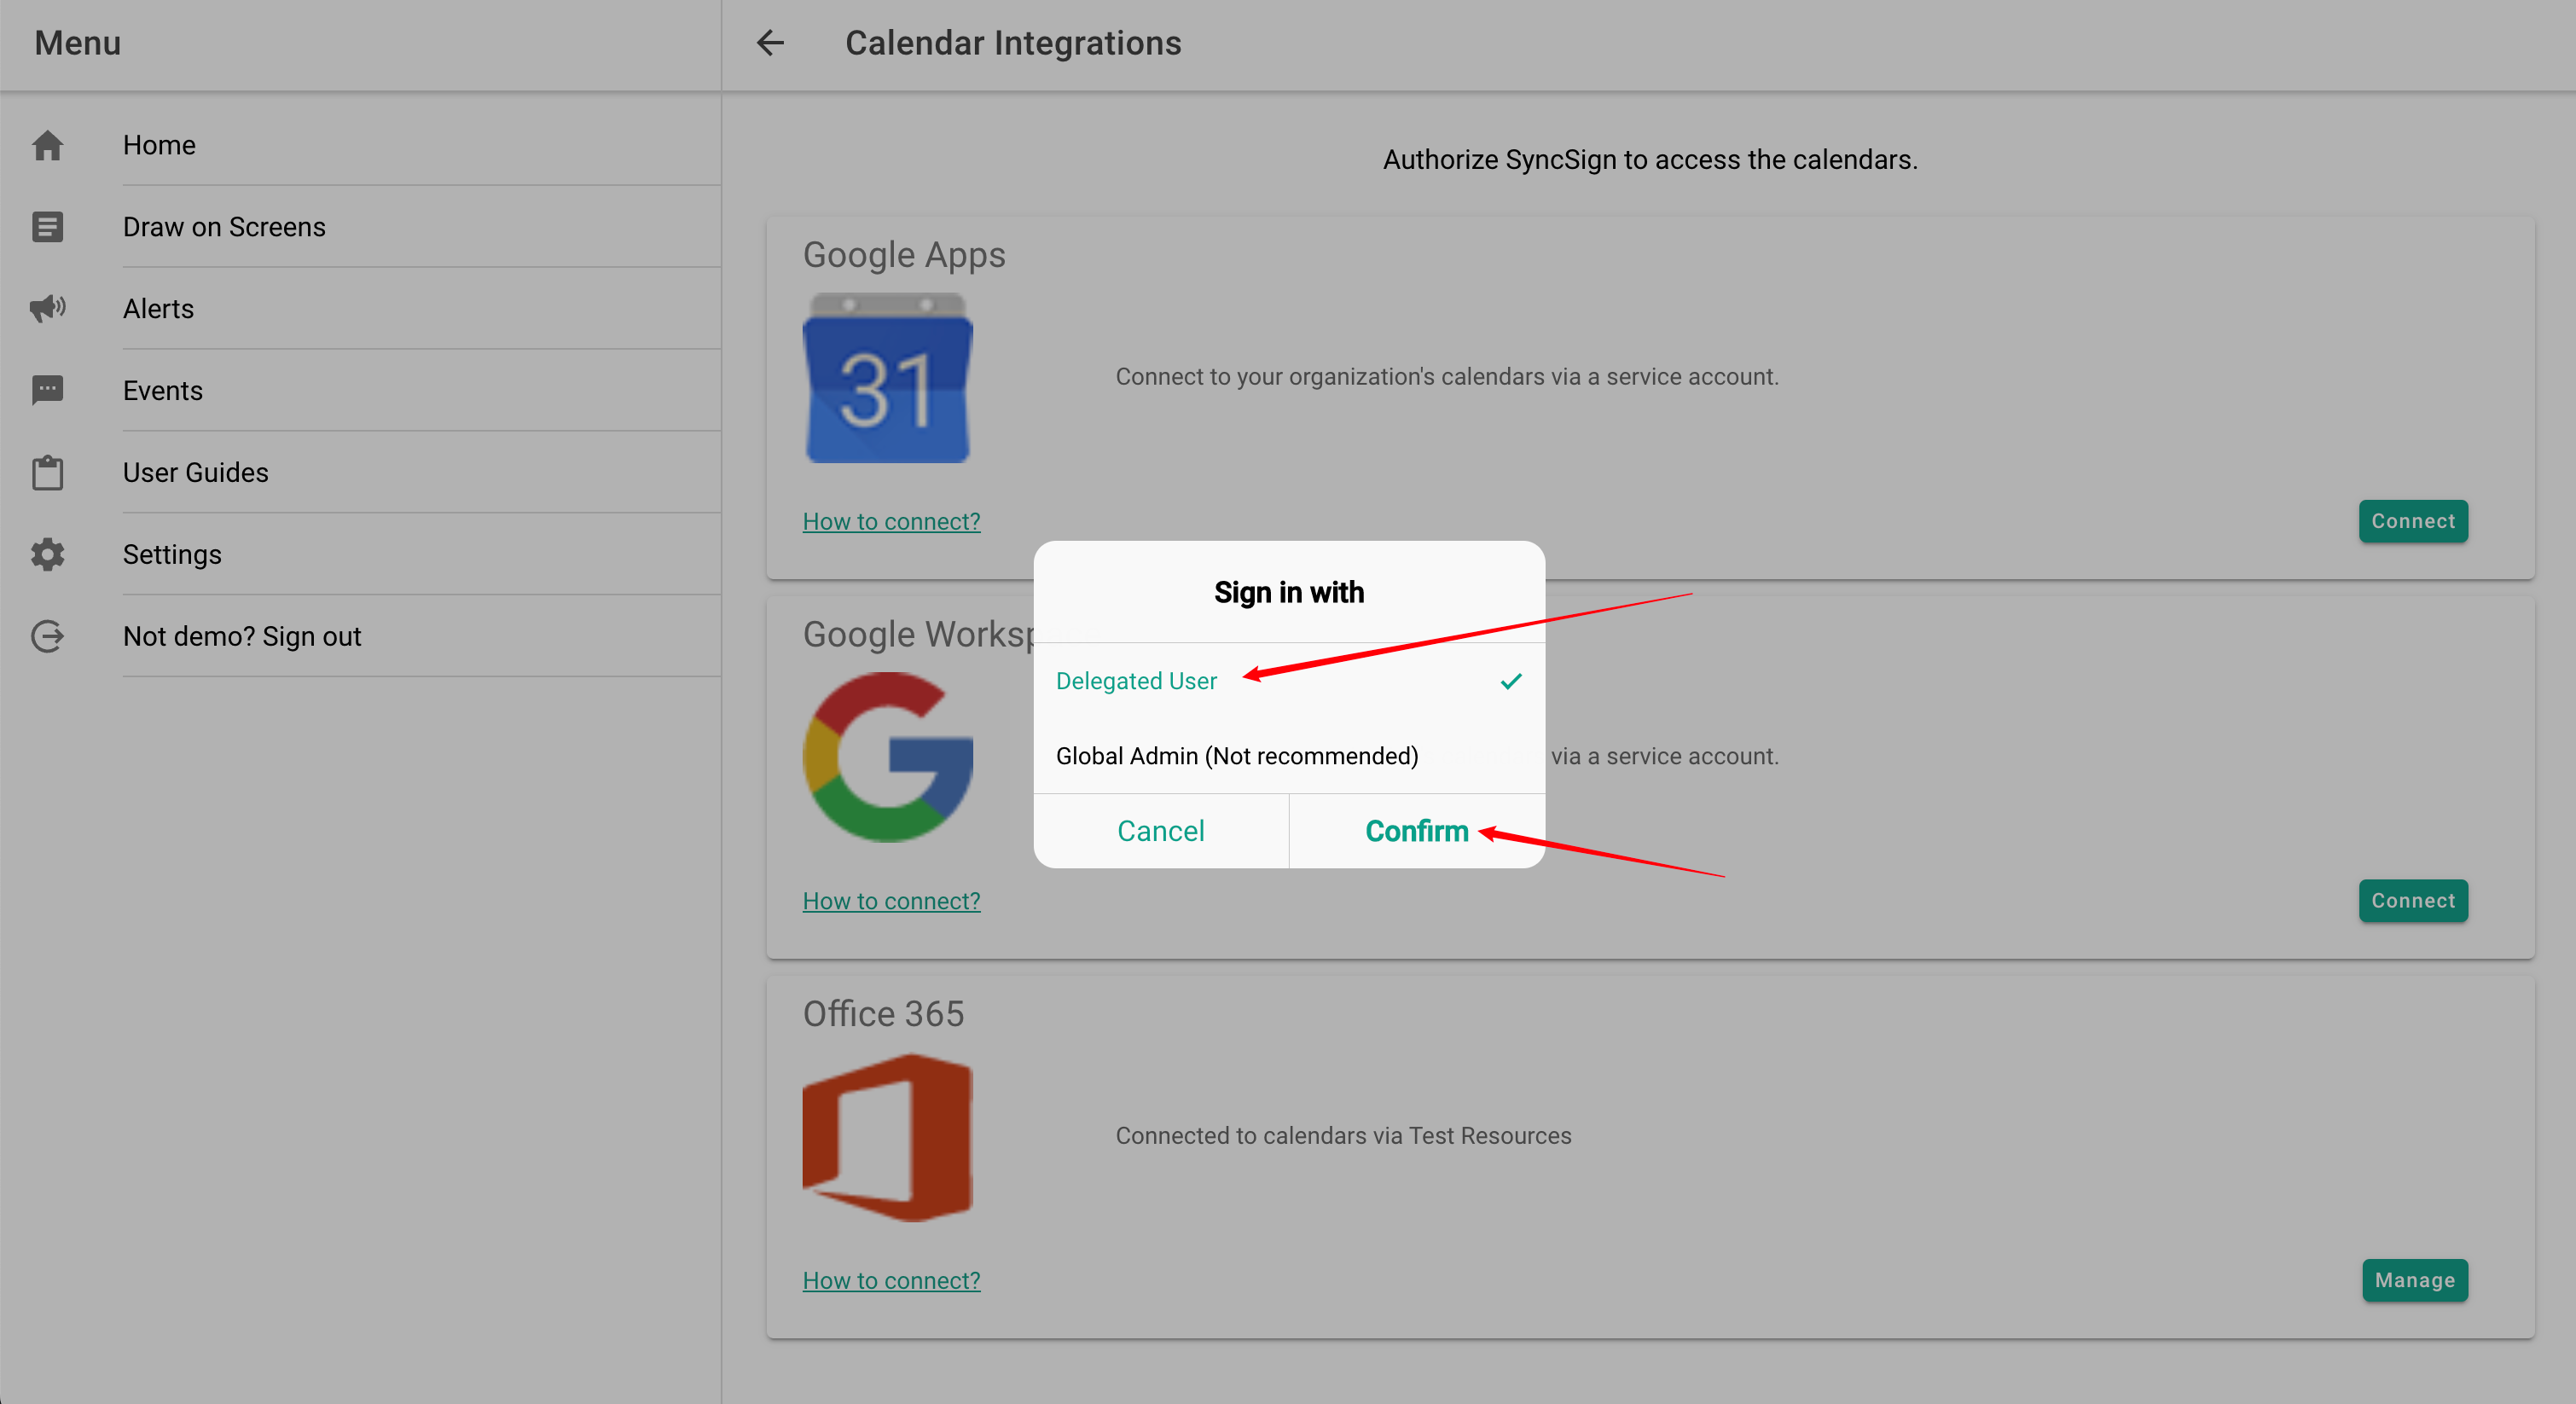
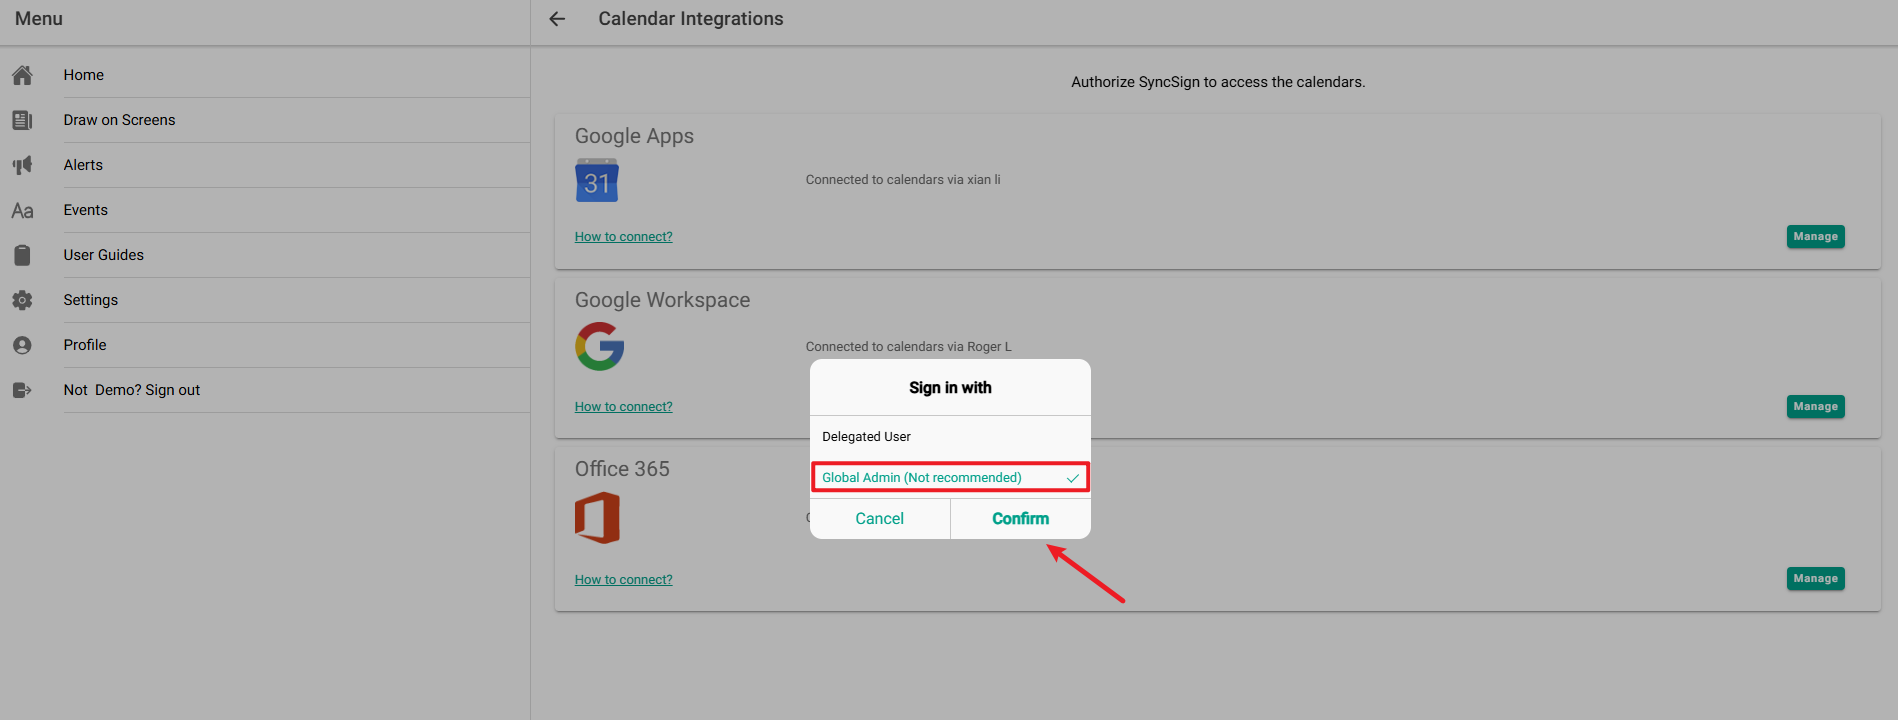
If you are a Microsoft 365 Administrator in your organization, please select “Global Admin” authorization method to log in.
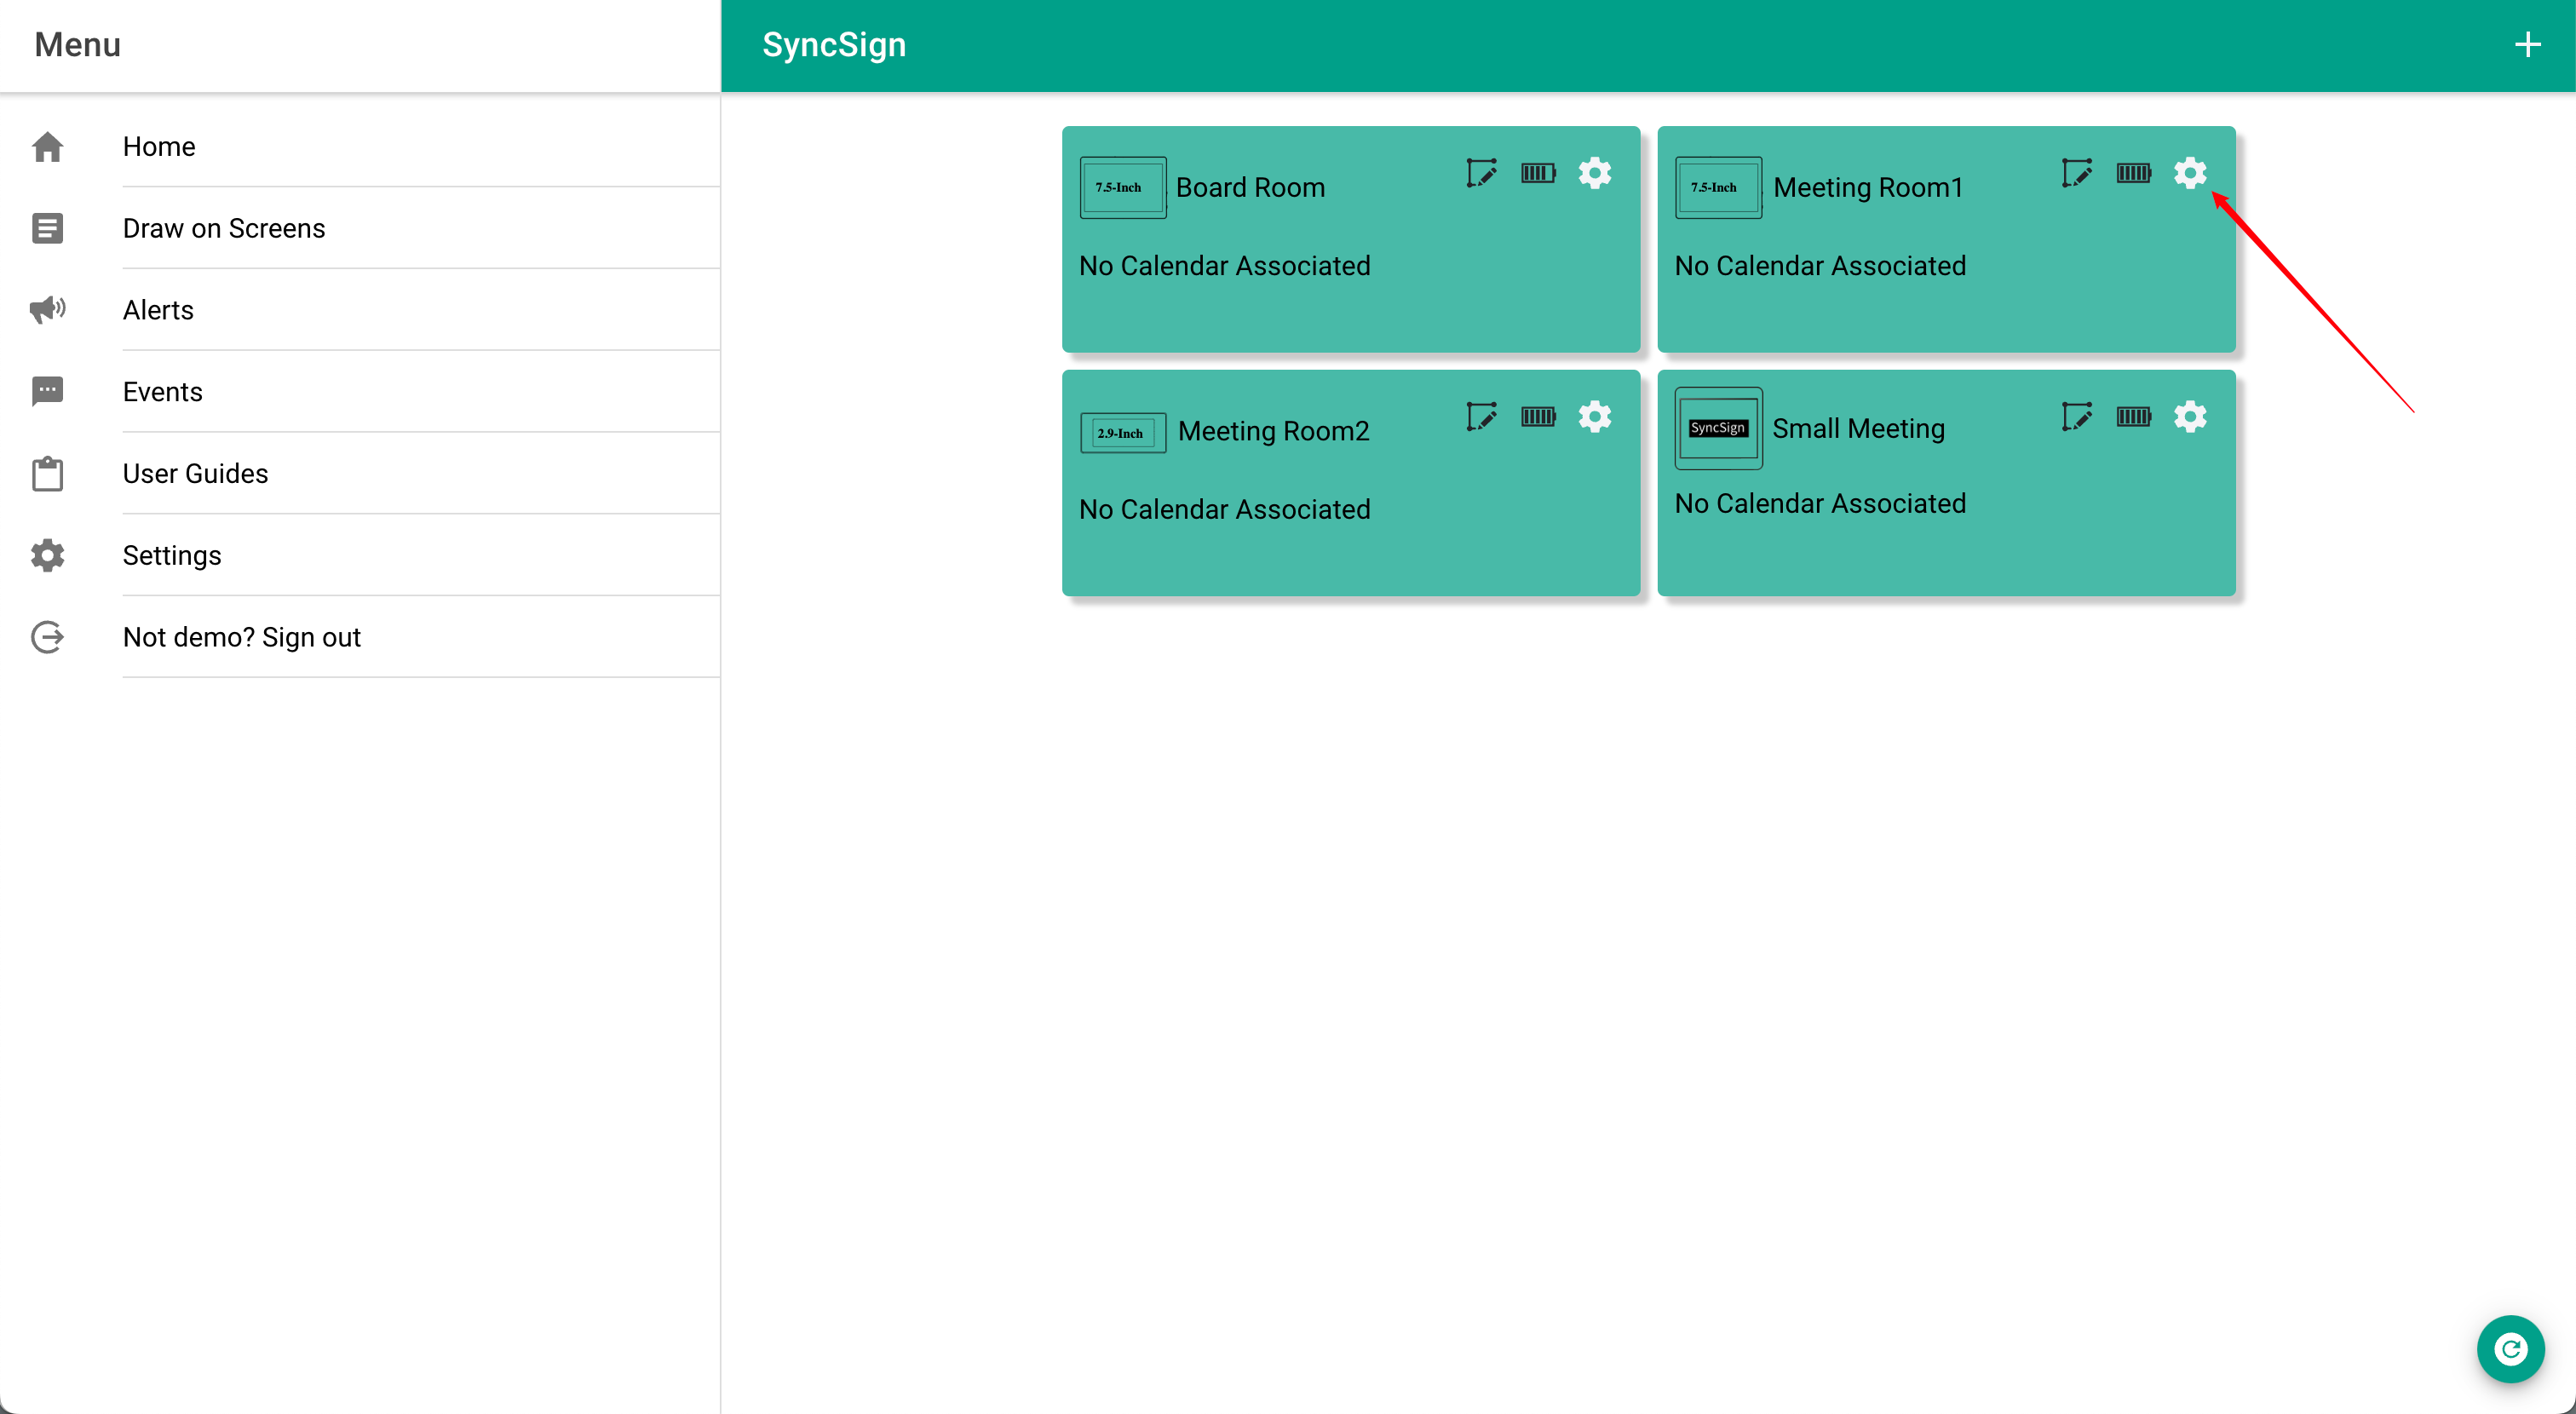
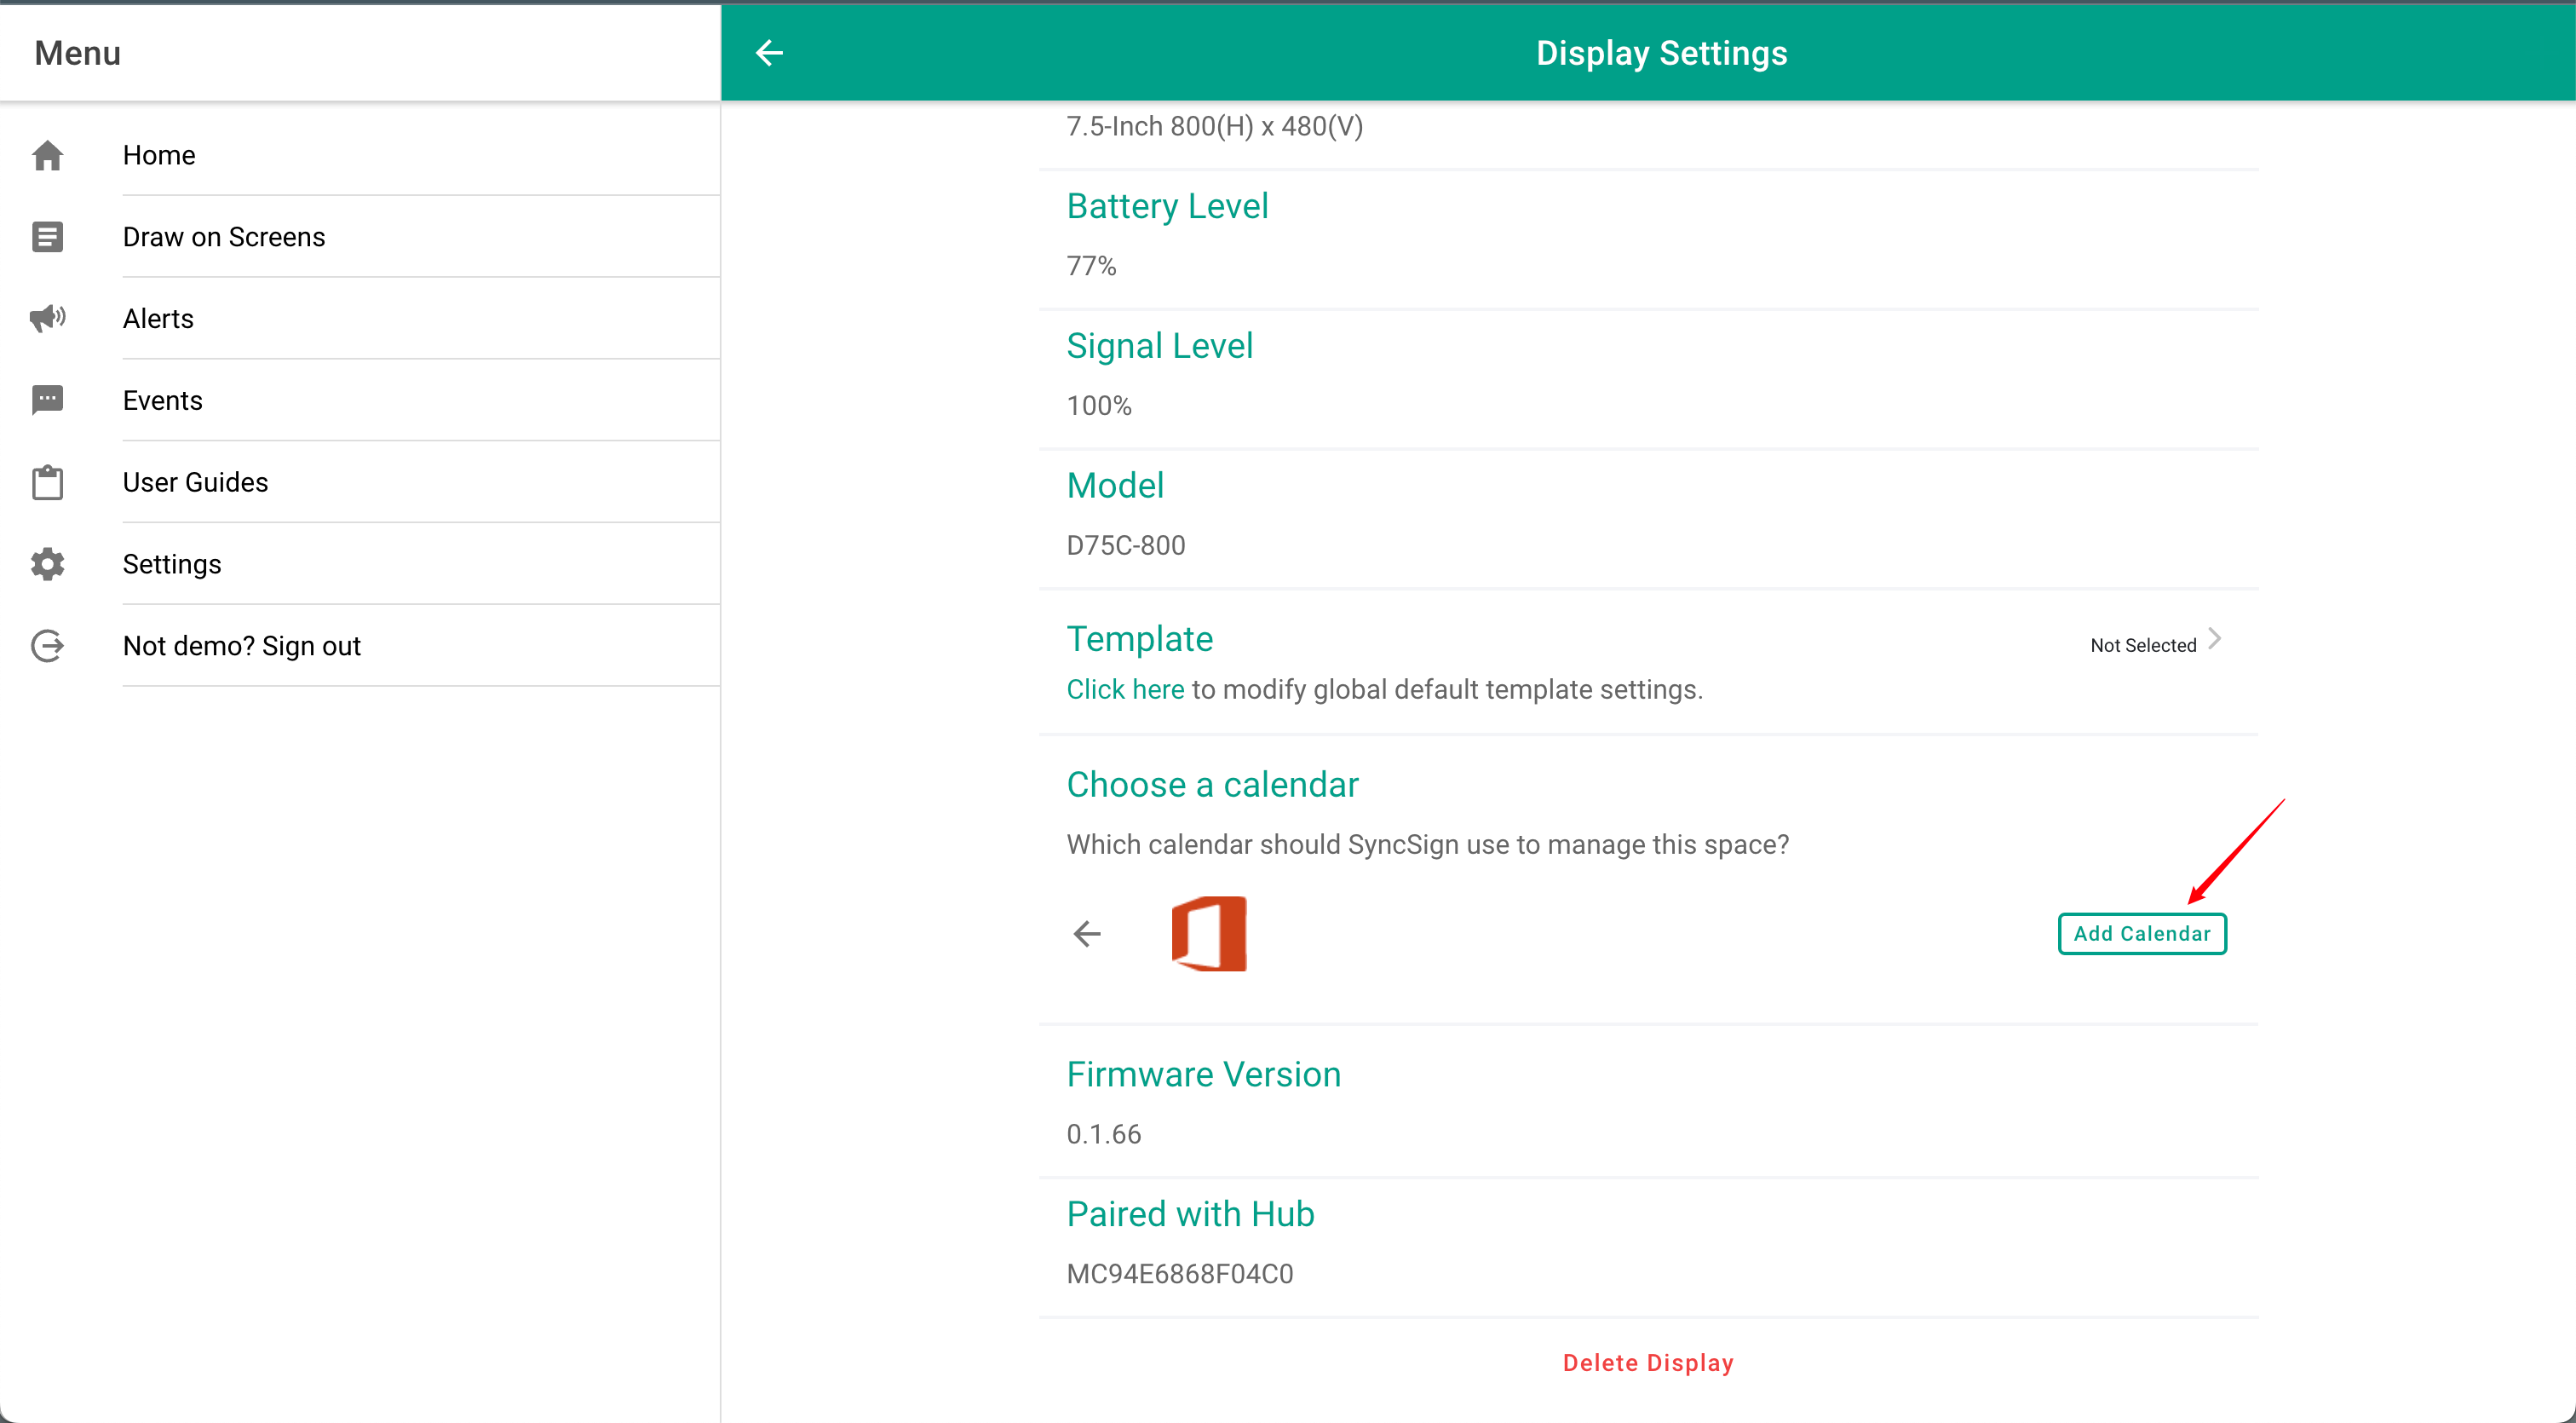
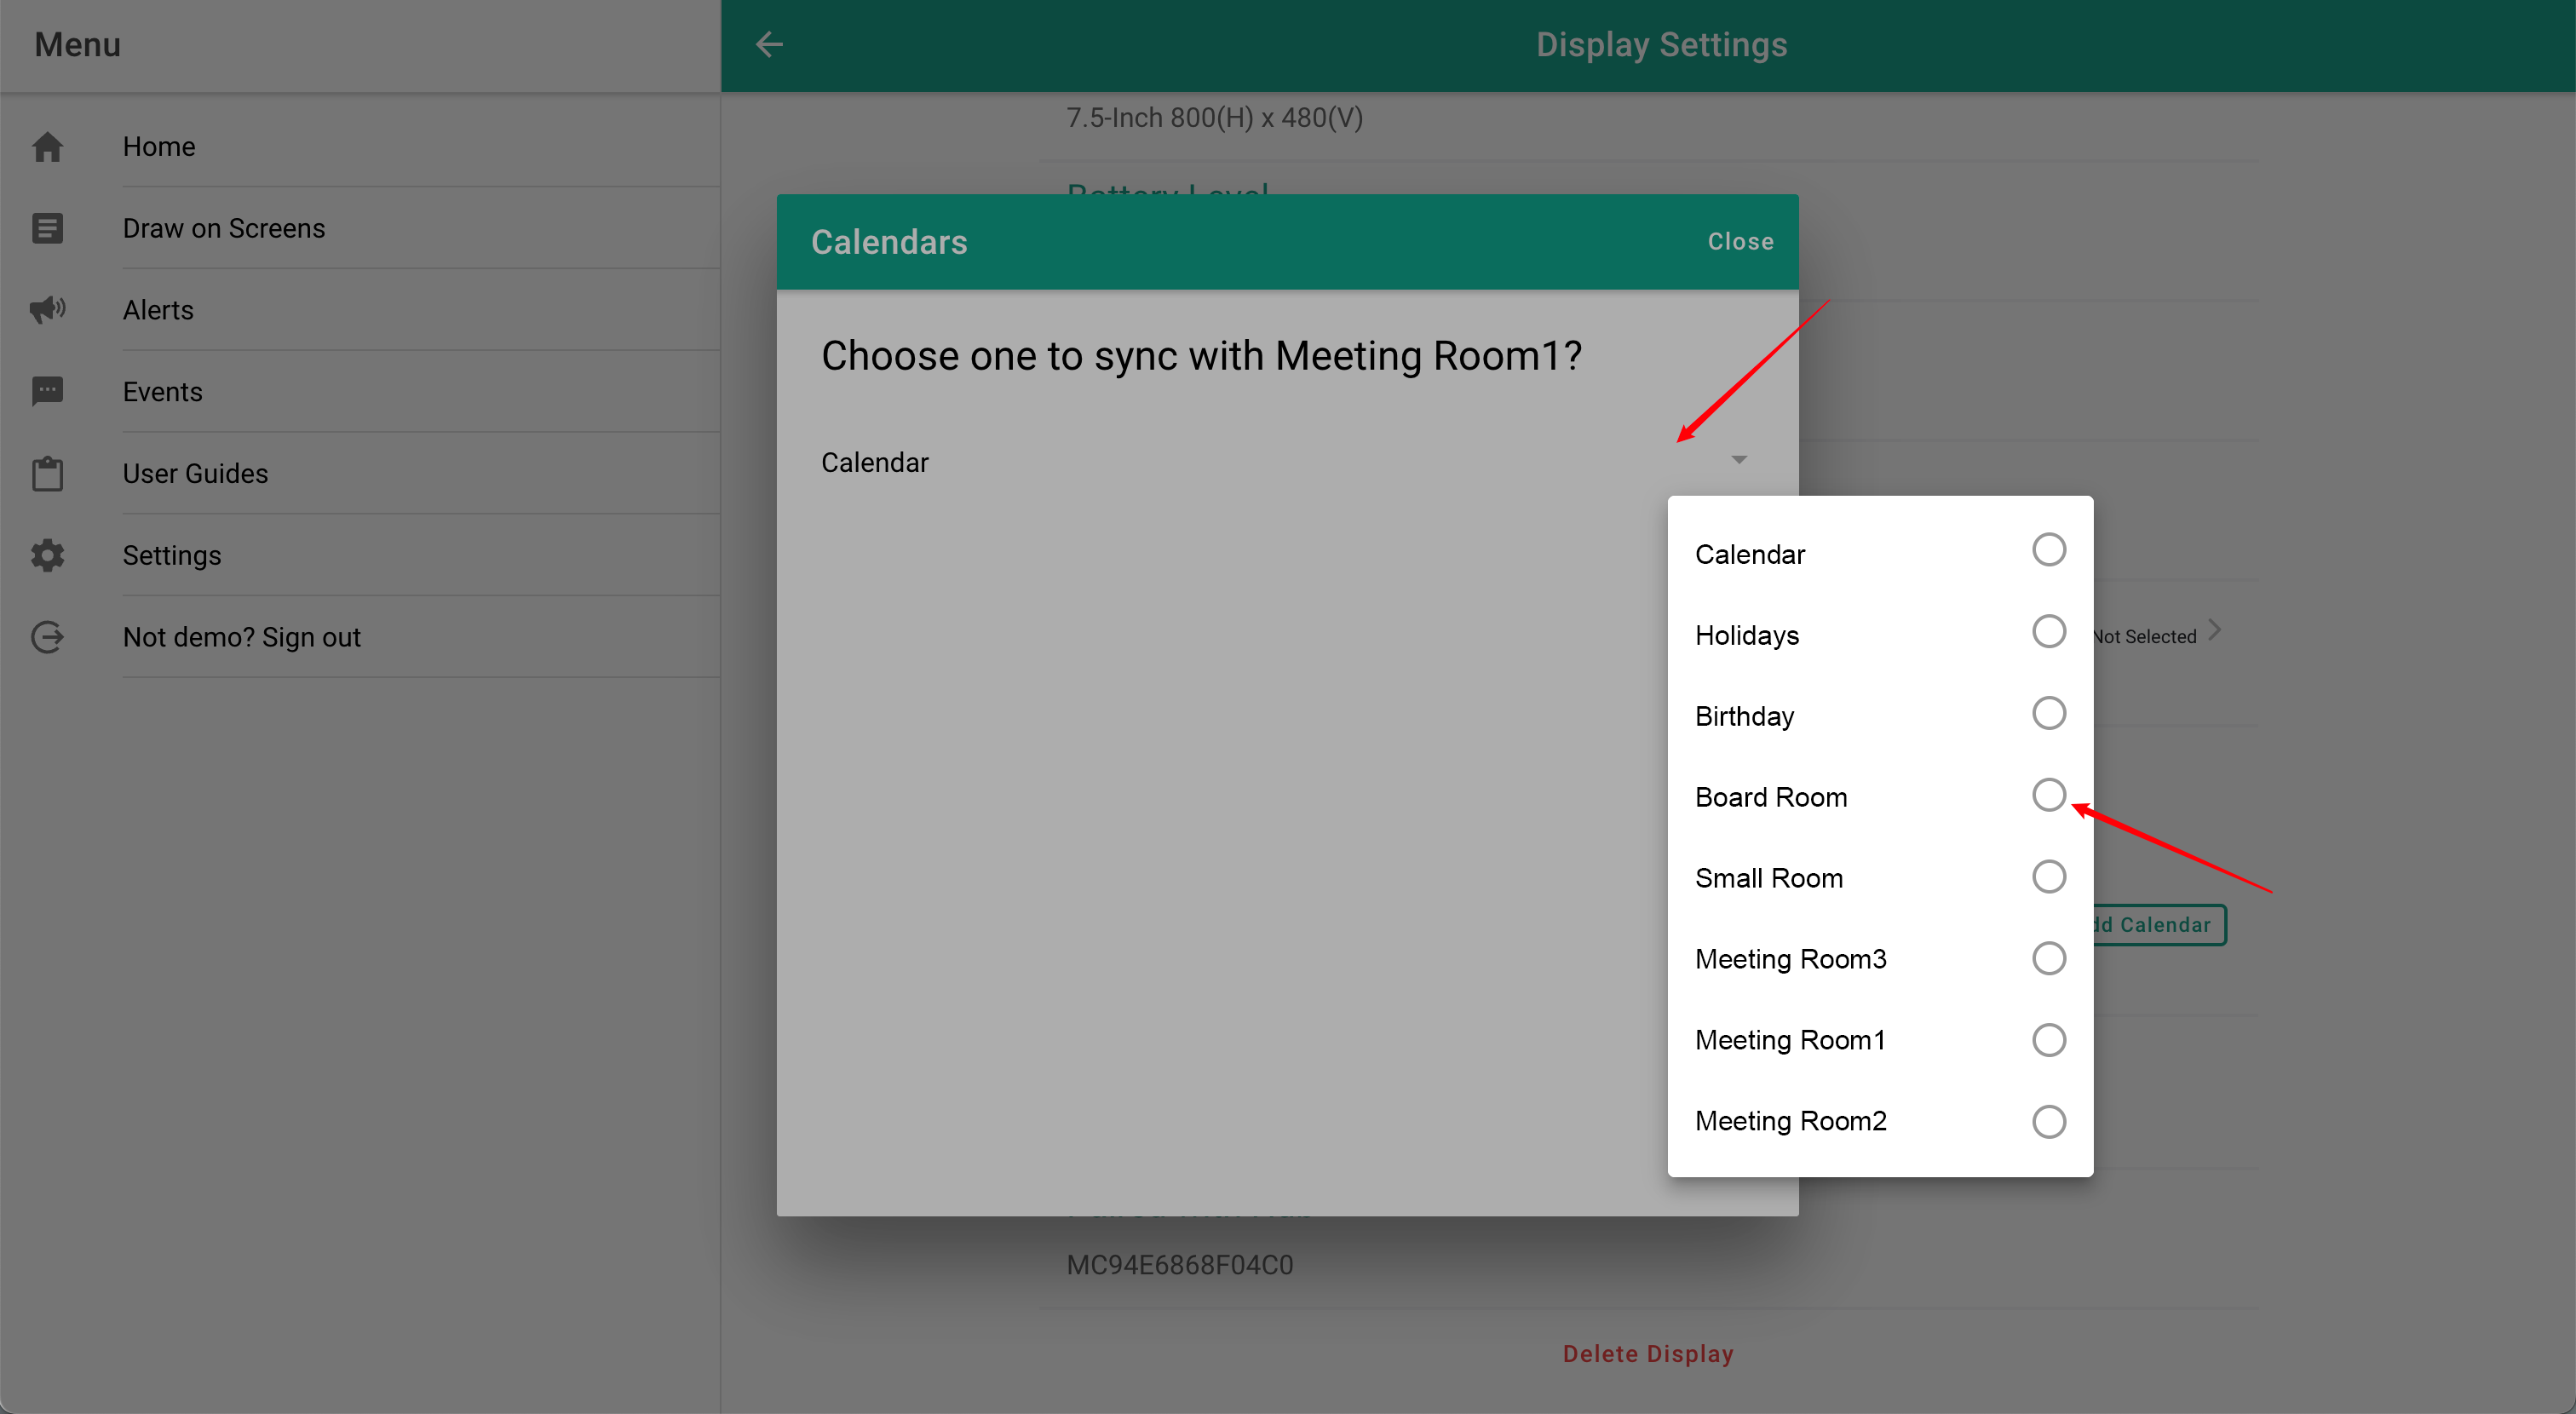
After 24 hours, you can add room resources in the SyncSign portal. To add a resource, navigate to “Home” -> “Display Settings” -> “Select Office 365,” and then click “Add Calendar” to manually add the room resource.
If you feel that delegated authorization is troublesome, you can use global administrator authorization to integrate with SyncSign.
If you encounter any issues, please feel free to contact us at (help@sync-sign.com).
FAQ & Troubleshooting
If you encounter any issues during setup or usage, please refer to the following common solutions:
- Microsoft 365 Compatibility
(Includes support for Business licenses and Personal accounts; Microsoft GCC and GCC High are not supported)
- Room/Calendar Not Appearing in SyncSign Client
(What to do if your room resource doesn’t show up in the SyncSign client)
- Display Synchronization Refresh Failure
(Troubleshooting steps when the display stops updating)
- Event Title Shows Organizer Name Instead of Event Subject
(How to fix the issue where the meeting subject is replaced by the organizer’s name)
If these solutions do not resolve your issue, please feel free to contact us at (help@sync-sign.com).