On-Premise Server (SOPS) Setup
Note
If you are not sure which data source flow to follow, start with SOPS Setup Navigation for a step-by-step navigation guide.
Introduction
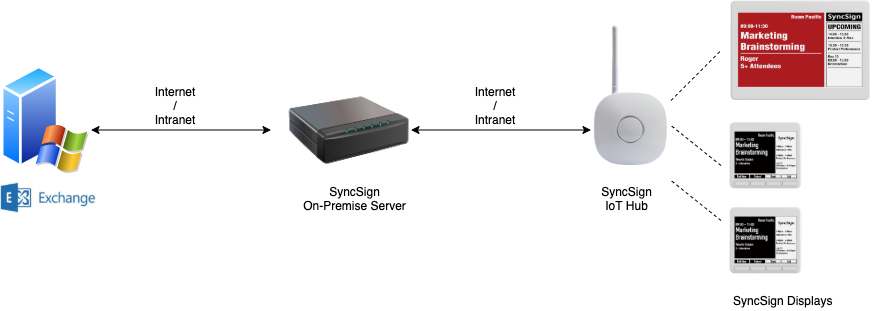
The SyncSign on-premise deployment server is the managing bridge between the data source (e.g., calendar system) and the SyncSign Hubs/Displays. It’s a standalone and compact hardware device, which can be installed within the company’s infrastructure. The main advantage is that the data are not going outside your company’s network.
We provides three fulfillment options for SyncSign On-Premise System (SOPS),
Hardware server with preinstalled software.
A downloadable virtual machine package, which runs on the desktop computer or server inside your office.
An importable machine image to create a computing instance that runs directly on the cloud service provider, such as AWS, Azure Cloud, or Google Cloud (Available soon).
Preparation
Virtual Machine
Purchase the license and download the VM image from SyncSign
Install the latest virtual machine software:
Download a platform package according to your host computer, then install it
It’s optional to install the VirtualBox Extension Pack
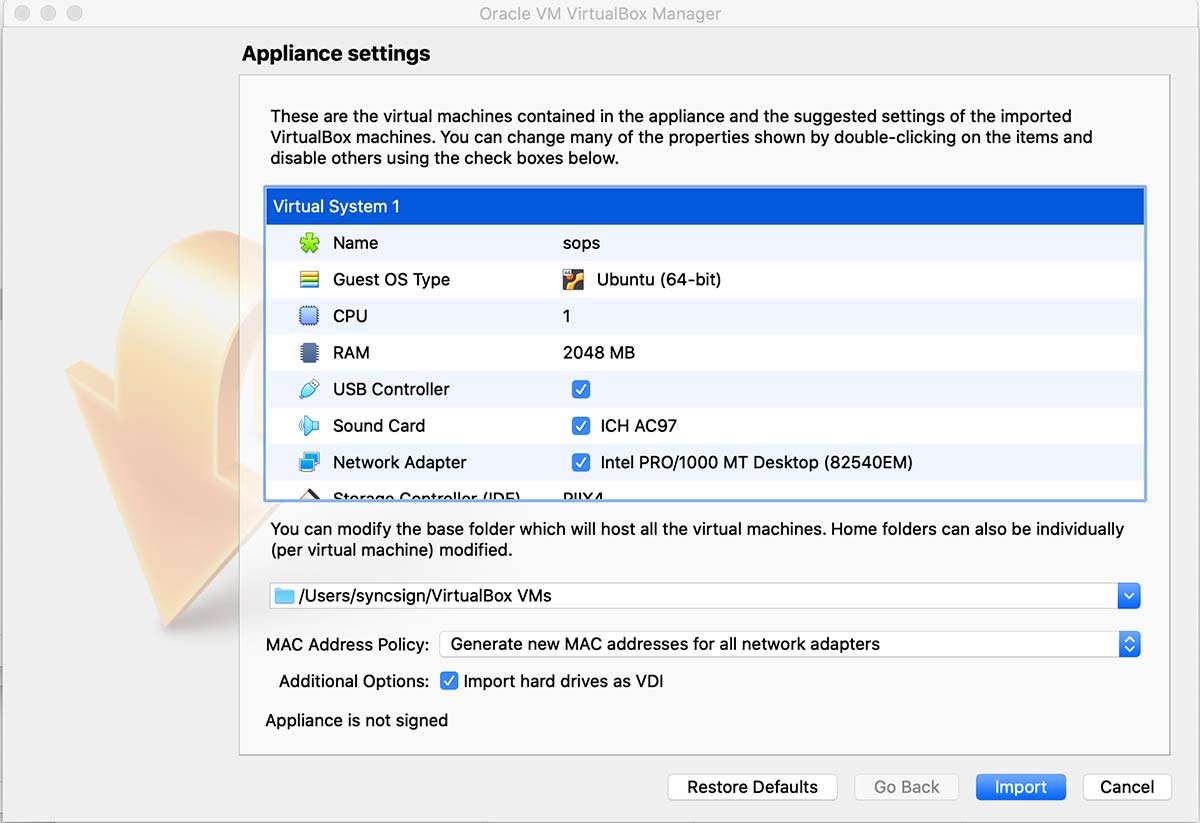
Once the VirtualBox installed, click the syncsign-sops-xxx.ova file to import.
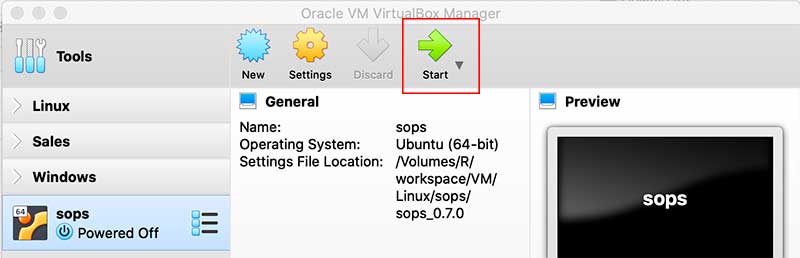
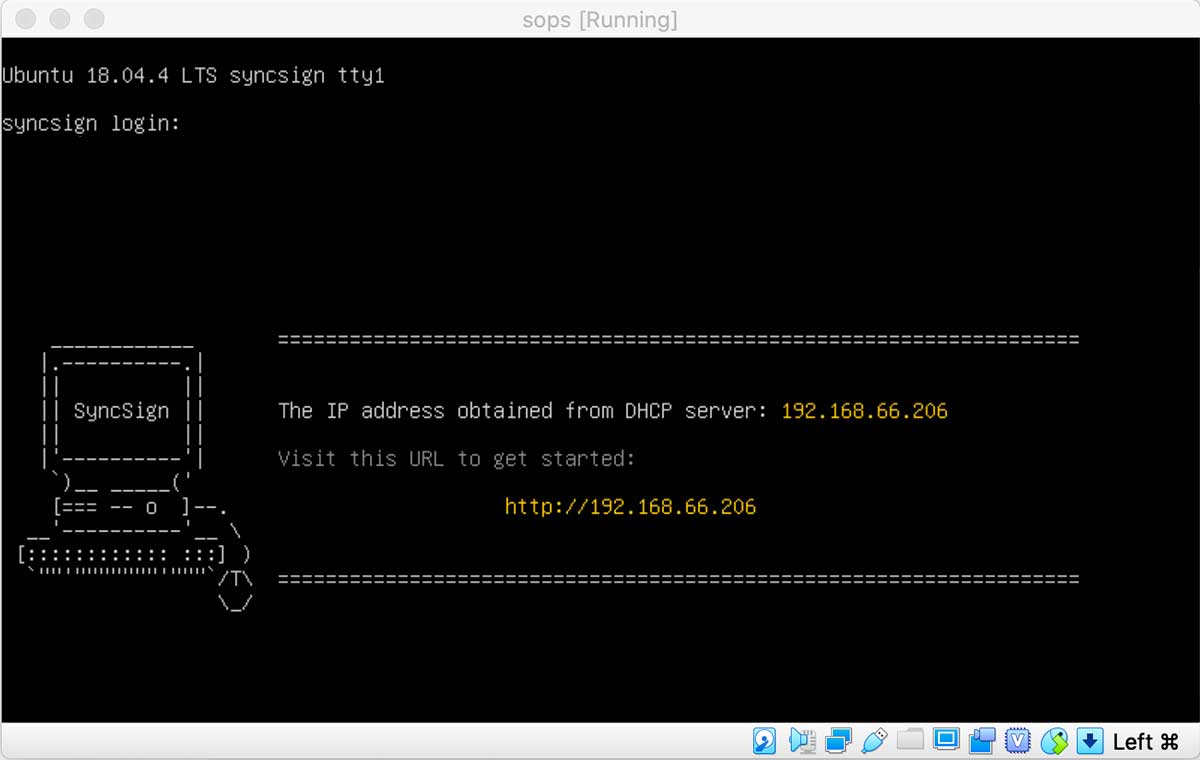
Start the virtual machine and wait for the instruction to appear on the screen console.
Then you will see the URI to open the installation web page:
Cloud Computing Instance
The instruction to import as the AWS EC2 Instance is coming soon.
Install
Virtual Machine
Open the link appears on the screen console (e.g., http://192.168.0.15) with a browser
You will be redirected to an install page. Input your email and license ID (as obtained from SyncSign)
Remember to modify the generated password and save it in a secure way.
Watch this video for a walkthrough on how to setup the server.
Cloud Computing Instance
The instruction to setup the cloud computing instance is coming soon.
Setup
Basic Setup
Setup Data Sources
The SOPS support integration with multiple data sources:
Google Calendar / Google Workspace
Microsoft Office 365
Microsoft Exchange Server
NextCloud Calendar
CalDav Calendar
CSV file
Google Sheets
Secure Enhancement
Although its possible to use the SOPS with http scheme (e.g. http://<sops-ip-address>). it’s better to setup a TLS encrypted communication.
Before proceed, please prepare this at hand:
A domain name you owned
The SSL/TLS certificates purchased from a trusted source (or use a self-signed certificates)
Then,
Sign-in the SOPS portal, go to [Settings]>[Connection]
Setup a domain that you are going to visit the SOPS portal and endpoints
Modify the DNS A record and point it to this domain. Now you should be able to open the portal with http://<your-sops-domain>
Click the “Enable SSL/TLS communication” checkbox, then upload the root certificates and private key to the portal
Usage
Web Serivces by SOPS
Managing Web Portal: https://<your-sops-domain>
Legacy Web Portal: https://<your-sops-domain>/m
Calendar data sources, Organization Logo settings, and Hub/Node management have moved to the Managing Web Portal. Use the Legacy Web Portal only for the small number of workflows that have not yet migrated.
Web App for QR-Scan-Booking: https://<your-sops-domain>/booking
Web App for Tablet Display: https://<your-sops-domain>/tablet
API Endpoint: https://<your-sops-domain>/api/v1
Add A Hub to the SOPS
Watch this [Add a Hub] video for a walkthrough.
Add A Display Node to the SOPS
Watch this [Add a Node] video for a walkthrough.