Using CSV URL
Generate URL
Prepare the CSV file. (With all data that you expect to show on the display filled in advanced)
Visit:https://sourceforge.net/projects/hfs/files/latest/download (after jumping to this link, the link will automatically download the installation package).
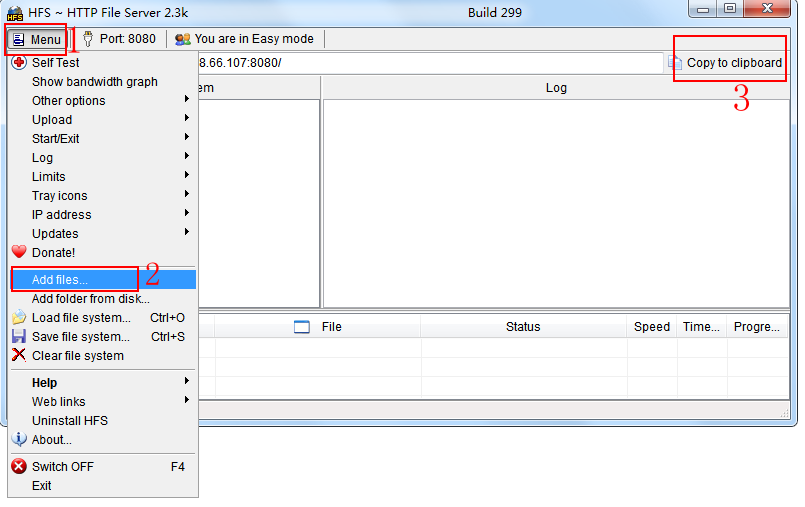
Unzip the installation package (which was just downloaded). Install the software, click [Menu] (upper left corner), click [Add files ], select the target CSV file, click [Copy to clipboard].
Note
Please do not close the HFS (the one you’ve just downloaded) during the whole CSV URL updating process.
Configuration on the SOPS
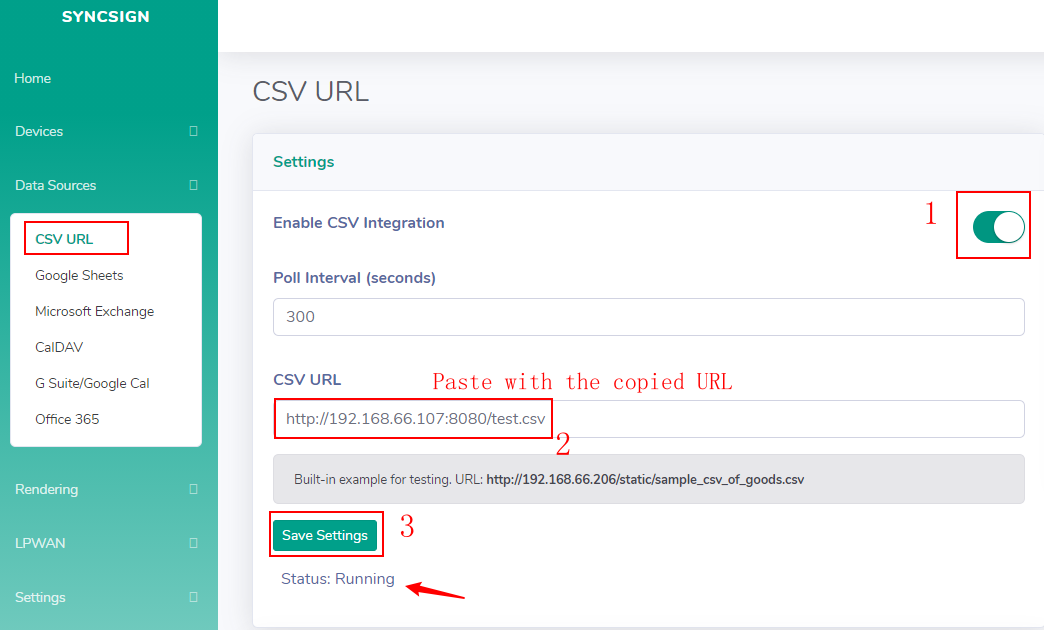
SOPS home page -> Data Sources -> CSV URL -> Checked the [Enable CSV Integration].
Set the Poll Interval (seconds) value: This setting indicates that with an interval of the set value, the SOPS will check if there is any update on the imported CSV file.
Paste the copied CSV URL, click [Save Settings]. Fetching and parsing CSV file header, choose a Column as the Unique Source ID, click [Save], click [OK].
Please click the [Status] to check if the CSV file was successfully updated. (The Status needs to be ‘Running’)
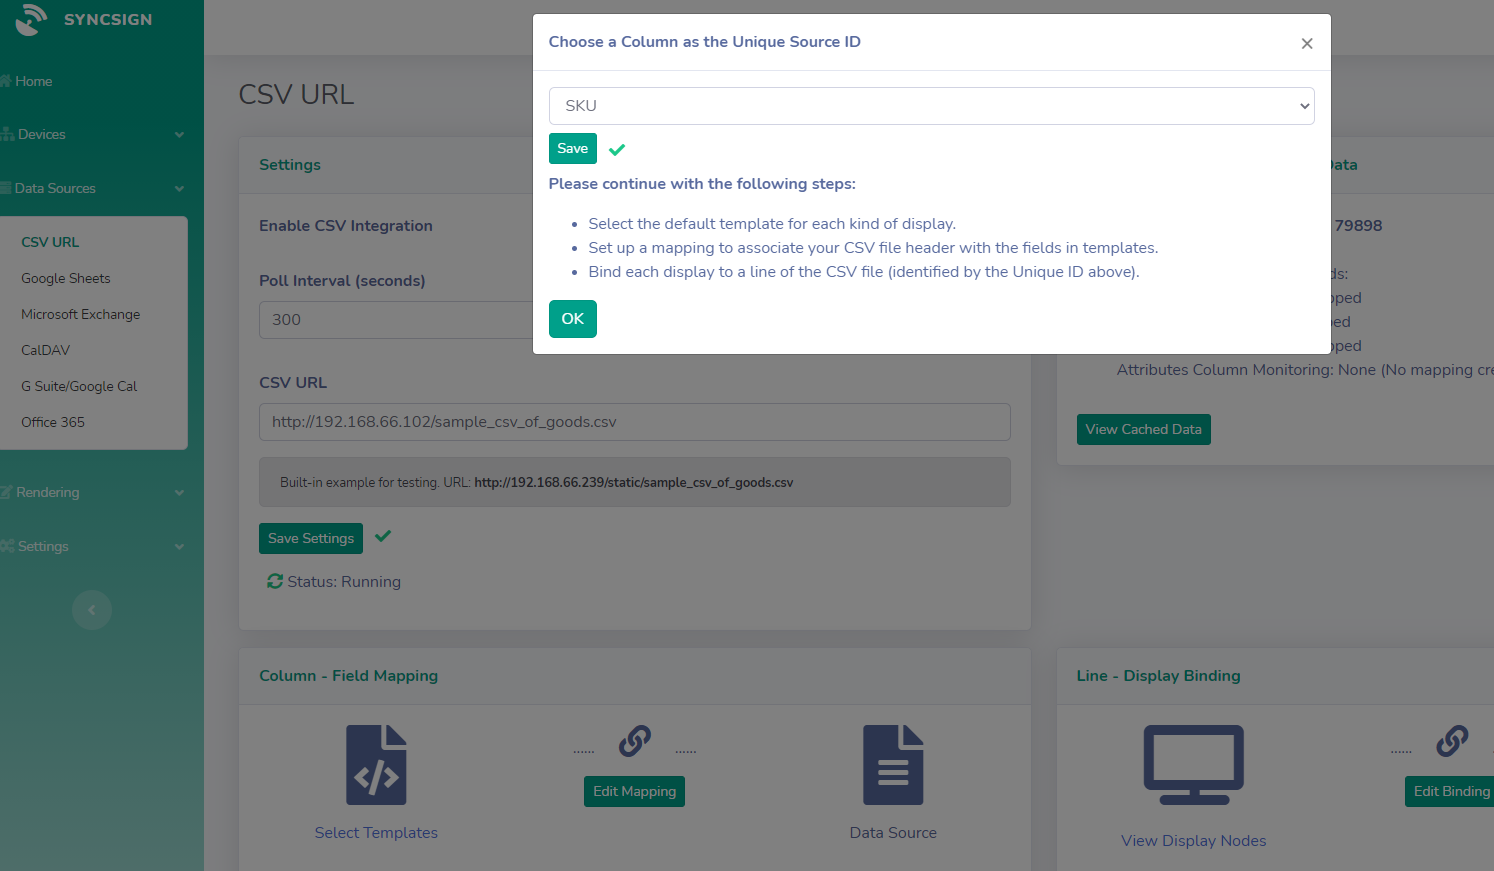
- Please continue with the following steps:
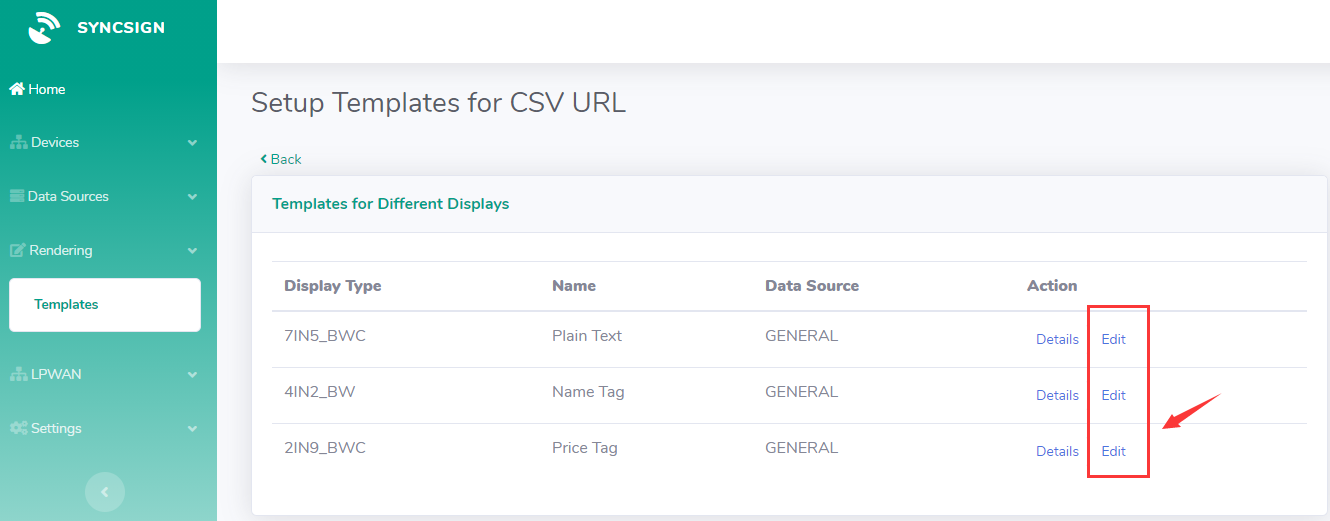
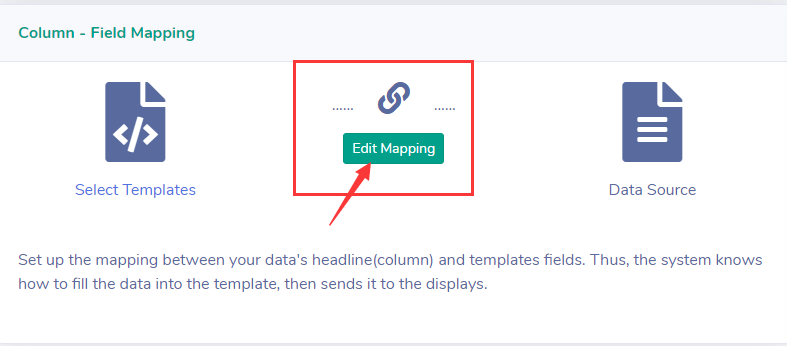
1.Select Template: Choose a template for each size of the displays, then click Edit for each size of the displays.
2.Back to the CSV page. Set up a mapping to associate each display node with one line of the data source. Thus, whenever the line changes, the display can update accordingly.
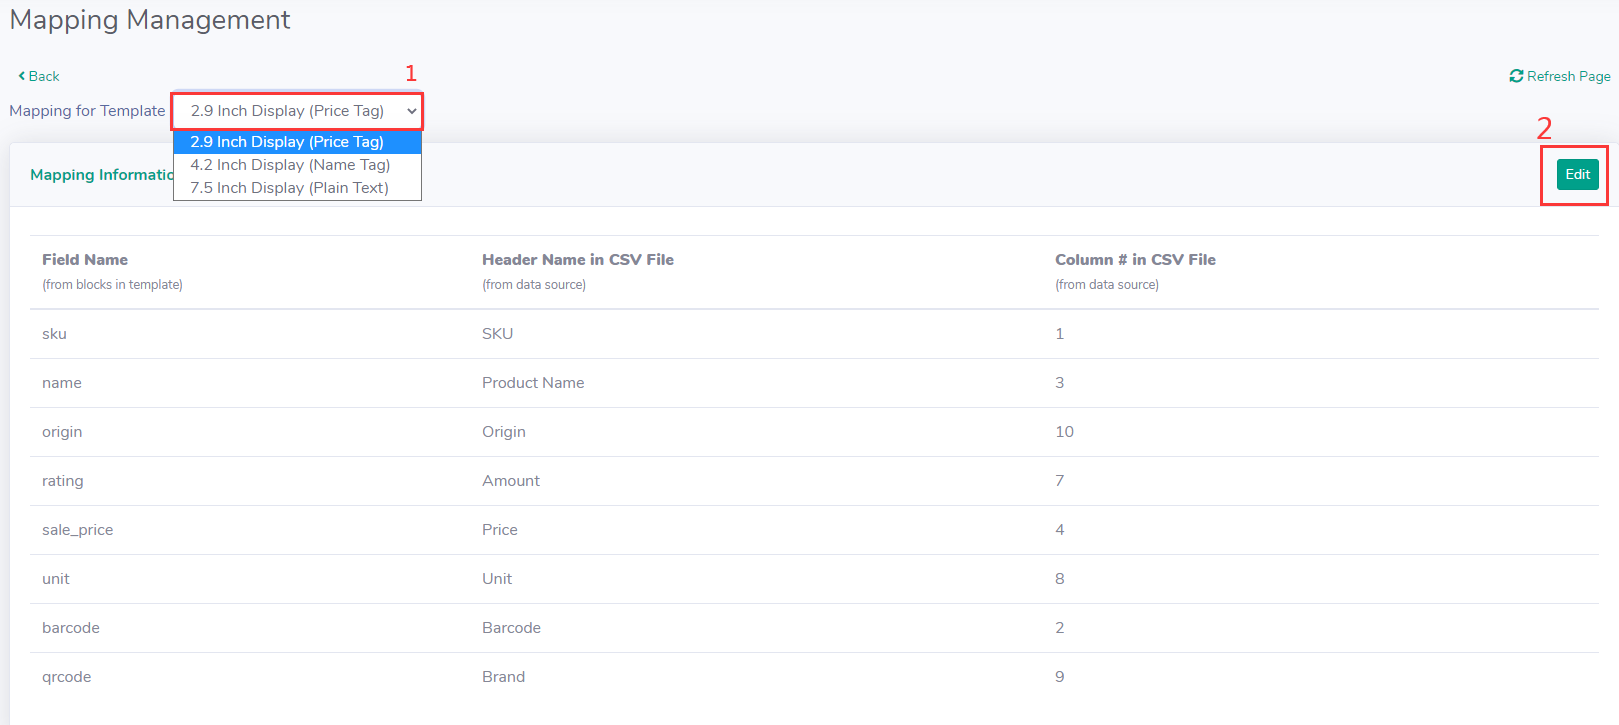
Specify which column is the Unique Source ID: Choose a Column as the Unique Source ID. The primary key ID (Source ID) only occurs once. Thus, it can be used to identify the lines.Example: SKU, Employee ID, Line Number, or Room ID…
Click [Save Settings]
- 3.Display Binding
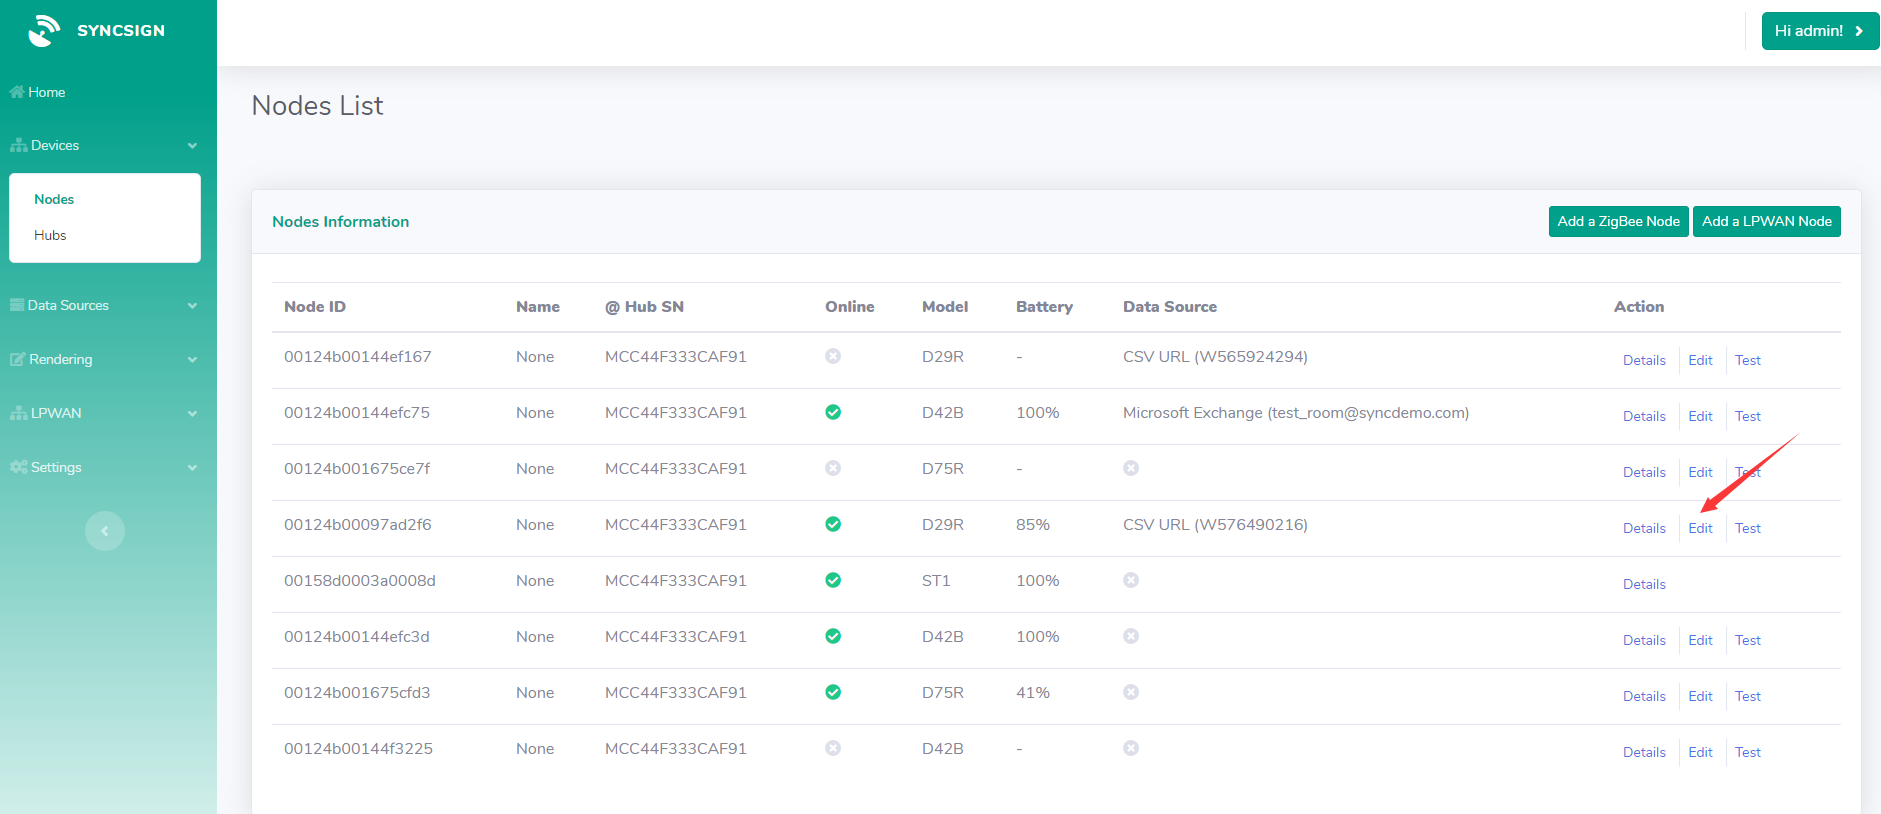
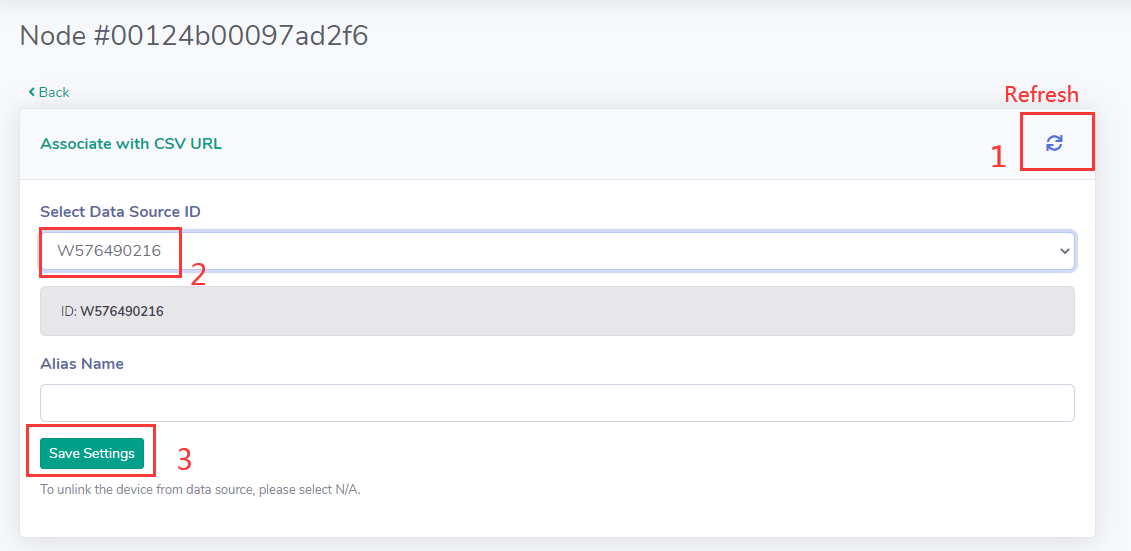
(i). If the data amount is relatively small, the following binding method is recommended. - Click [View Display Nodes]: - Click [Edit] in the corresponding display row to select the CSV data source and the corresponding Source ID. This act is to associate each display with a row of data sources. Therefore, whenever the row changes, the data changed can be updated to the display correspondingly. - Select Data Source: CSV URL - Select Data Source ID (The Alias Name field can be left blank)
Note
If there is a cross sign on the left side of the Save Settings, please click the refresh button on the upper right corner of the field.
After you click the [Save Setting], the data will be updated to the display correspondingly.

(ii). If the data amount is relatively large, the following binding method is recommended.
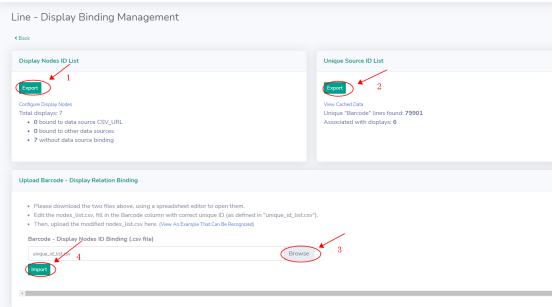
Click [Edit Binding], then the website will navigate to Line - Display Binding Management page
Section Display Nodes ID List-> Click [Export],then a CSV file (nodes_list.csv) will be downloaded automatically
Section Unique Source ID List -> Click [Export], then a CSV file (unique_id_list.csv) will be downloaded automatically
Use a file editor to edit those two CSV files downloaded just now
Please download the two files above, using a file editor to open them
Edit the ‘nodes_list.csv’, fill in the None column with a correct unique ID(As defined in ‘unique_id_list.csv’)
Then, upload the modified ‘nodes_list.csv’ here. (View An Example That Can Be Recognized)
Features
1.Adding a Customized Template
On SOPS Home page: [Rendering] -> [Template] -> [Add a Template] -> [Edit Template] -> [Save Settings] Then it will be synchronized to your CSV template database. * If you need us to help you to customize a template. Feel free to contact us.
2.Clear Cache Data
The data source cache can also be cleared. If you want to change the CSV file, you may conduct as followed: - Disable the CSV Integration on the CSV URL page - Click [View Cached Data], wait for the data source cache to load - Click [Clear Cached Data]