Using Microsoft 365
Warning
Prerequisites for Exchange Online Integration:
If you plan to integrate SOPS with Exchange Online, please do not add your Hubs or Displays to the system yet.
You must first configure a valid public domain name and install a valid SSL certificate (issued by a trusted third-party authority) on the SOPS Web Portal.
Navigate to https://<SOPS-LAN-IP>/settings/security to configure the domain and enable HTTPS.
Summary
To integrate Office 365 with SyncSign On-Premise Server (SOPS), please follow the steps below:
Register and Configure Application
Attention
User Interface Notice: This guide primarily uses the Microsoft Entra admin center for instructions, but you can also find similar functionality in the Azure Portal.
App Registration
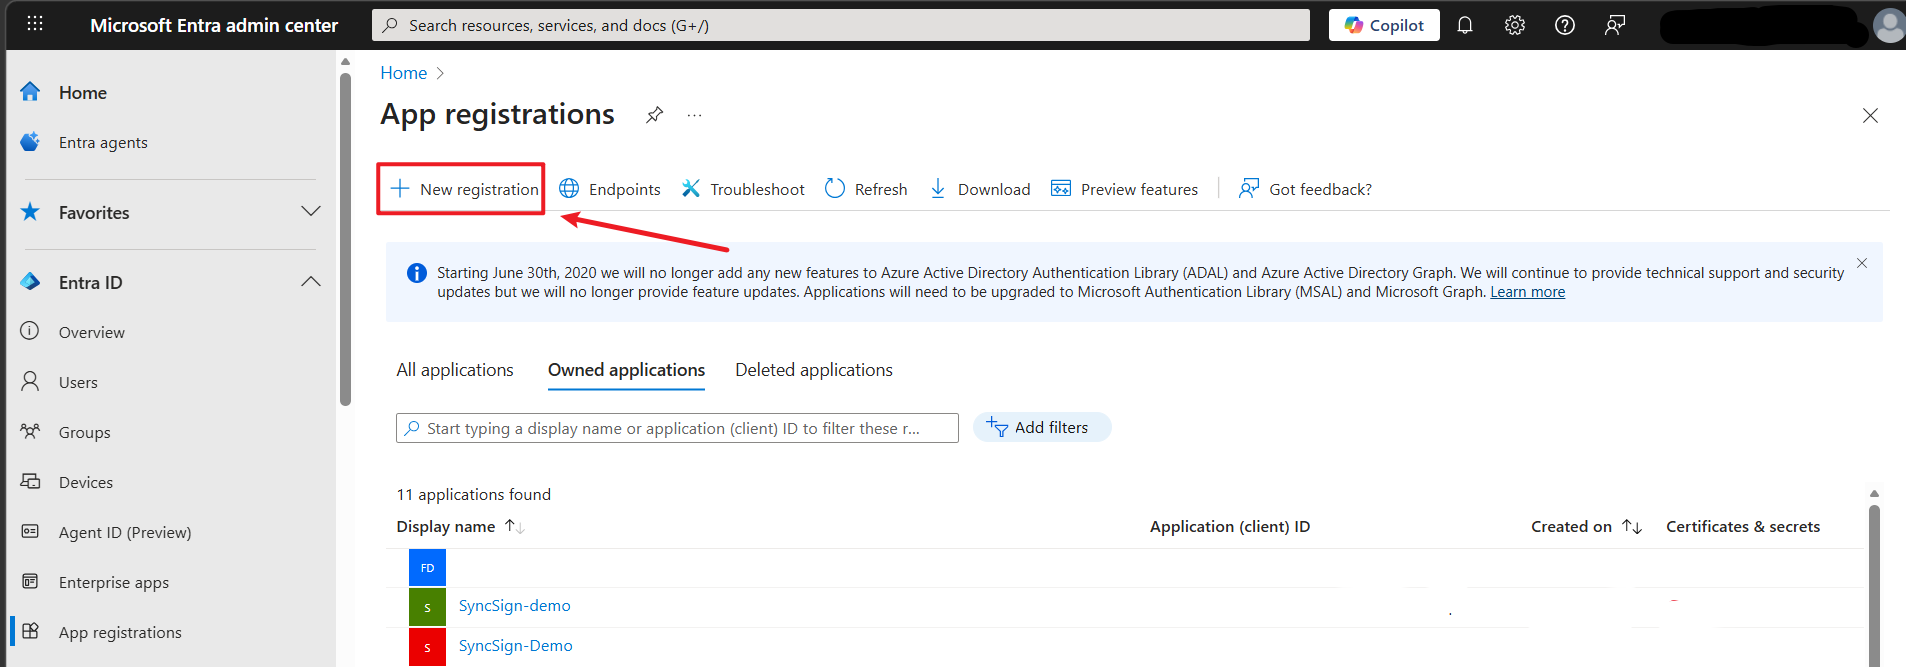
- Register a new application using the Microsoft Entra admin center
Sign in to the Microsoft Entra admin center or Azure portal using an Administrator account.
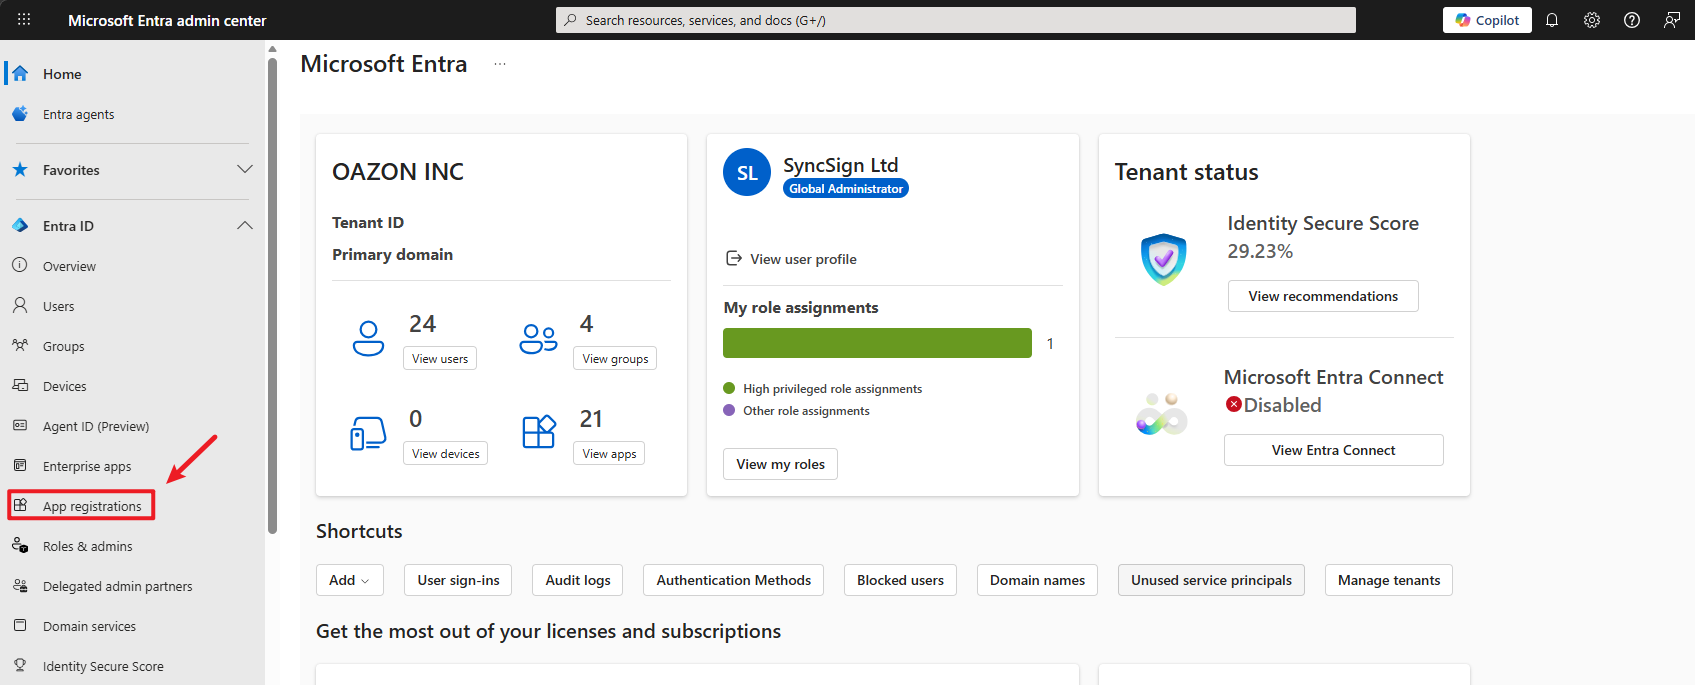
Find “App registrations” on the home page. If you cannot find it, you can search for “App registrations” in the search bar.
Enter the following information for the new application:
Name - Enter a meaningful application name that will be displayed to users of the app.
Supported account types - Select which accounts you would like your application to support. Either “Single tenant” or “Multitenant” is OK if you are signing in with the admin account of your organization.
Redirect URI - Select the type of app you’re building as Web , and then enter the redirect/reply URI for your application. Please use
https://<Your-SOPS-Domain>/m. Incorrect URI may lead to AADSTS50011 error while linking Office 365 account to SyncSign.
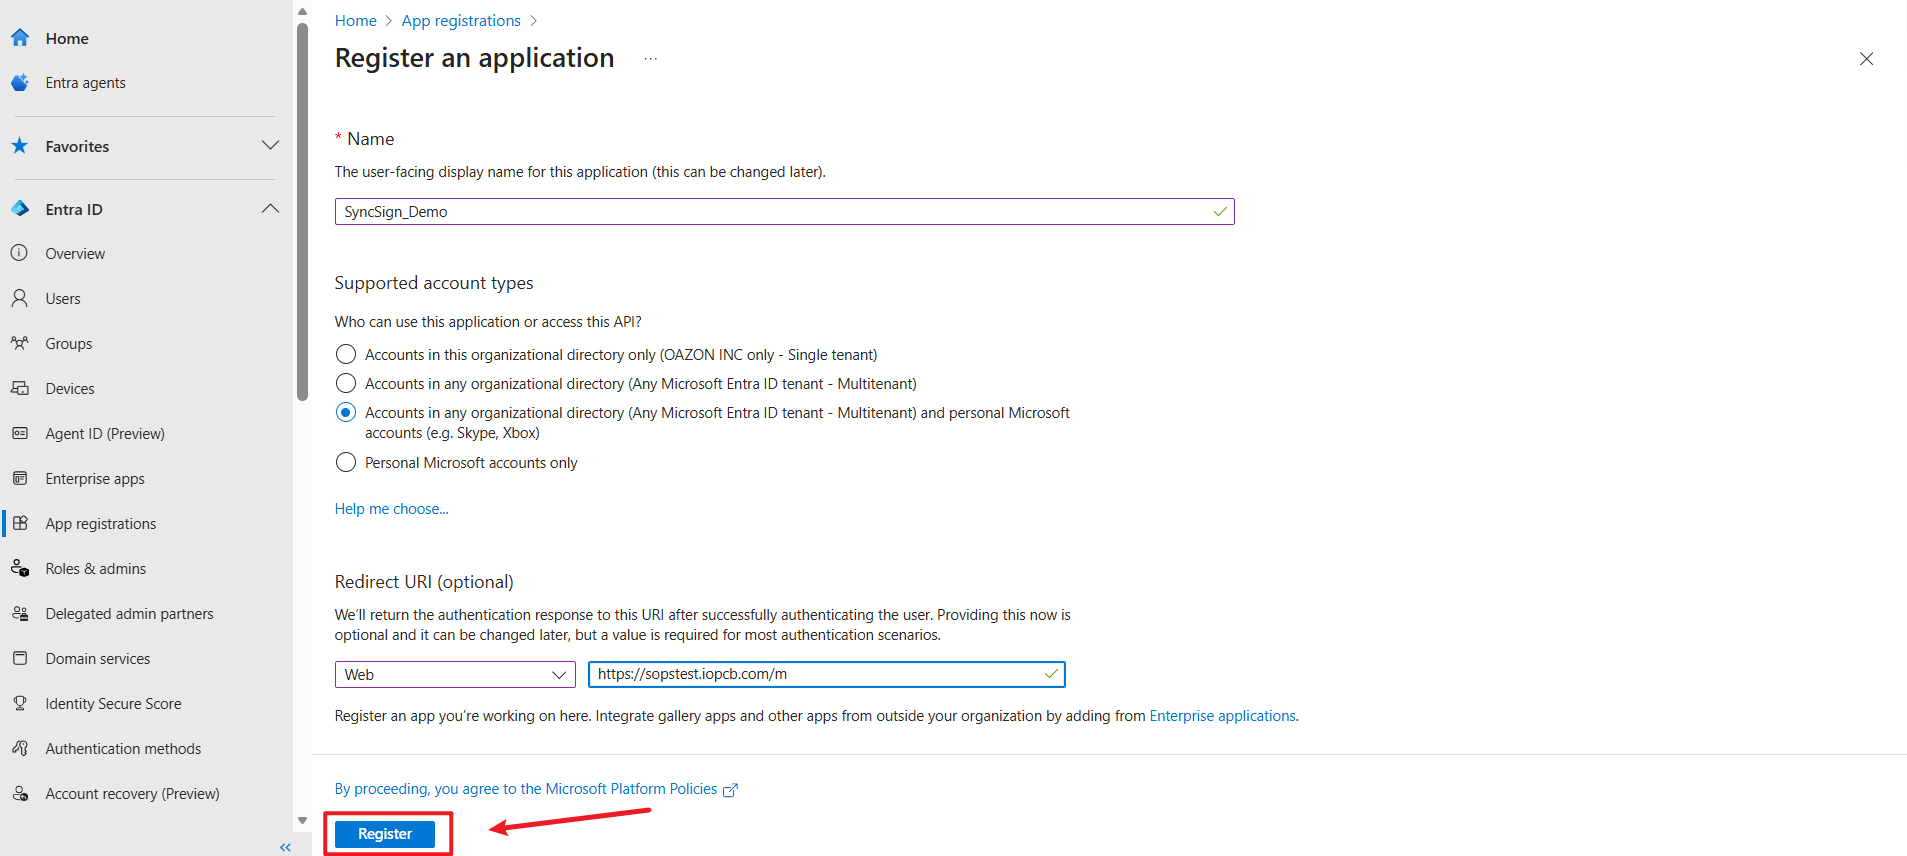
When finished, select Register.
Configure Authentication
Find the App you just created. Under “Authentication”, select the “Supported account types” based on your deployment needs (Single-tenant for internal use or Multitenant for external access), enable implicit grant flows for both Access and ID tokens, and click “Save”.

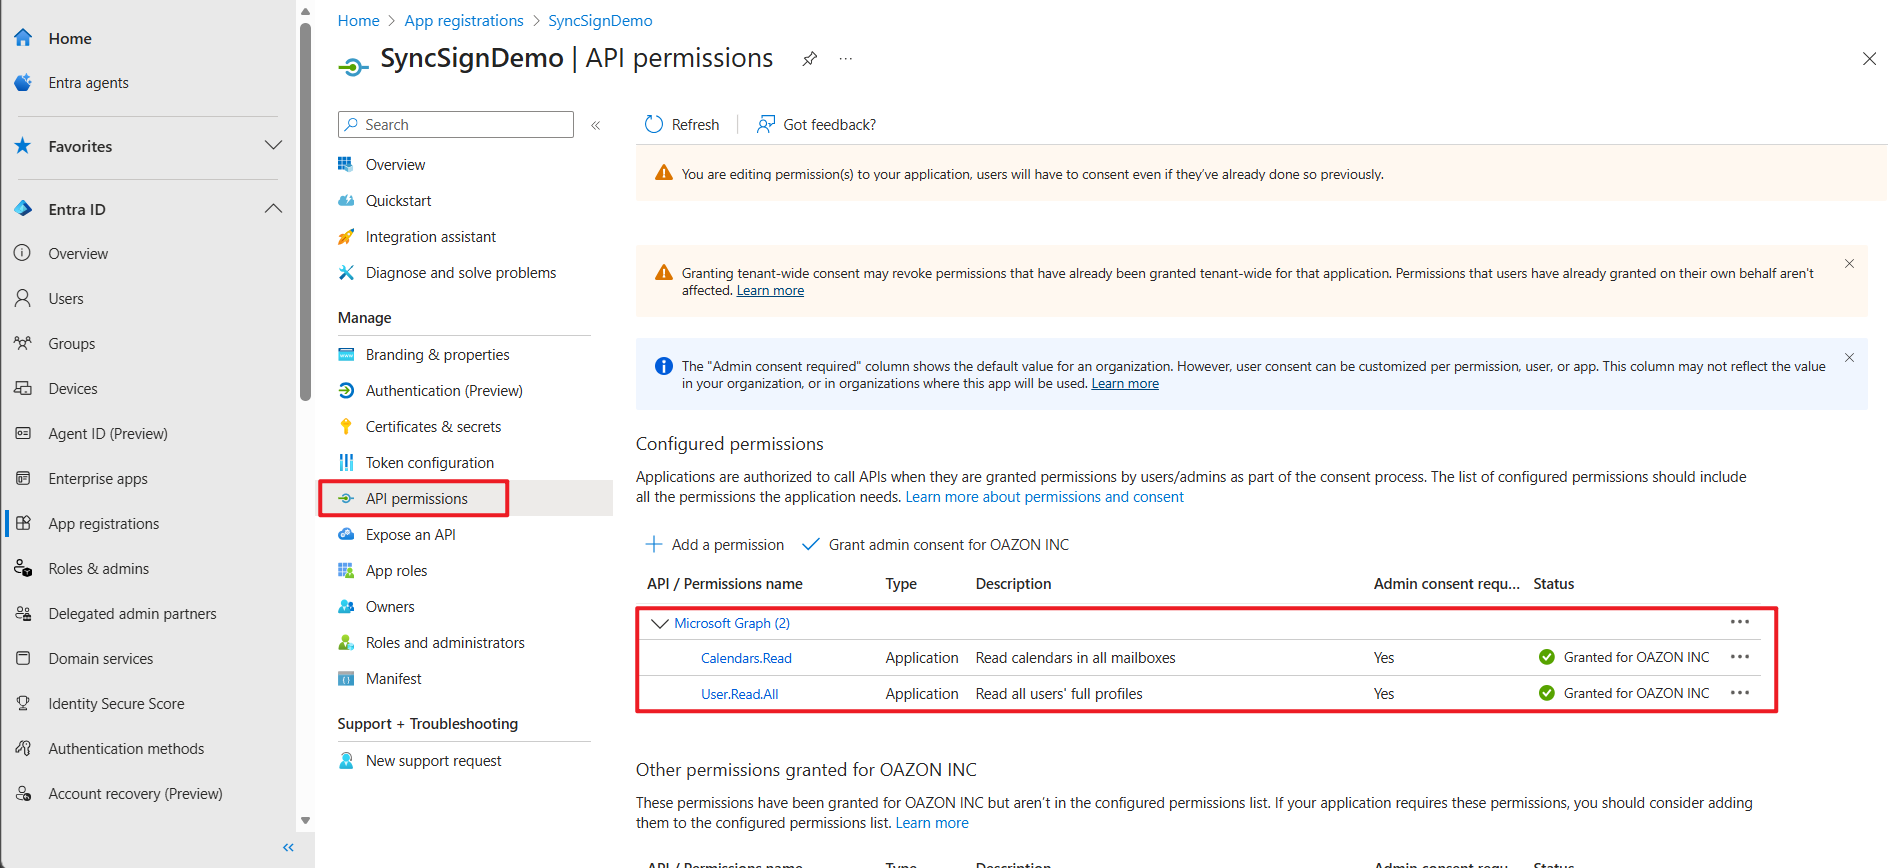
Configure Permissions
Grant administrative consent for the “Calendars.Read” and “User.Read.All” application permissions to enable organization-wide read access for the application.
Generate Credentials
Create a new client secret and capture the string from the “Value” column to serve as the application password for authentication.
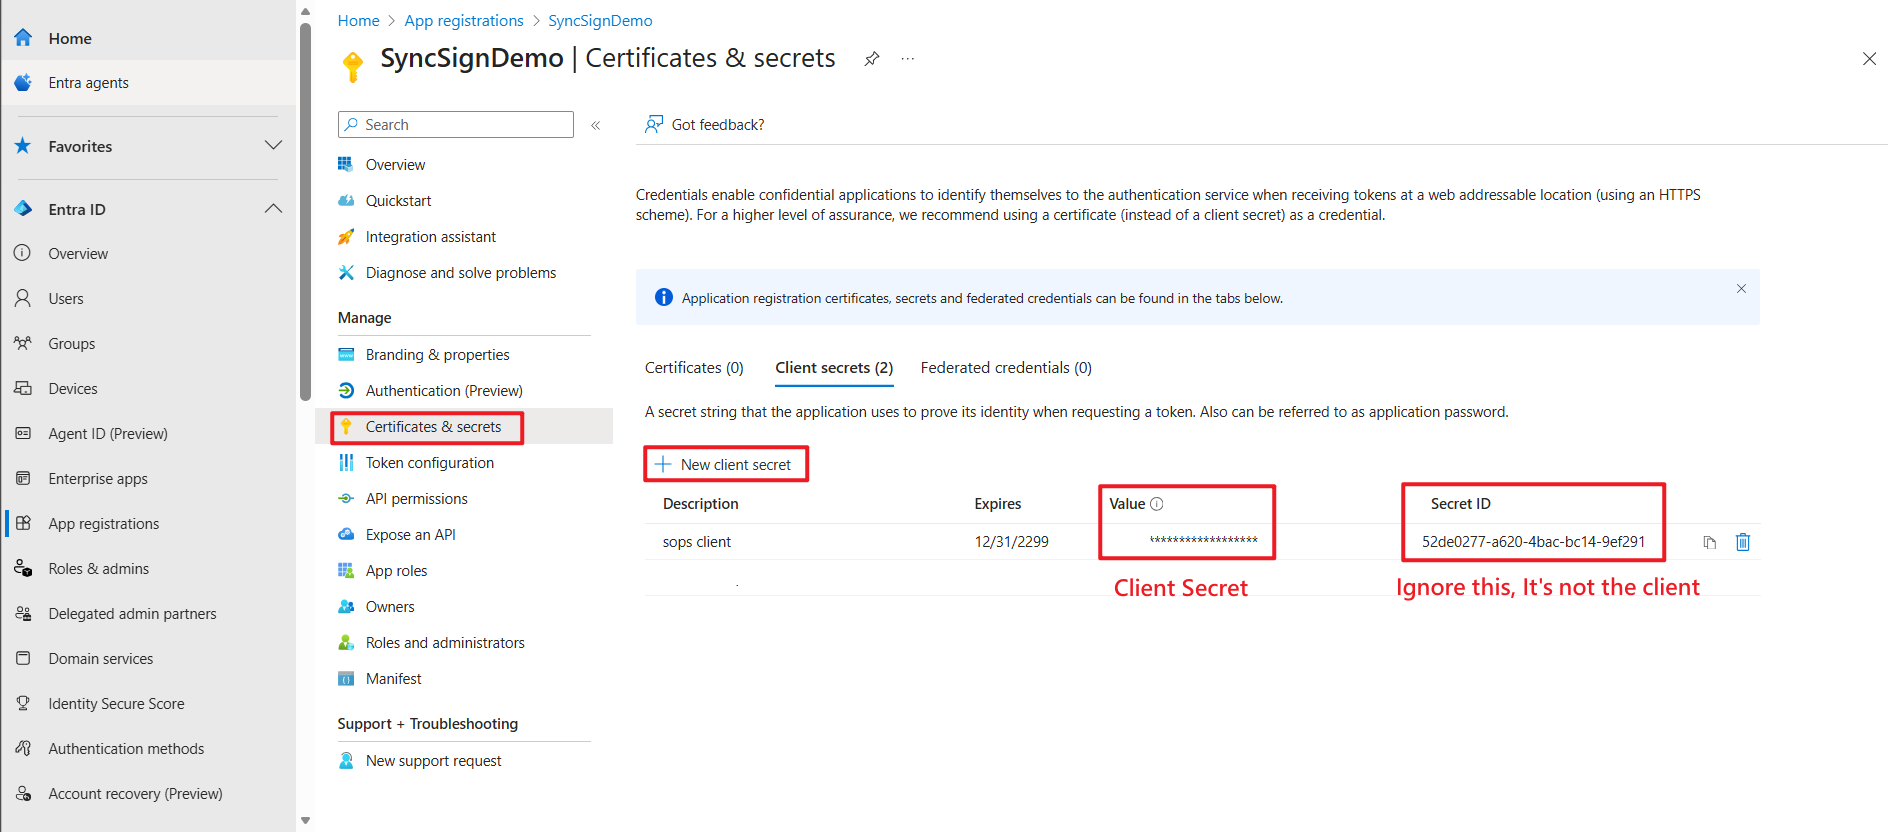
Note
It is recommended to set a long expiration period for the Client Secret to prevent any disruption to the calendar integration caused by secret expiration.
Note
Please mark down the Client Secret on this page, as you may need it to configure the SOPS later.
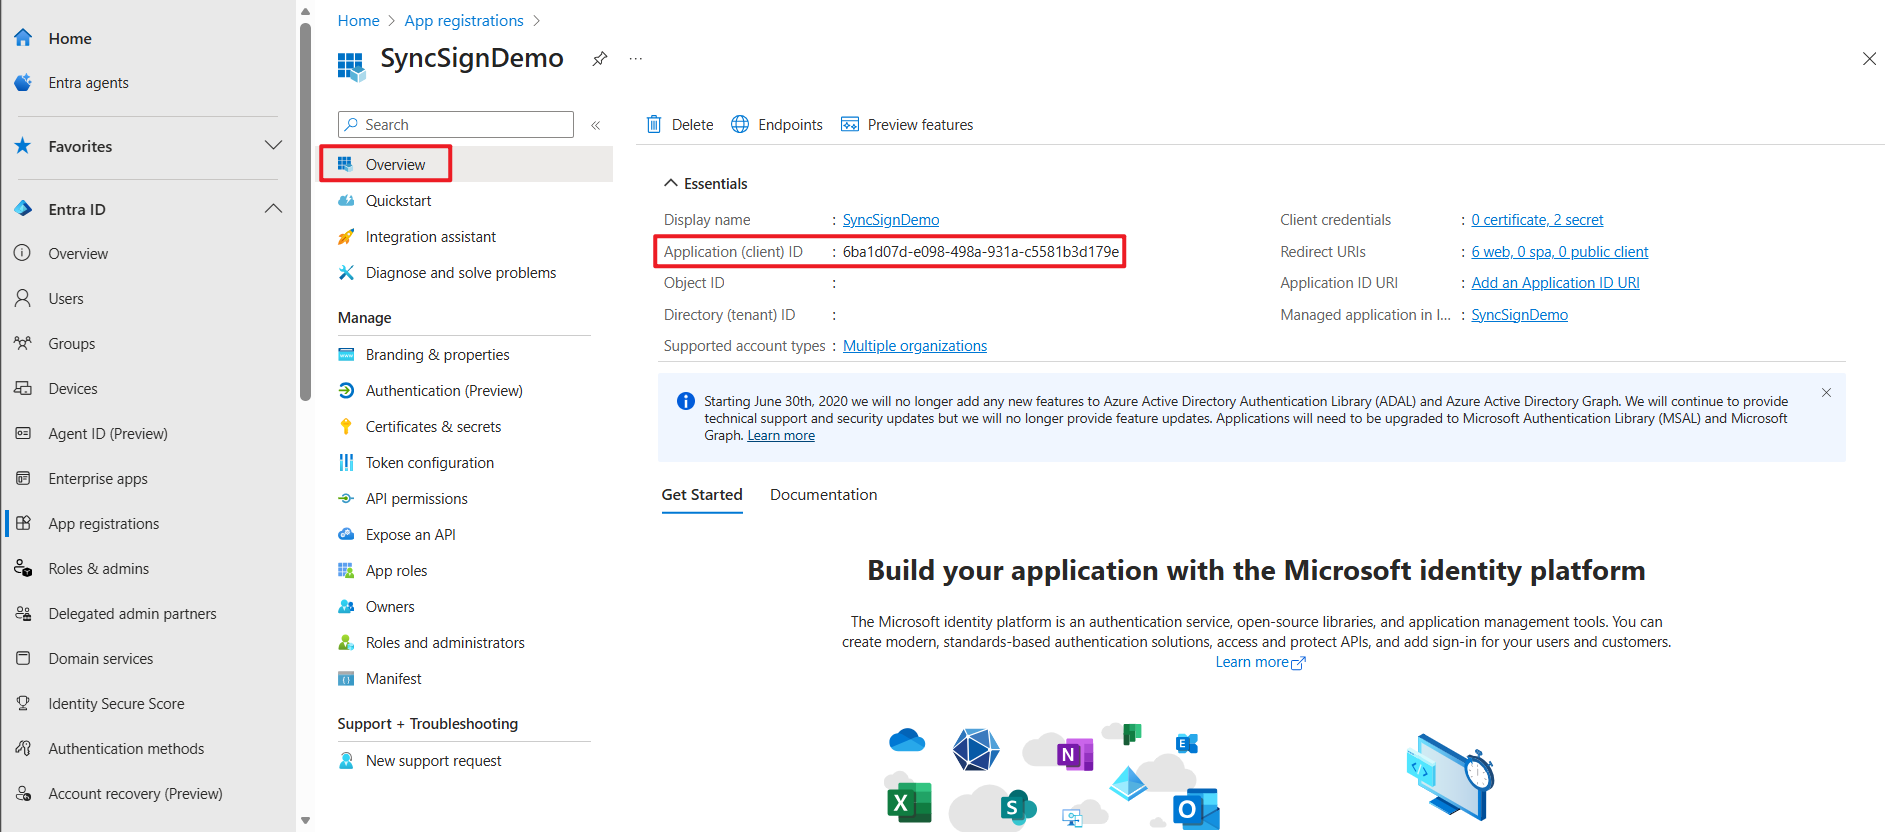
Setup the SOPS to Access the API
Before accessing the SOPS web portal, please go to the Microsoft Entra admin center and locate the App you just registered. In the App Overview, find the “Application (client) ID” and copy it.
The next step is to enable the SOPS to use your Office 365 developer account
Go to
https://<Your-SOPS-Domain>/m, click The navigation bar > Settings > Integration > Settings > Office 365 > Edit.Fill in the Client Id and Client Secret obtained when registering Office 365 App, and hit [ Save ].
Calendar Integration on the SOPS
After saving the Client Id and Client Secret, go to
https://<Your-SOPS-Domain>/mand complete the calendar binding from the Display configuration page.This step includes two actions: authorize or sign in to Office 365, and then bind the display to a calendar or room resource.
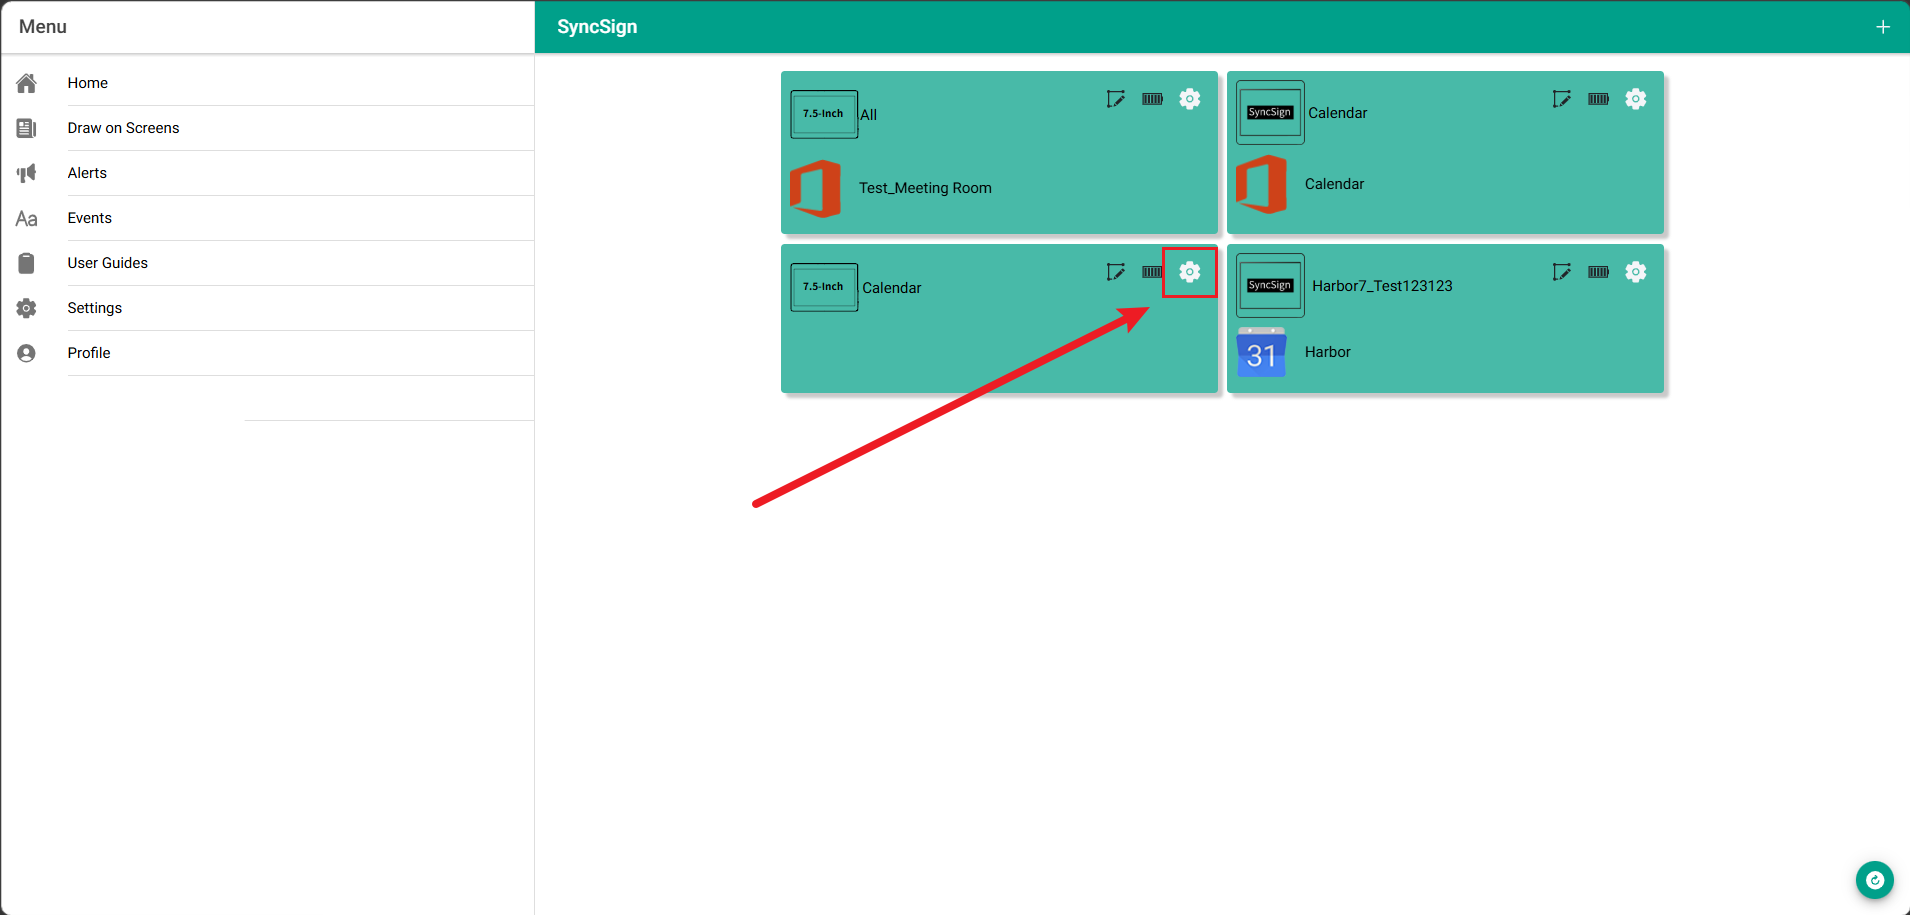
Open the Display list and click the settings icon on the display that you want to bind to an Office 365 calendar.
In the Display Settings page, find Which account should SyncSign use to sync events? and select Office 365.
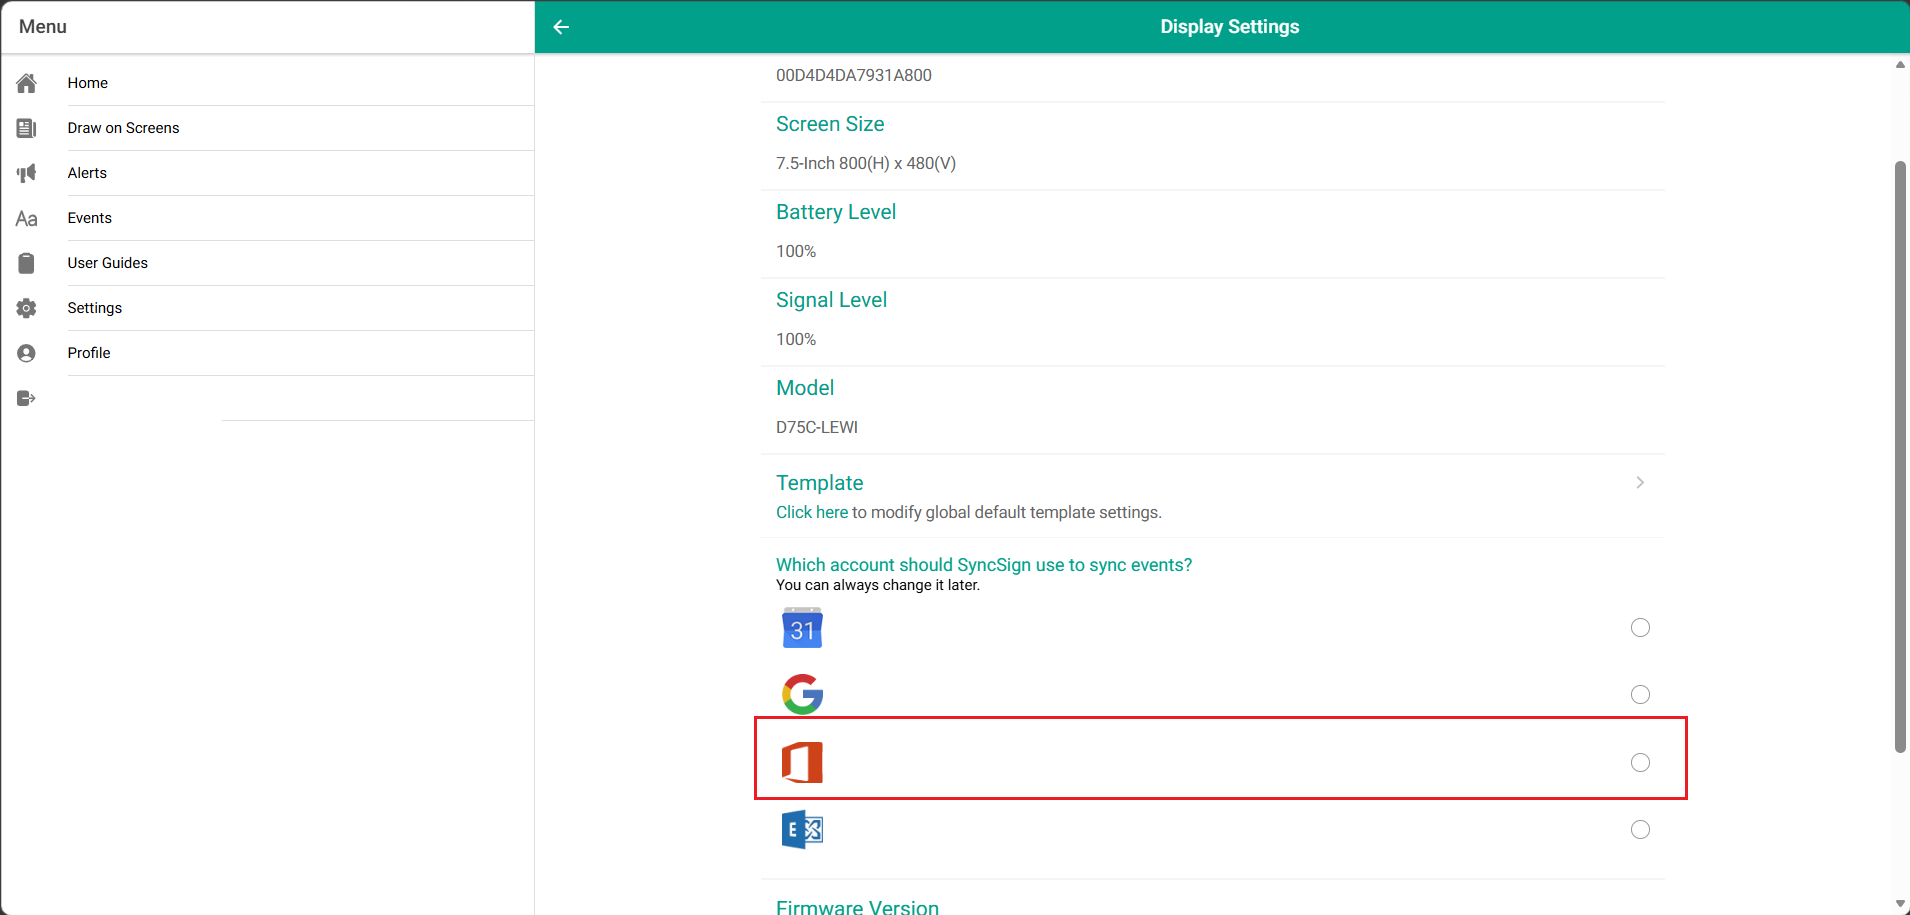
If SOPS asks you to authorize or sign in, complete the Office 365 login with an account that has access to the target calendar or room resources.
After the authorization is completed, SOPS may return to the same Display Settings page and the page may look unchanged. This is expected. At this point, the Office 365 account has been authorized, but the display has not been bound to a calendar yet.
Select Office 365 again in the Display Settings page, then choose the required calendar or room resource to finish the binding.
Note
Please refer to the instruction Use Office 365 with SyncSign’s global administrator authorization method (Cloud-based Office 365 Integration).