Using Office 365
Go to http://portal.office.com/. Sign in to Microsoft 365 admin center using the Administrator credentials for your company’s account.
How to create a room resource
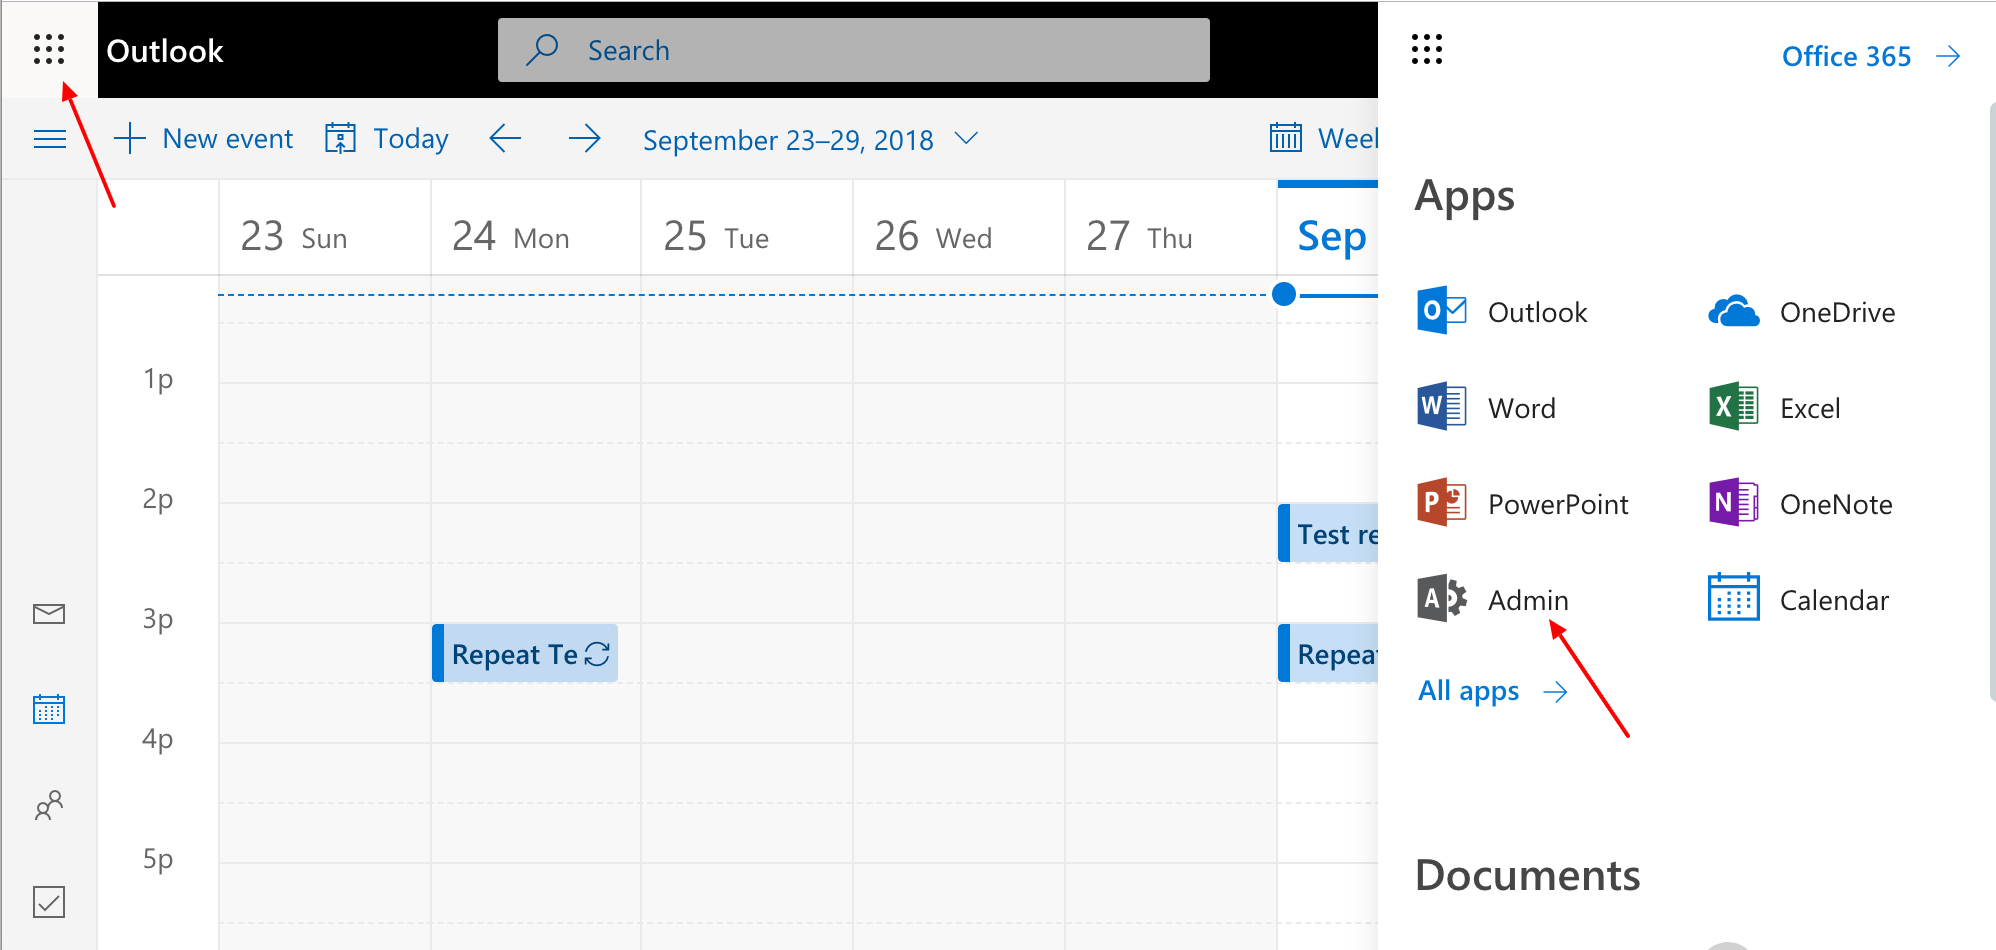
Select [ Admin ] from the list of available apps.
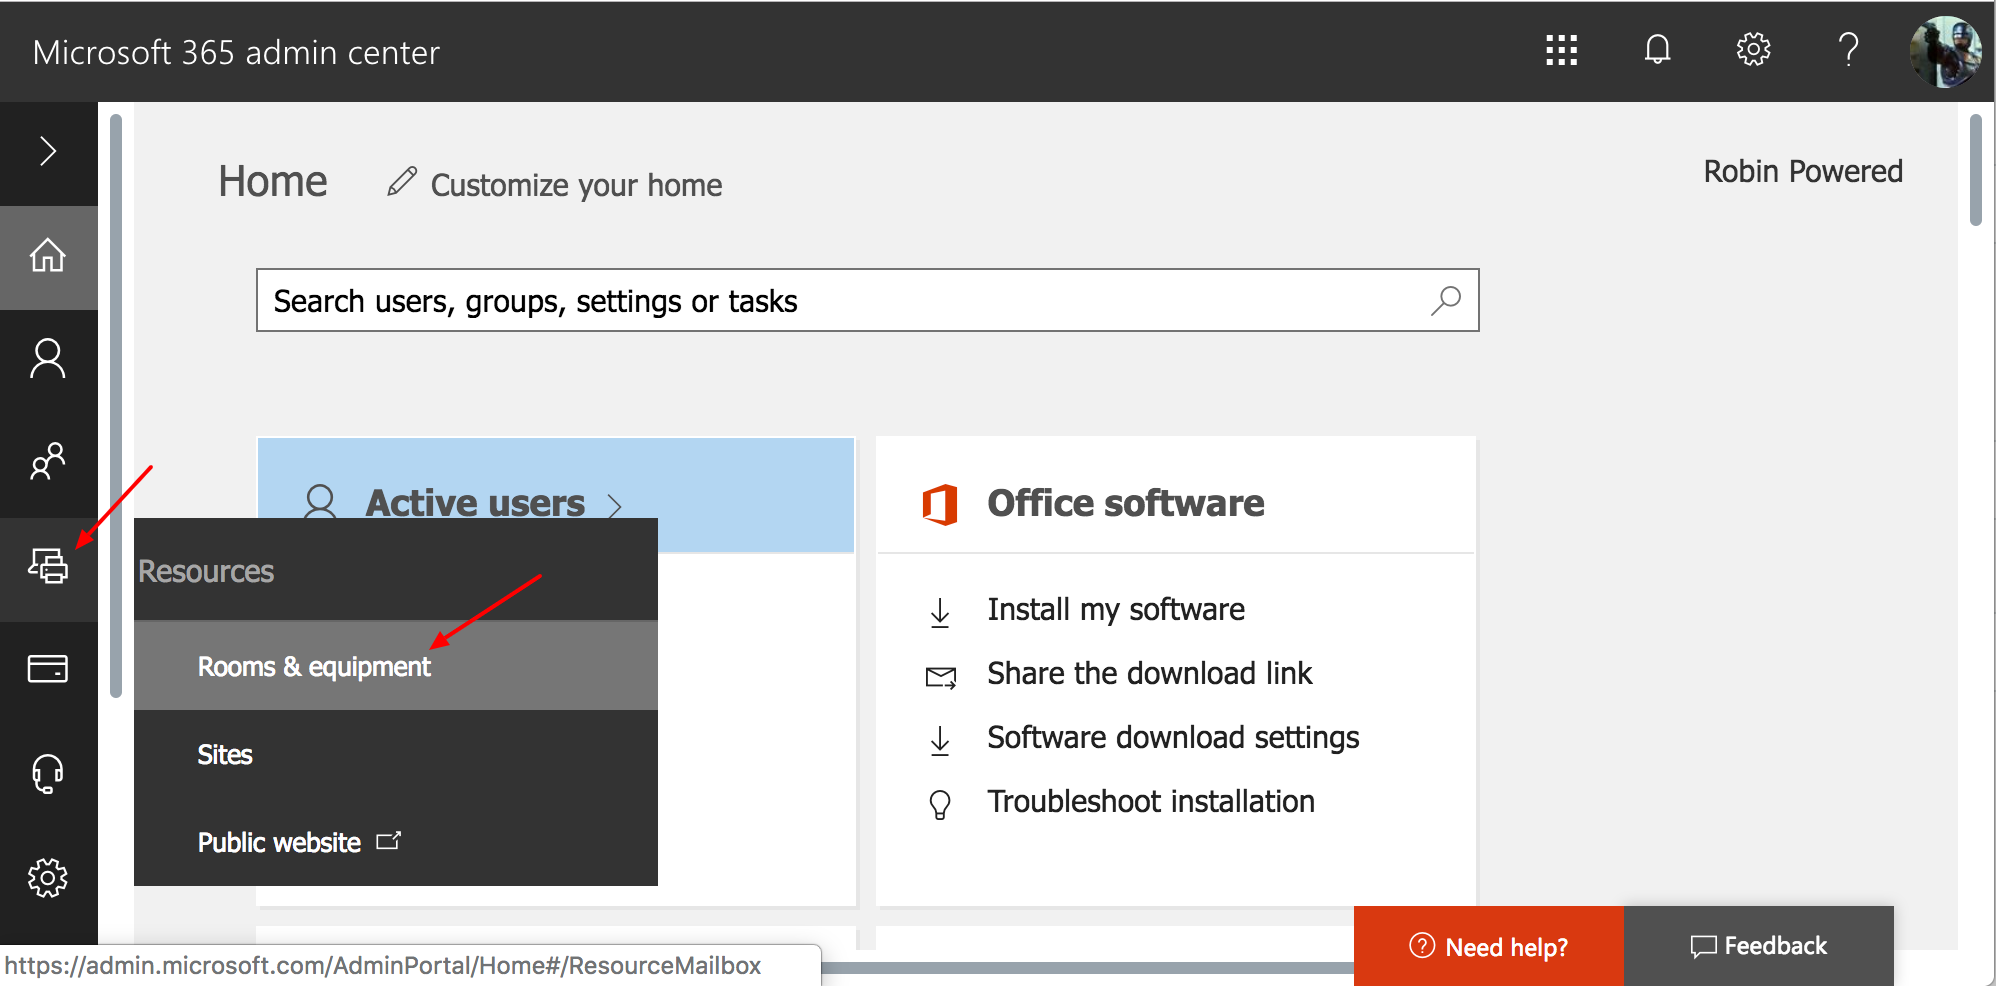
Click [ Resources ] > [ Rooms & equipment ] on the left.
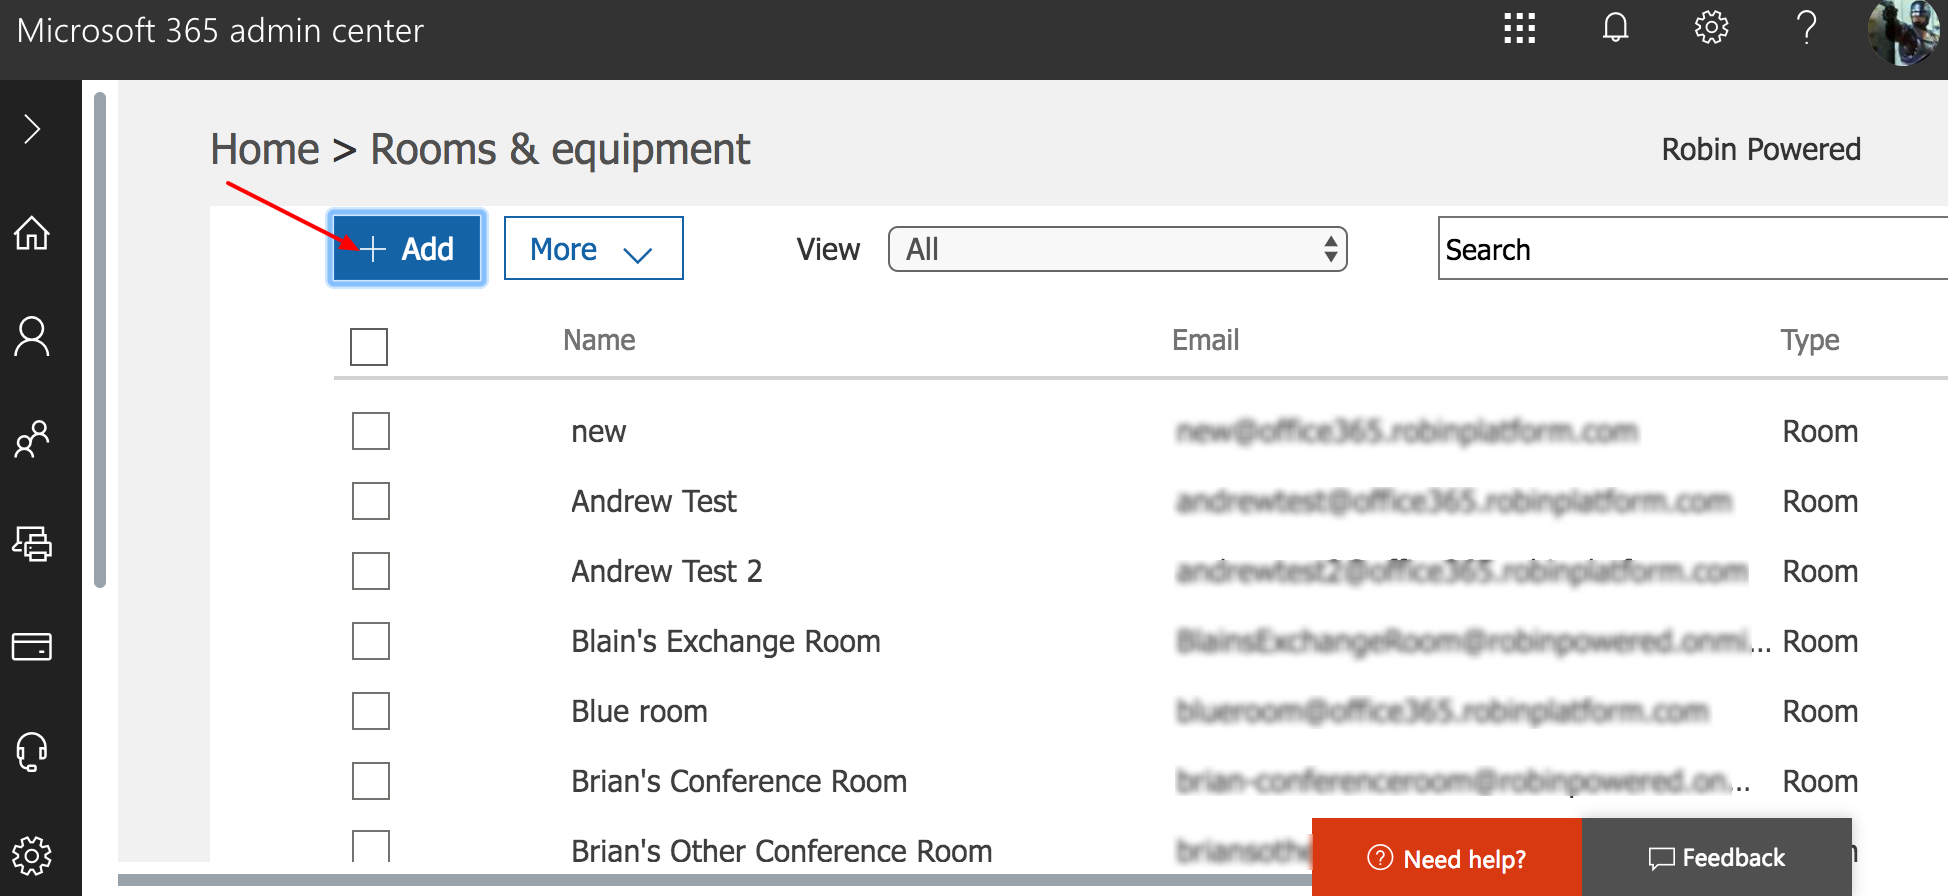
To add a new resource, click the [ + Add ] button.
If someone in your organization has already set up a meeting room calendar, you’ll see a list of room names and associated email addresses. Meeting room calendars in Office 365 are more like users than shared calendars, and each will have its own email address for invitations.
Note
Variations on the admin panel in Office 365
If you don’t see Equipment icon in the menu on the left, you may be running Office 365 for Small Business, or another variation. The set-up process is slightly different. This guide from Microsoft has more.
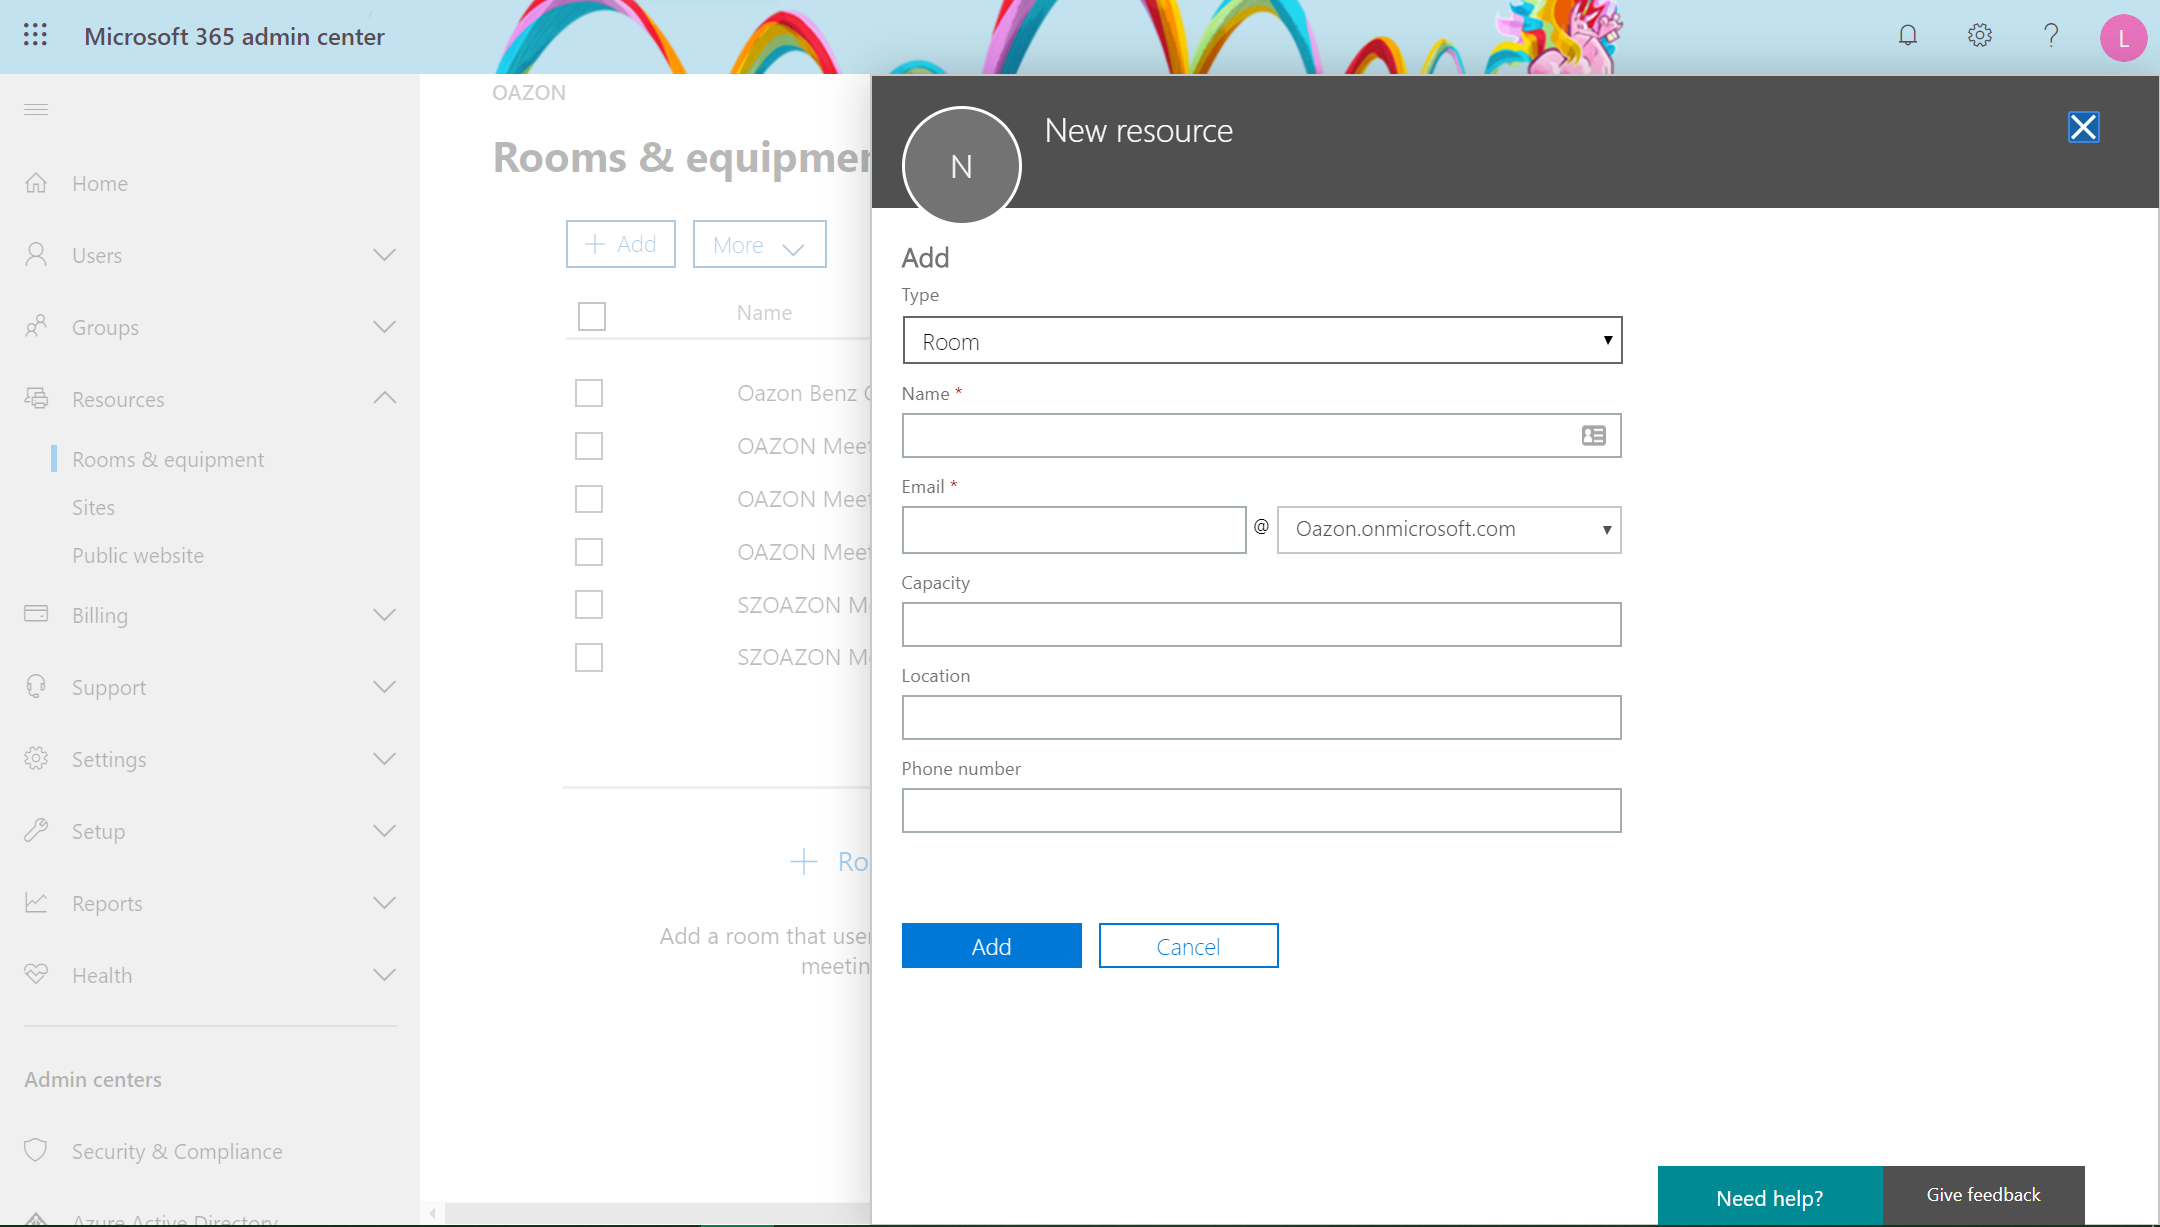
Fill in your room details. Here you can include the name of the meeting room you’re adding, your email (or whoever will be associated with space), capacity (max number of meeting occupants, location and phone number (if applicable). We recommend that you create a room resource for each meeting room. Once you’re finished, click [ Add ] to save your changes.
Click [ Set scheduling options ] to confirm that the room will automatically accept meeting invitations when it’s available (this is the default).

Repeat and create rooms for each of the bookable spaces in your office.
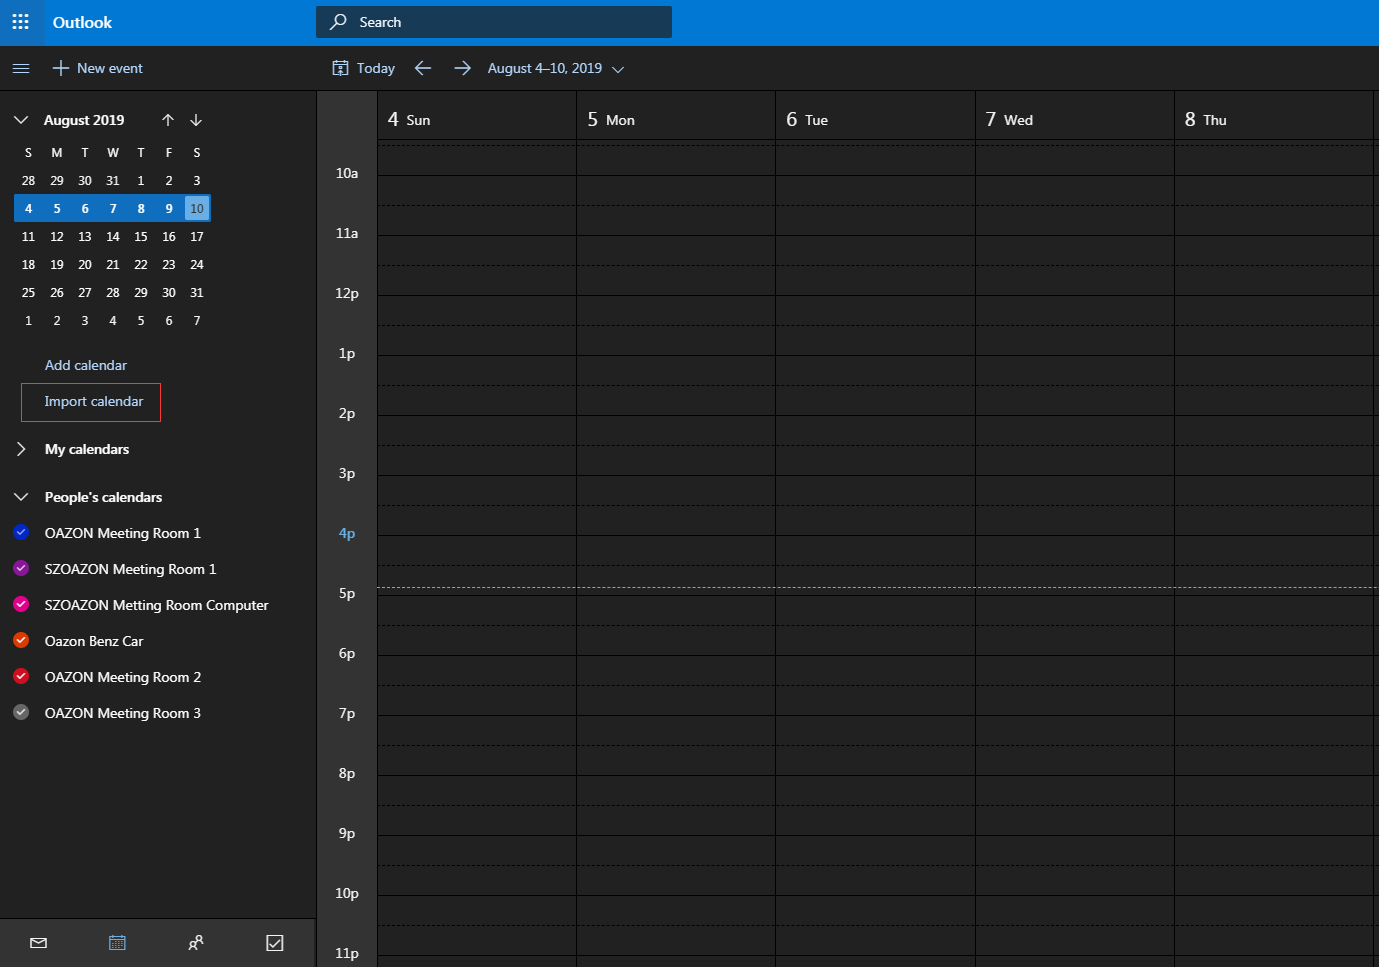
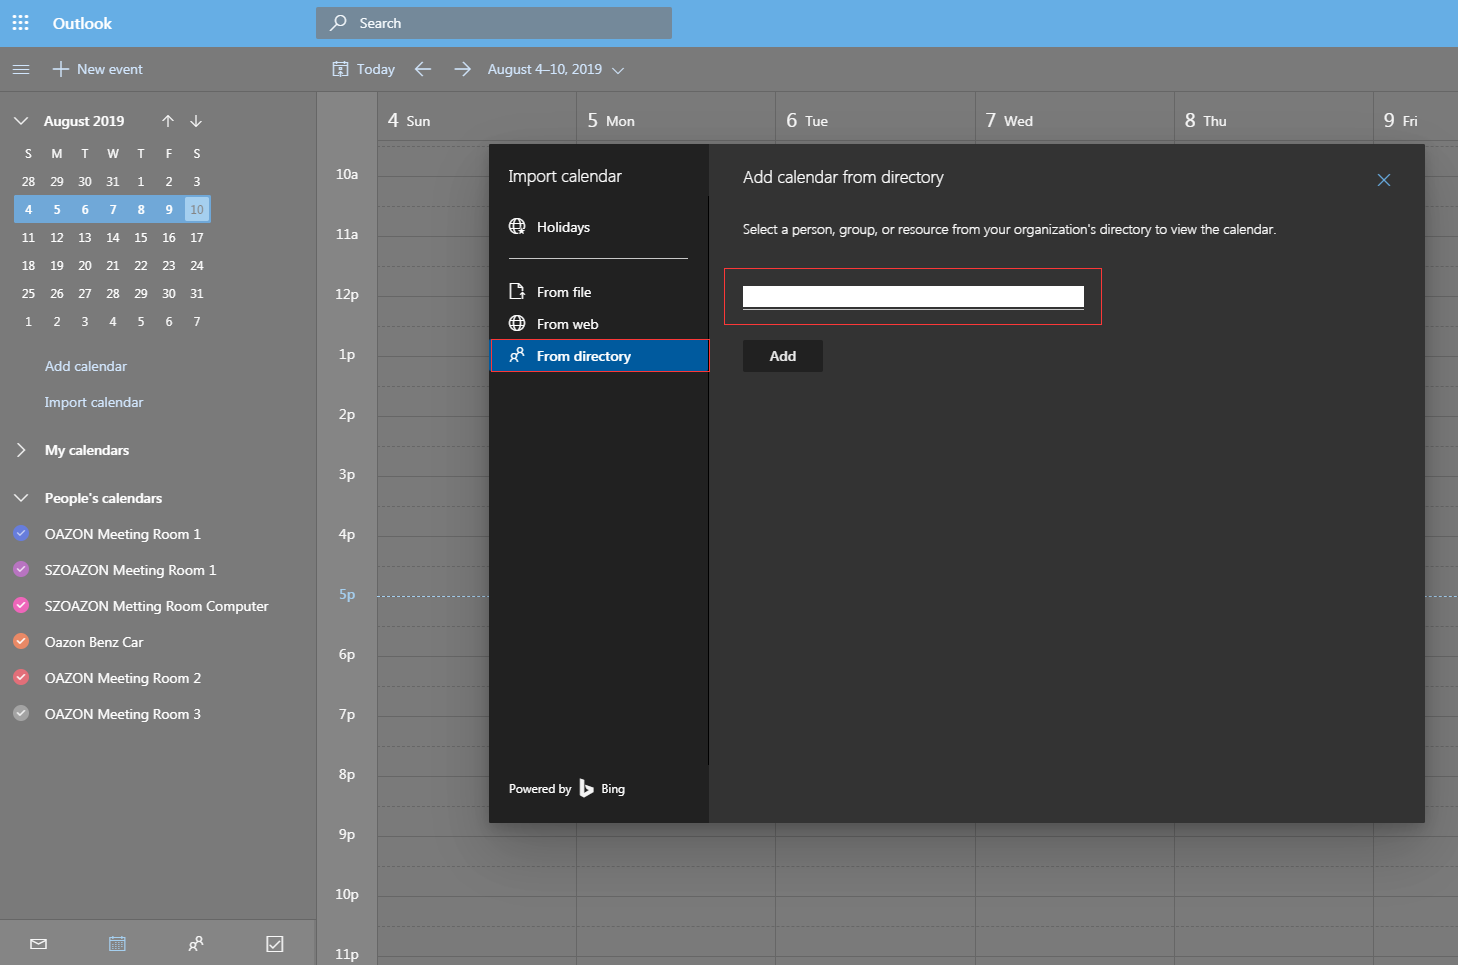
Go to Office 365 Calendar. Import the resource (meeting room) you just created into each one of the Resource Calendar.
Note
Resource Calendar: the calendar of the assigned resource.
Select [ From directory ], enter the resource’s name or email, and click [ Add ] button to import resource (meeting room).
You can right-click and share each Resource Calendar with any user under the Administrator Account, and then assign the Calendar Permissions.

Office 365 access rights - How to add a new user
In Office 365, Global Admins are the only role with access to all administrative features. A Global Admin will typically be the person who signs up to purchase Office 365. Your company can also have more than one Global Admin.
When you add new users, if you don’t assign them an admin role then they are in the user role and don’t have admin privileges to any of the Microsoft admin centers. But if you need help getting things done, you can assign an admin role to a user. For example, if you need someone to help reset passwords, you shouldn’t assign them the global admin role, you should assign them the password admin role. Having too many global admins, with unlimited access to your data and online business, is a security risk.
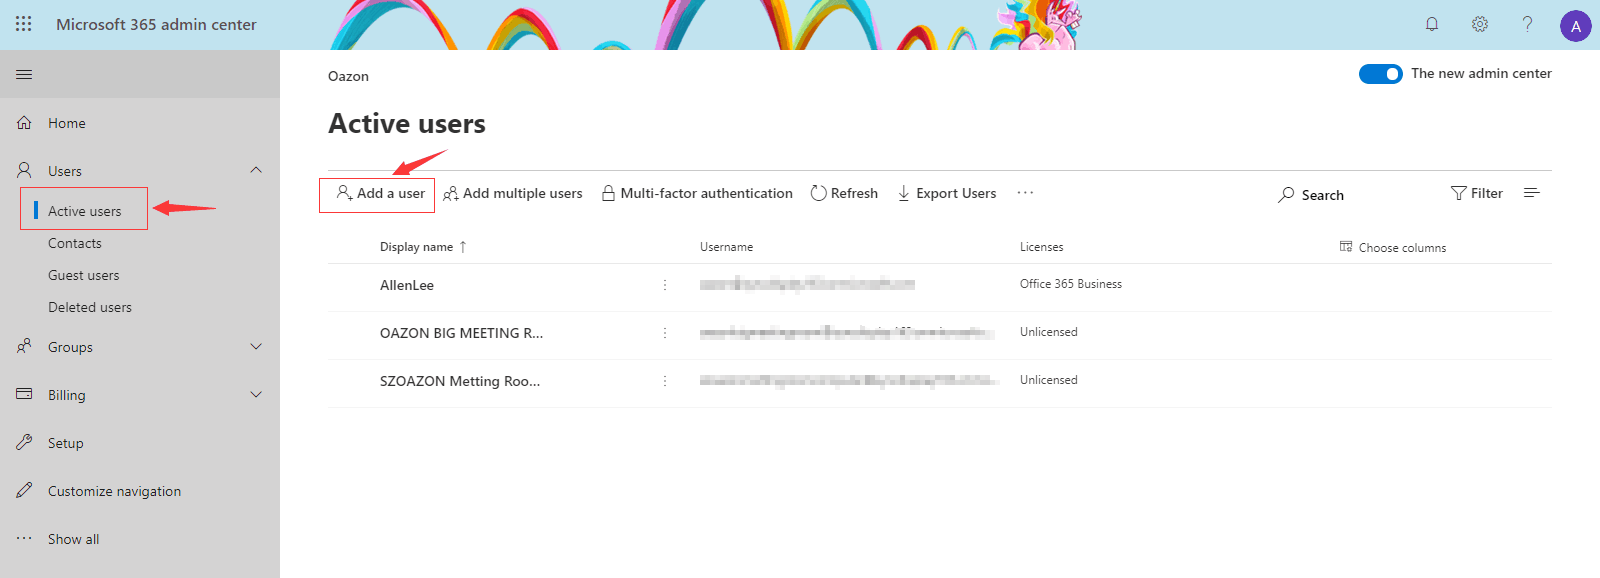
To create a new Office 365 user, go to “Users” > “Active users” in the Office 365 admin center and click on the plus sign. Enter the details of the new user and click “Create.” The user will now appear in your list of active users.
Note
More detail, please see the video.
Office 365 access rights - delegated user
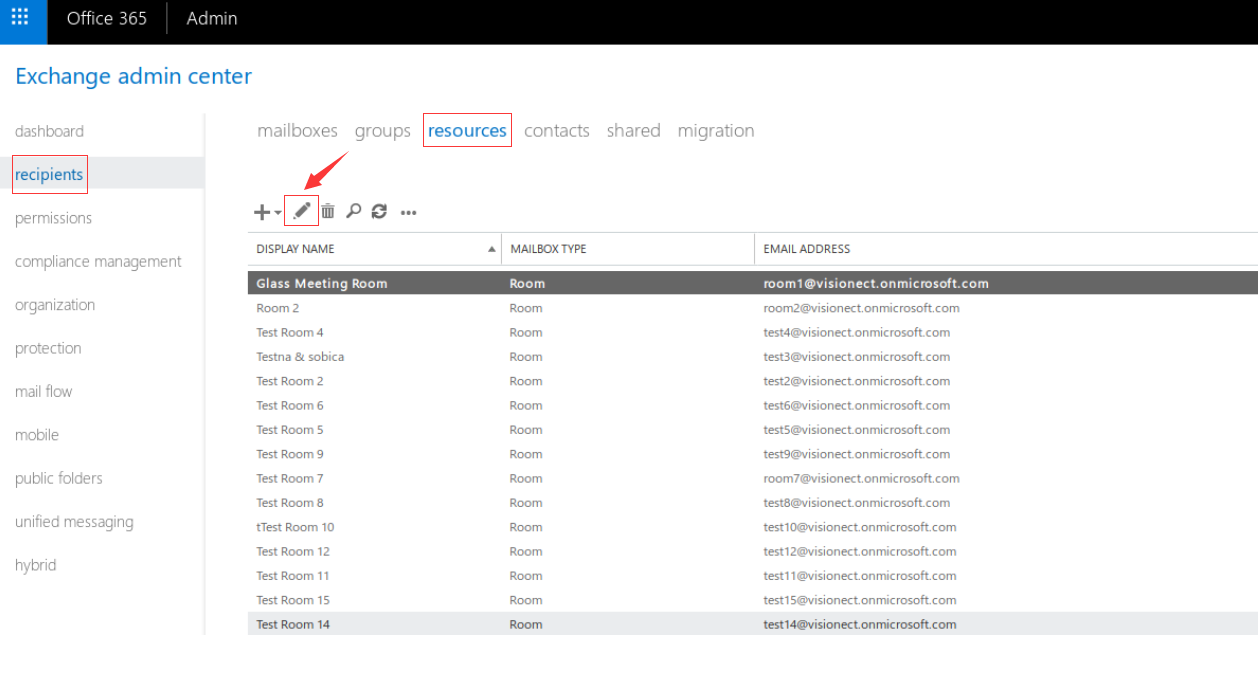
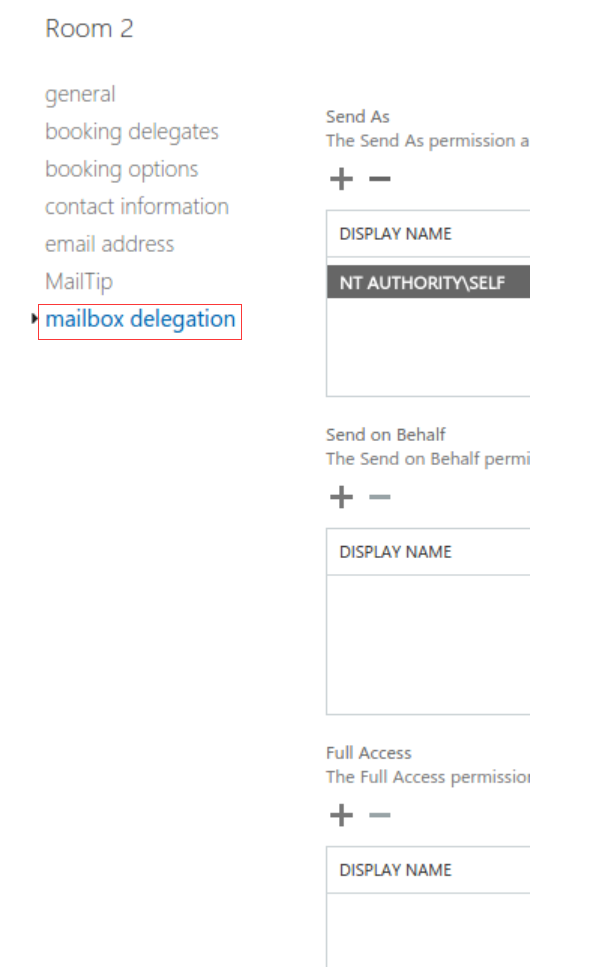
Start by logging into https://outlook.office365.com/ecp/ with your admin account, and go to “recipients” –> “resources”. Click on the pencil icon and select the room resource you want SyncSign to manage.
In the new window, select “mailbox delegation” and click the plus sign next to Full Access. Select the user you want to pair with SyncSign, click “Add” and then save your new settings by clicking on “OK” button below.
Note
Need more help, please bounce to Office 365 Help Center.
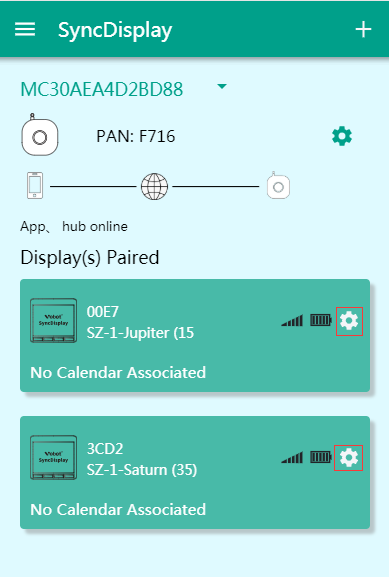
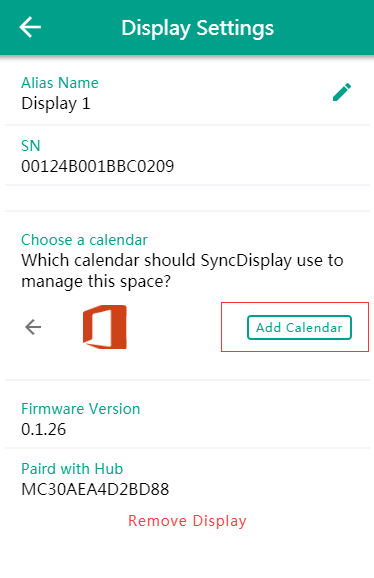
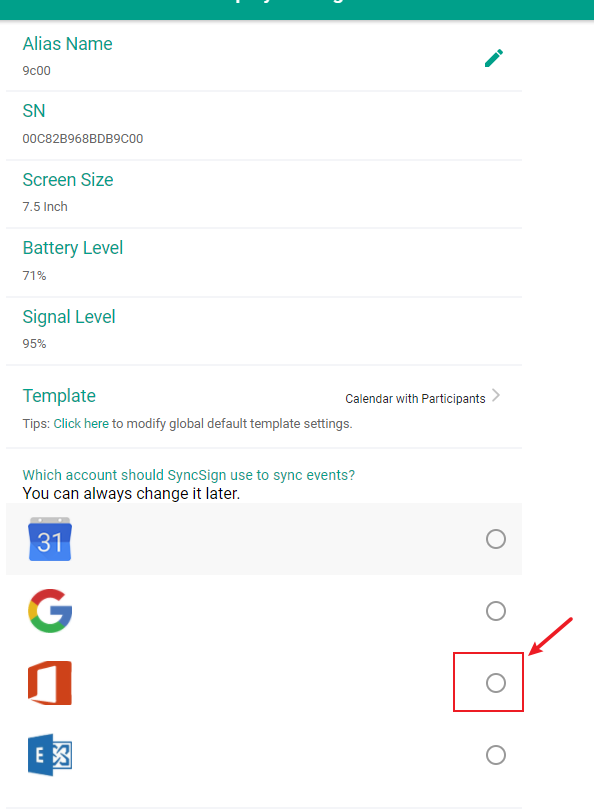
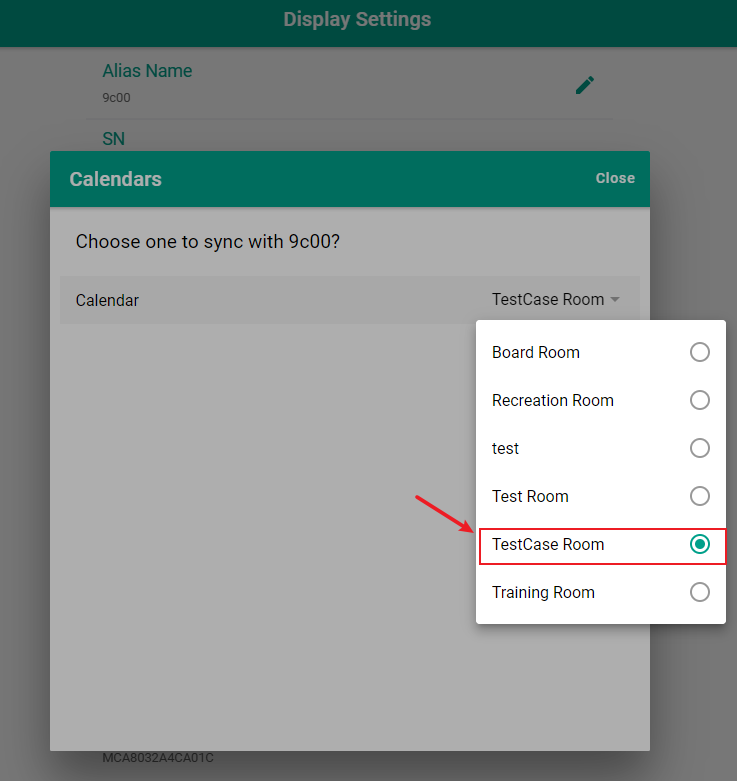
Sign in as a Global Admin User/Delegated User on SyncSign APP
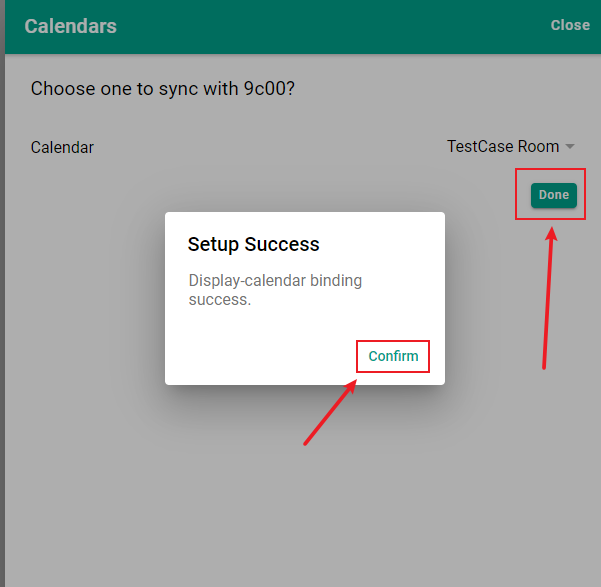
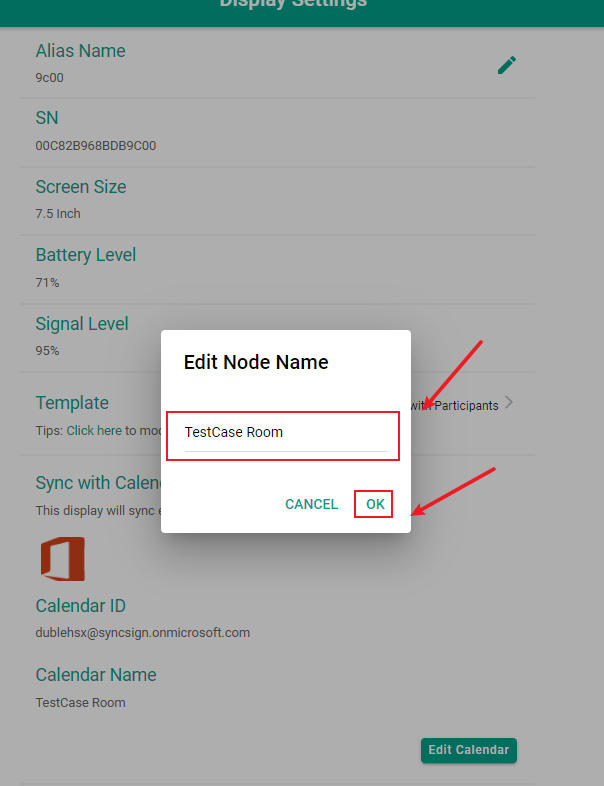
Go to SyncSign APP. Authorize the calendar access with the Administrator Account or user account under it. And then bind a Resource Calendar for each Display respectively.
How to set different time zones for office 365 events
Create an event in a room
Set time zone
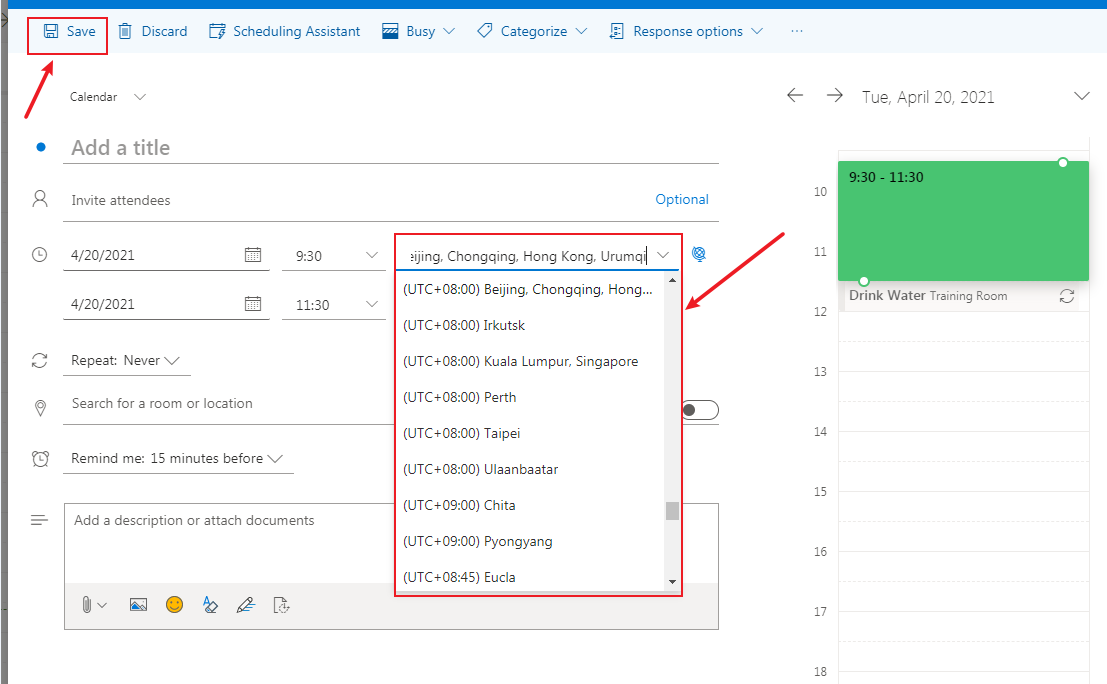
bind office 365
How to fix event titles for meeting room calendars in Office 365 and Exchange
Why is this happening?
This is the default behavior for Exchange Web Services and Office 365. It occurs because two configuration parameters, AddOrganizerToSubject and DeleteSubject are set to $True.
By default, your resource mailbox won’t show your Meeting Subject. Instead, it replaces this with your organizer’s name. This occurs for privacy reasons, but it’s only the default. Most organizations opt to see meeting subjects instead.
Please click here to view the solution.
Why a Global Admin is needed for the O365 app method set up
When setting up SyncSign for the first time, you may wonder why a Global Admin is required to authenticate as part of the set up process. Especially if you’re used to using delegate access to manually share permissions between accounts.
This is something we’re happy to answer and welcome opportunities to show our security practices. Based on past conversations, this article shares a few clarifications others found useful. Before you continue, we recommend reading this introduction to Azure app setup from Microsoft.
The big picture
In order to sync calendars, SyncSign needs to install an integrated Azure AD app onto your Office 365 account. In Office 365, only a Global Admin has the ability to install integrated Azure apps. This is a great thing for security, and prevents any user from giving apps access to sensitive parts of your configuration.
We’ll let Microsoft give you the full explanation on Azure App installation:
Only global administrators can:
Add apps from the Azure AD app gallery (pre-integrated 3rd Party Apps)
Publish an app using the Azure AD Application Proxy
All users in your directory have rights to add applications that they are developing and discretion over which applications they share/give access to their organizational data. Remember user sign up/in to an app and granting permissions may result in a service principal being created.
What does the installed app do?
SyncSign uses this app as a gateway to manage room calendars and of the users involved in each room’s meetings. You probably already have a few other services installed similarly, and can see a list of apps you have today via http://myapps.microsoft.com
Why not only share access to the room calendars?
SyncSign’s scheduling tools are focused on room calendars, however we frequently have to update meetings on behalf of users where the room calendar is just one of several which needs updates. This “cascading” concept is a key part of how we manage calendars when both people and rooms are involved.
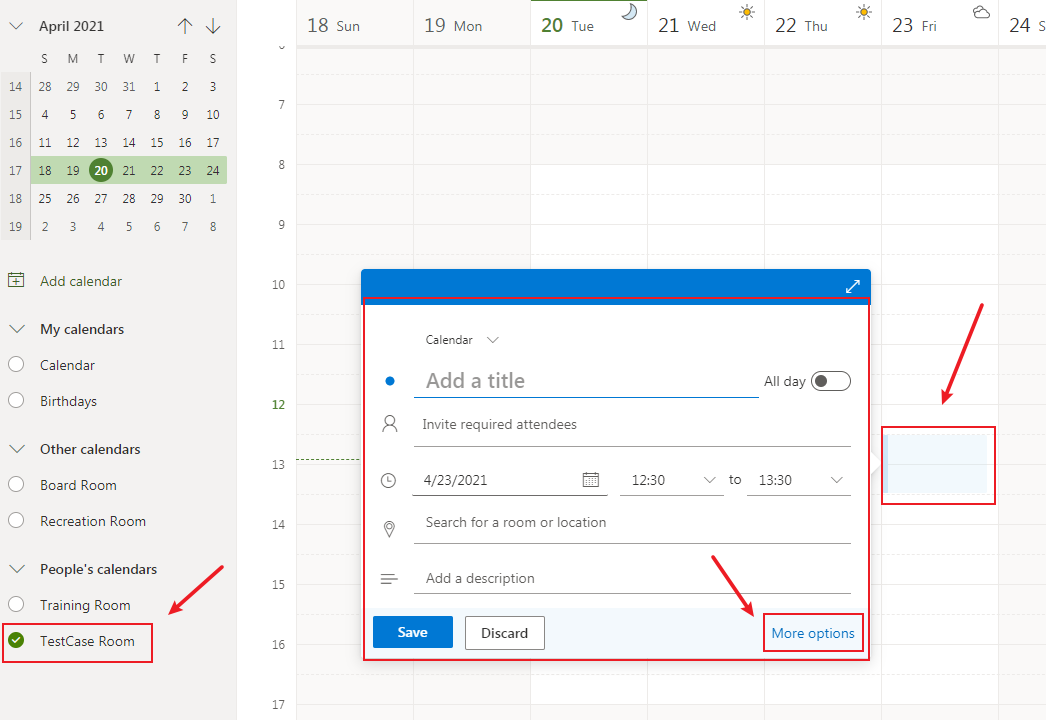
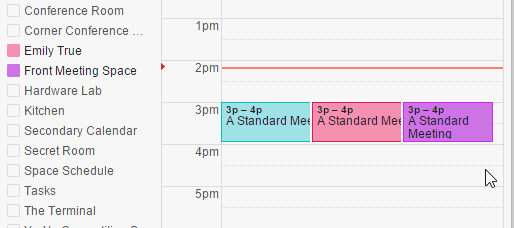
This is easy to visualize using Google Calendar. In this case we just edit the room’s event and nobody else is updated:
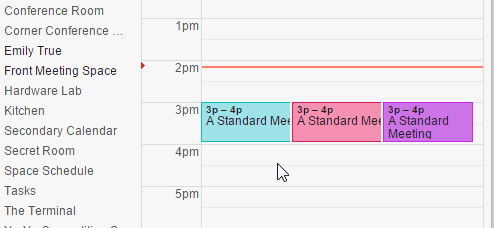
But if you update the organizer’s version it changes everywhere:
If you used a more explicit delegate approach, you’d quickly run into a problem of new employees having to share their personal calendars with the delegate and keep that list up to date to avoid “I deleted this event, why is it still on my calendar if the room is free?” moments.
As we continue to develop user-to-room and user-to-user scheduling tools, this permission becomes more and more important to successfully scheduling without creating confusing workflows for your users.
Why does it ask for full access to all mailboxes?
In short, there are three ways apps (like SyncSign) can authenticate with Exchange services:
NTLM: One-way hash of username and password. Most secure way of storing credentials for on-premise Exchange.
Basic: Plaintext username and password. This method is considered insecure and we don’t support it with SyncSign.
OAuth: Scoped token-based authentication standard, used by apps/services to request very specific rights for your account.
While we support NTLM for connect on-premise/hosted Exchange servers to SyncSign, Office 365 (via EWS) only supports OAuth and Basic authentication and not NTLM. If you see apps ask for just your O365 username and password to authenticate, it means they are using Basic authentication, and store your account password and username, which is a bigger security concern since the account info has to be decrypted on use when using Basic Auth.
Put another way, if you cannot connect to O365 through OAuth there’s a considerable concern with security compromising via apps that allow you to sign in via Basic authentication. For this reason, we only support OAuth authentication at this time.
Using OAuth, we securely install the connector app onto your Office 365 account. For Office 365/EWS, Microsoft (for some inexplicable reason) requires that all OAuth apps request this permission. SyncSign does not use it. Once installed, the SyncSign app can only interact with your calendars.