Adding Delegation Permissions in Office 365
To add a room resource in Office 365 to SyncSign, you need to assign the correct permissions to users.
To set the correct permissions for a delegated user in Office 365, follow these steps:
Note
Please follow the steps sequentially. Getting the steps wrong will cause you to fail to read rooms or push events successfully.
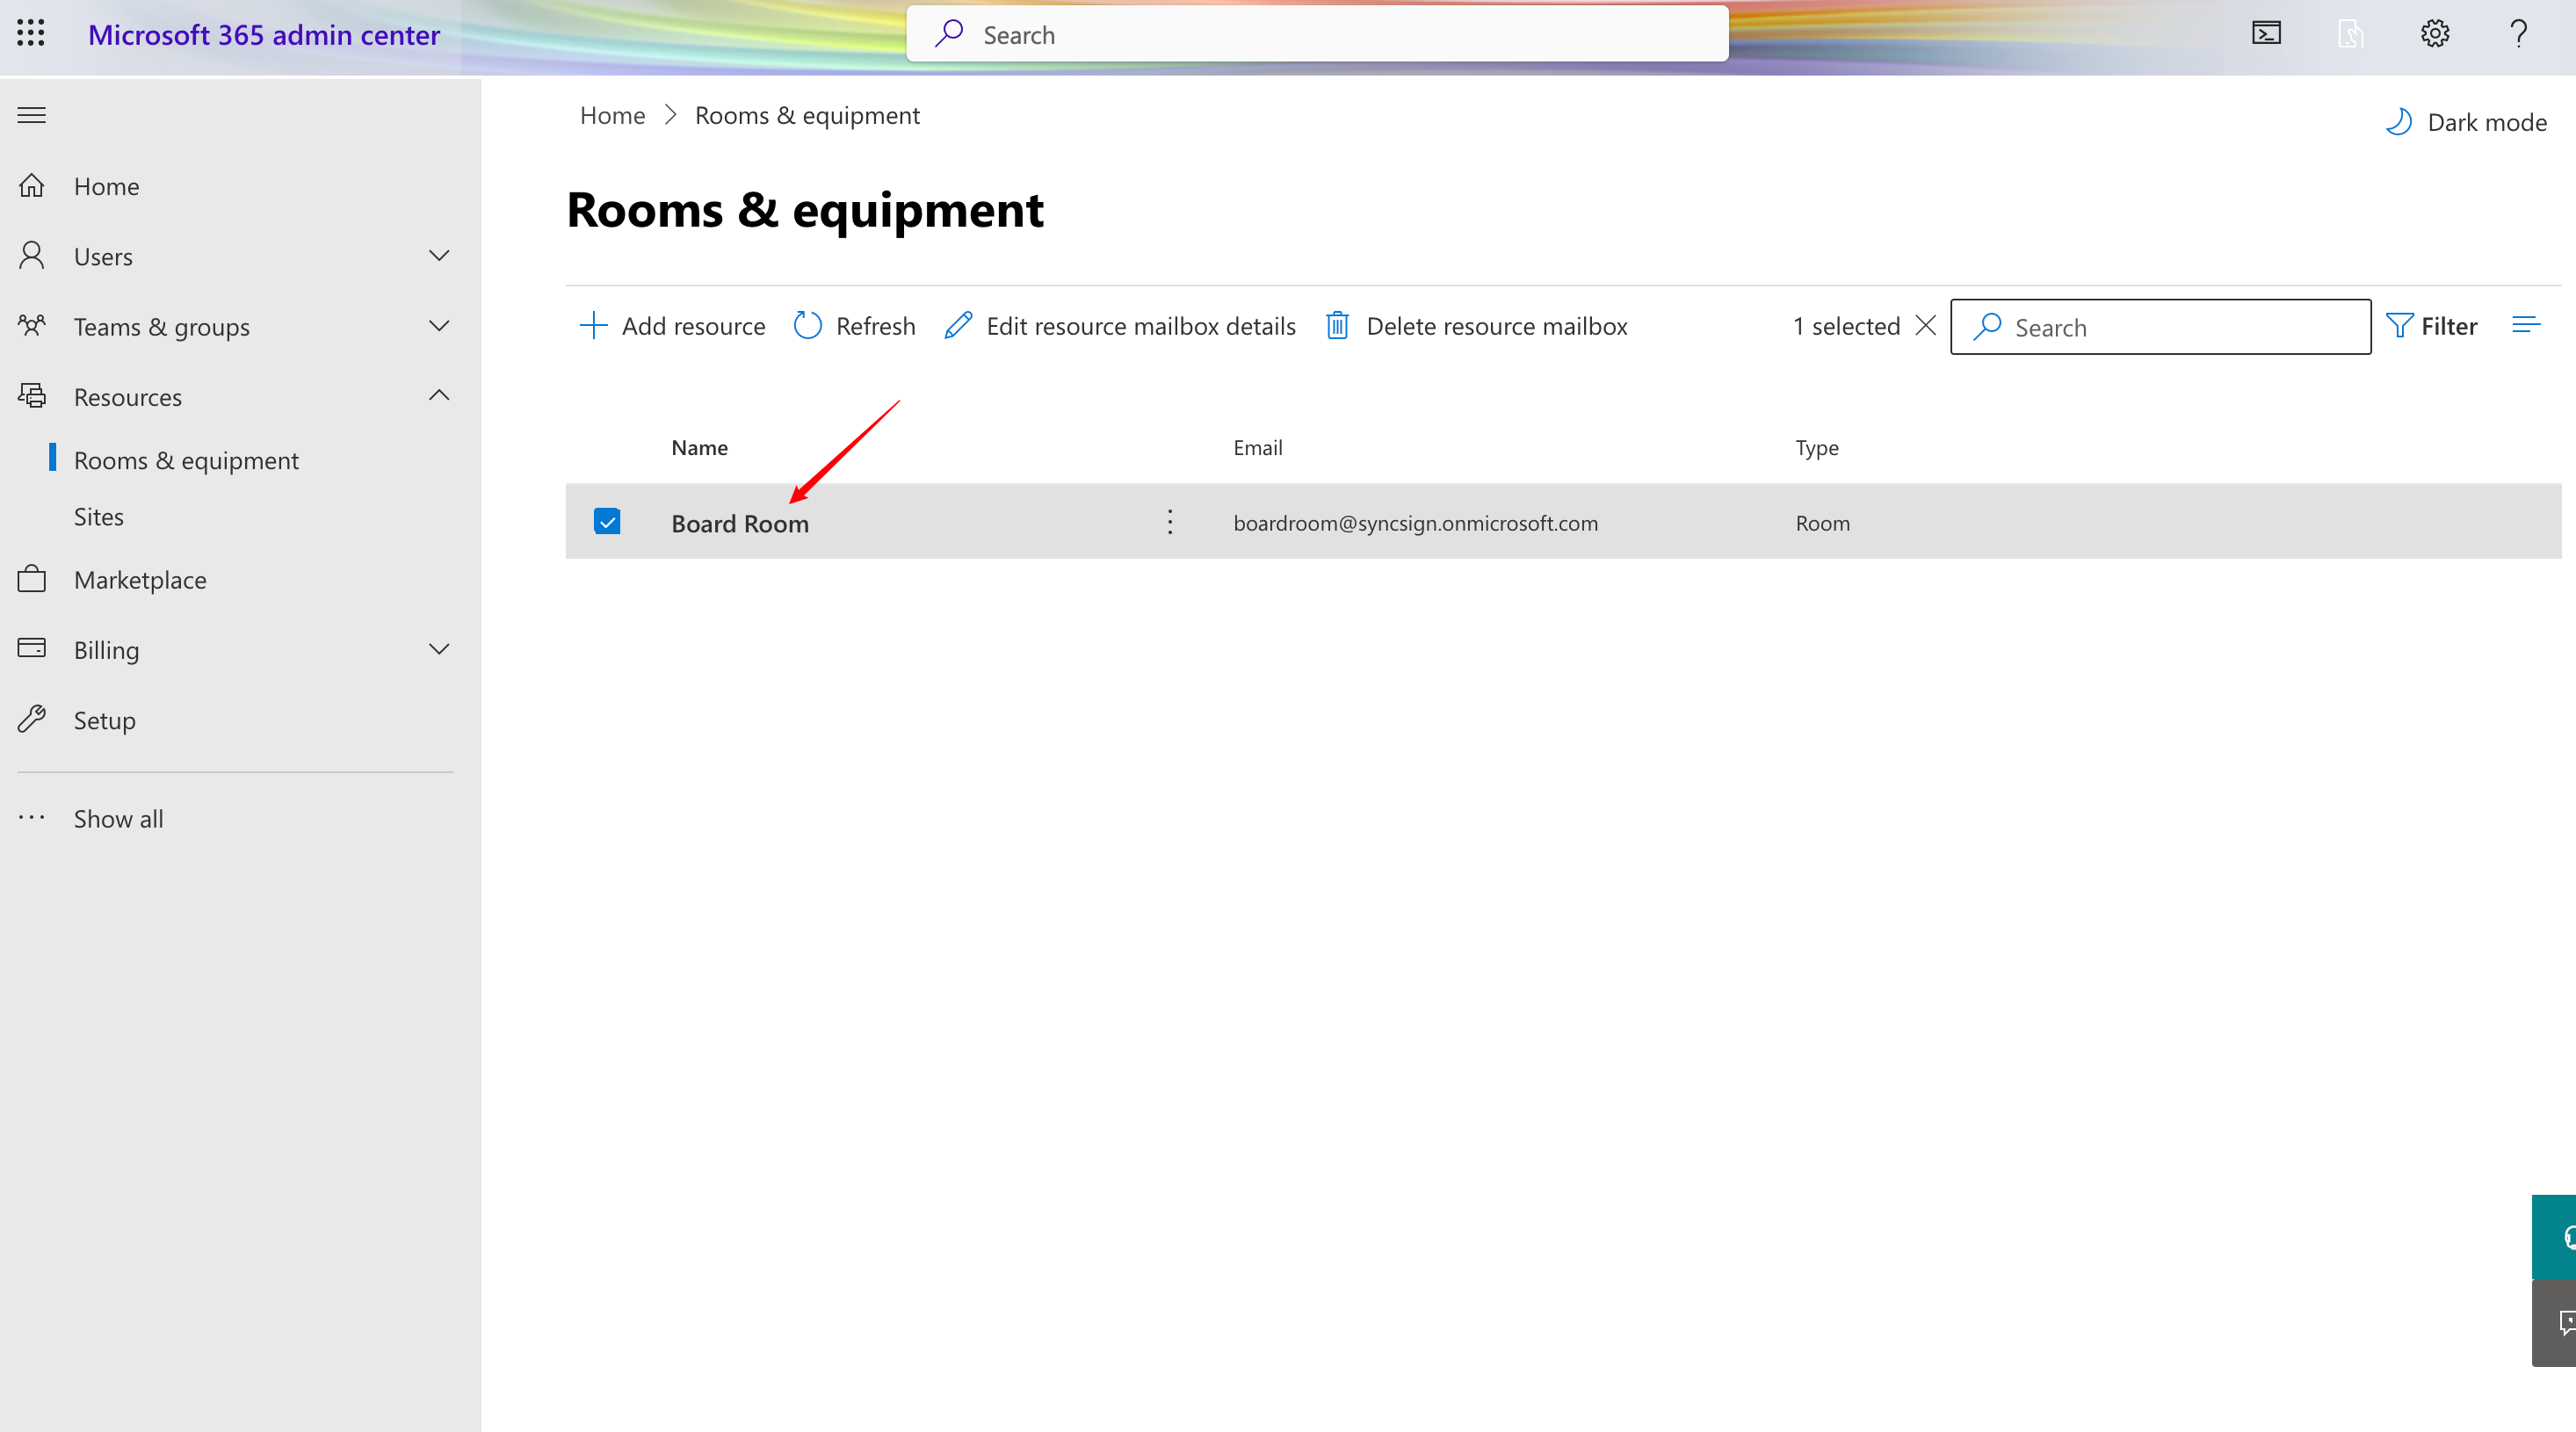
Go to https://admin.microsoft.com/#/ResourceMailbox and locate the room resource you are trying to add to the SyncSign portal
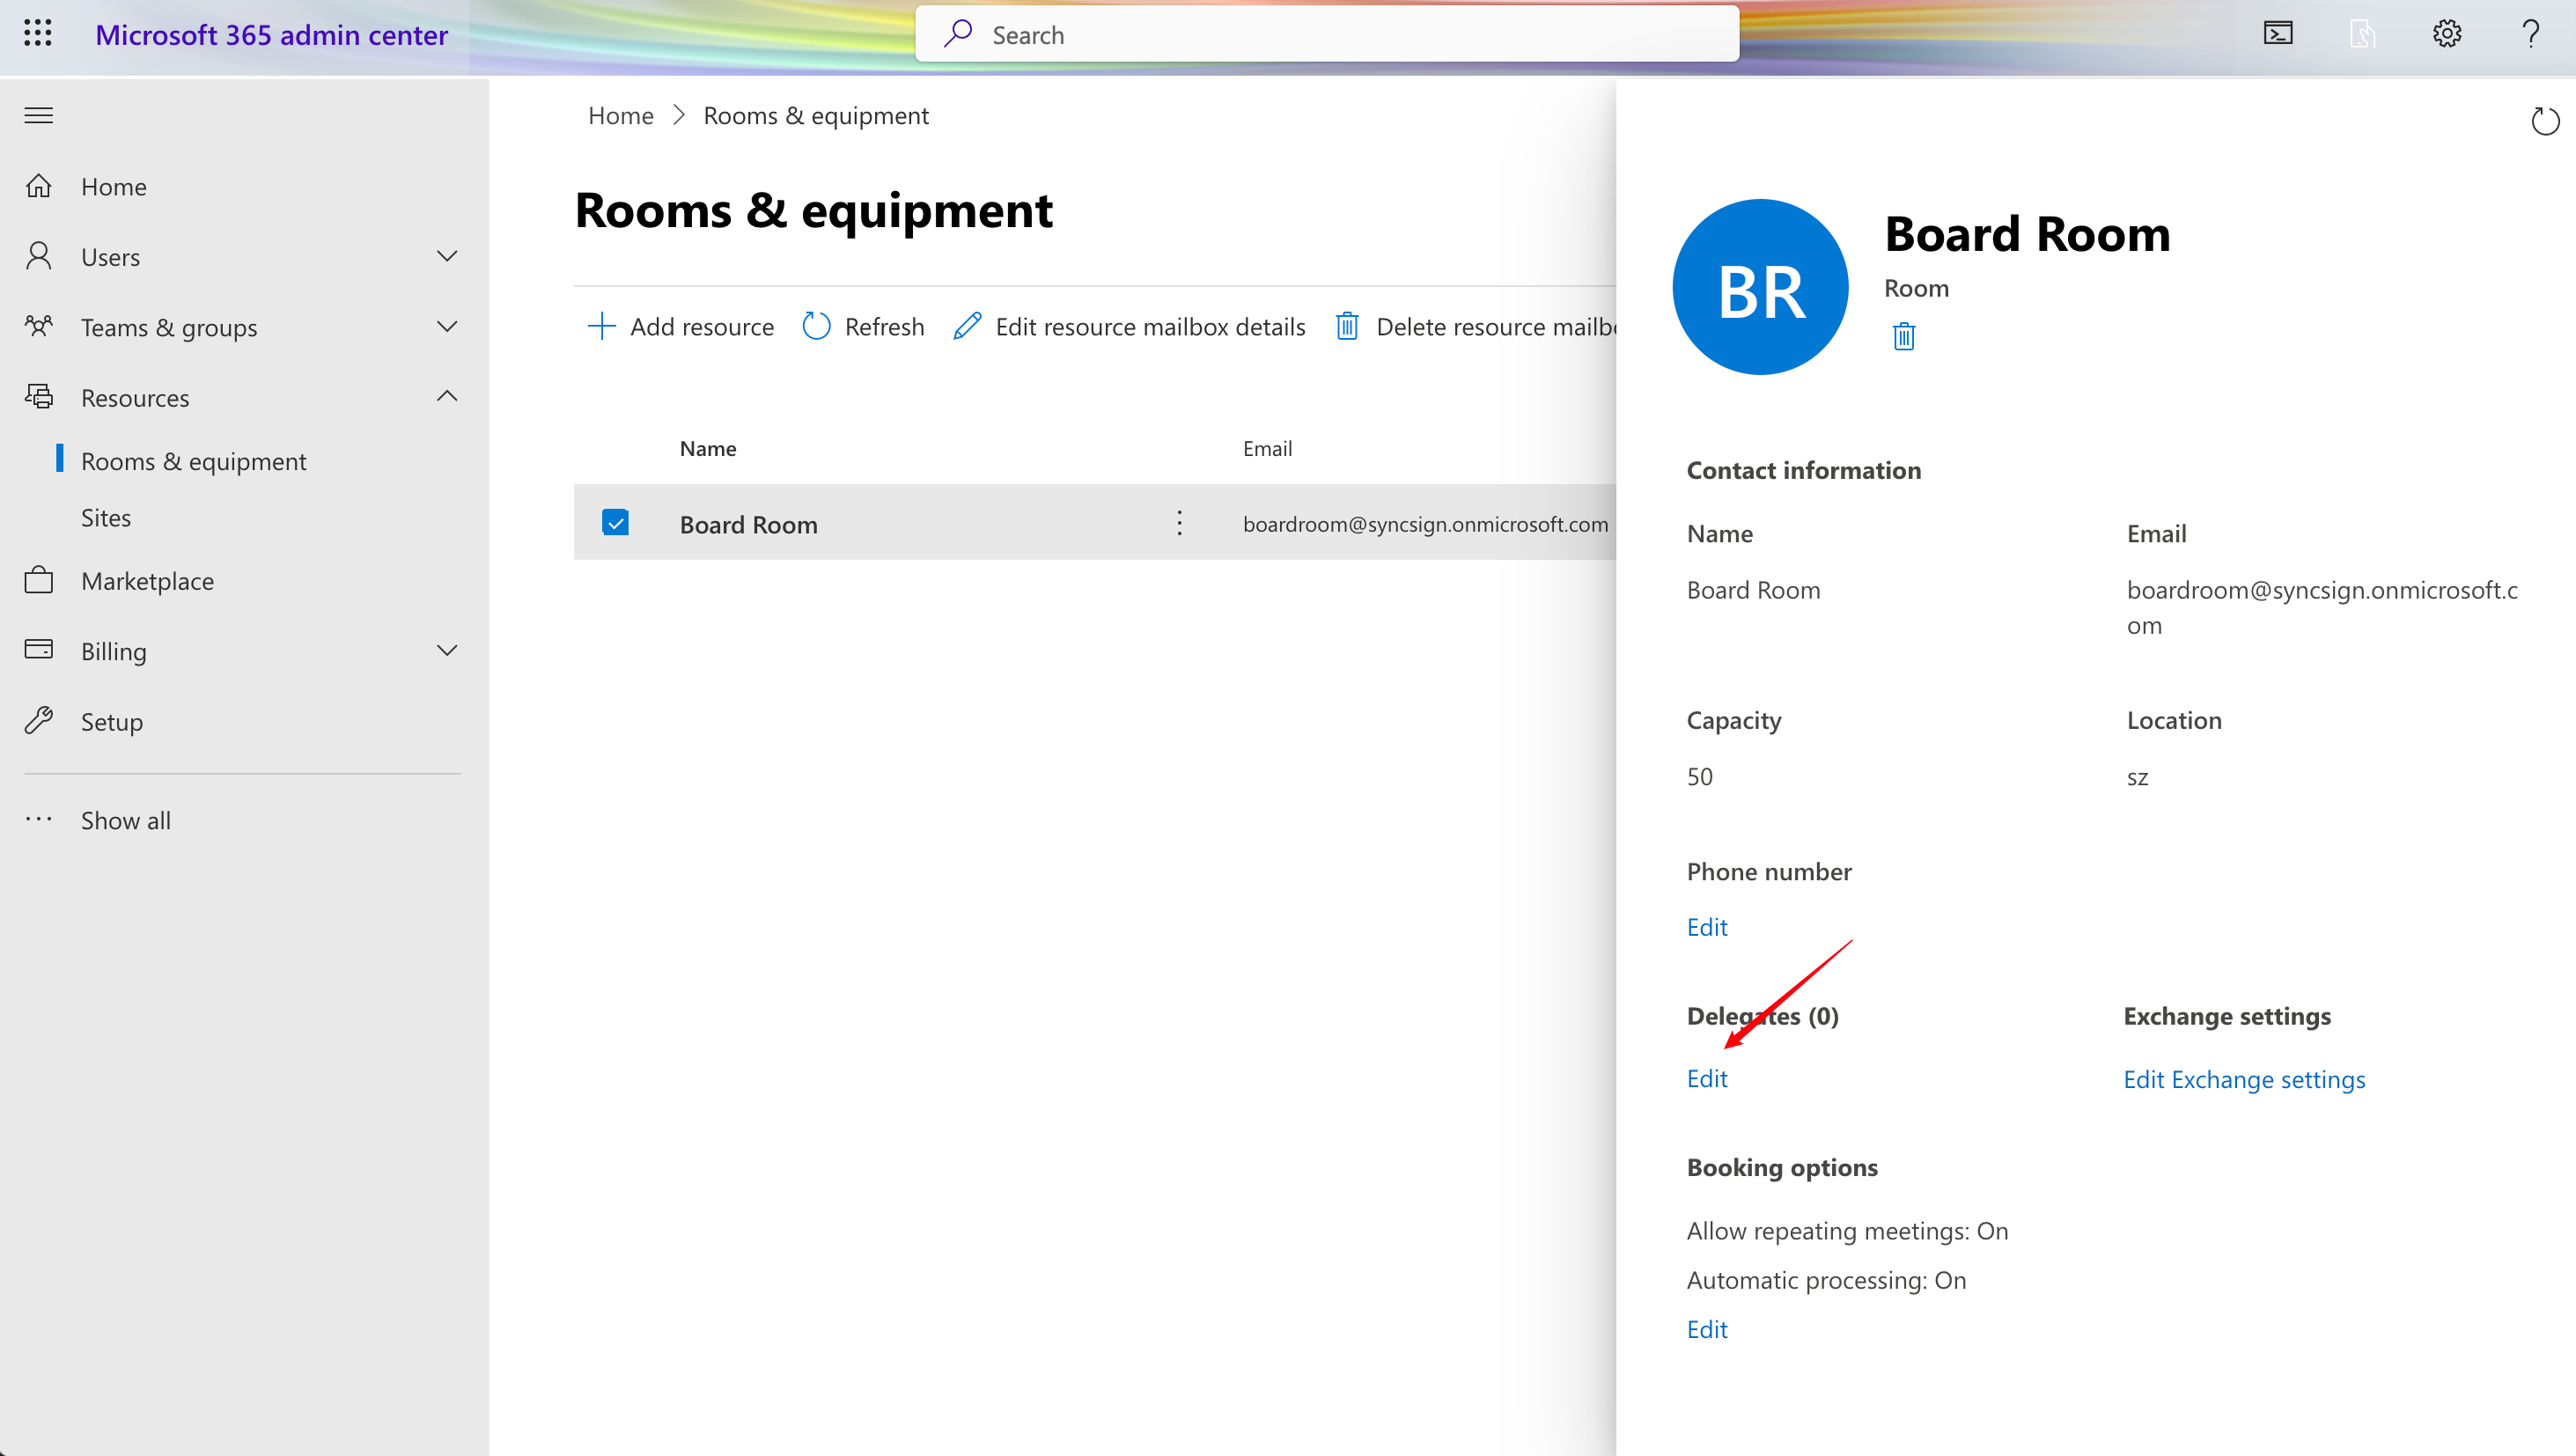
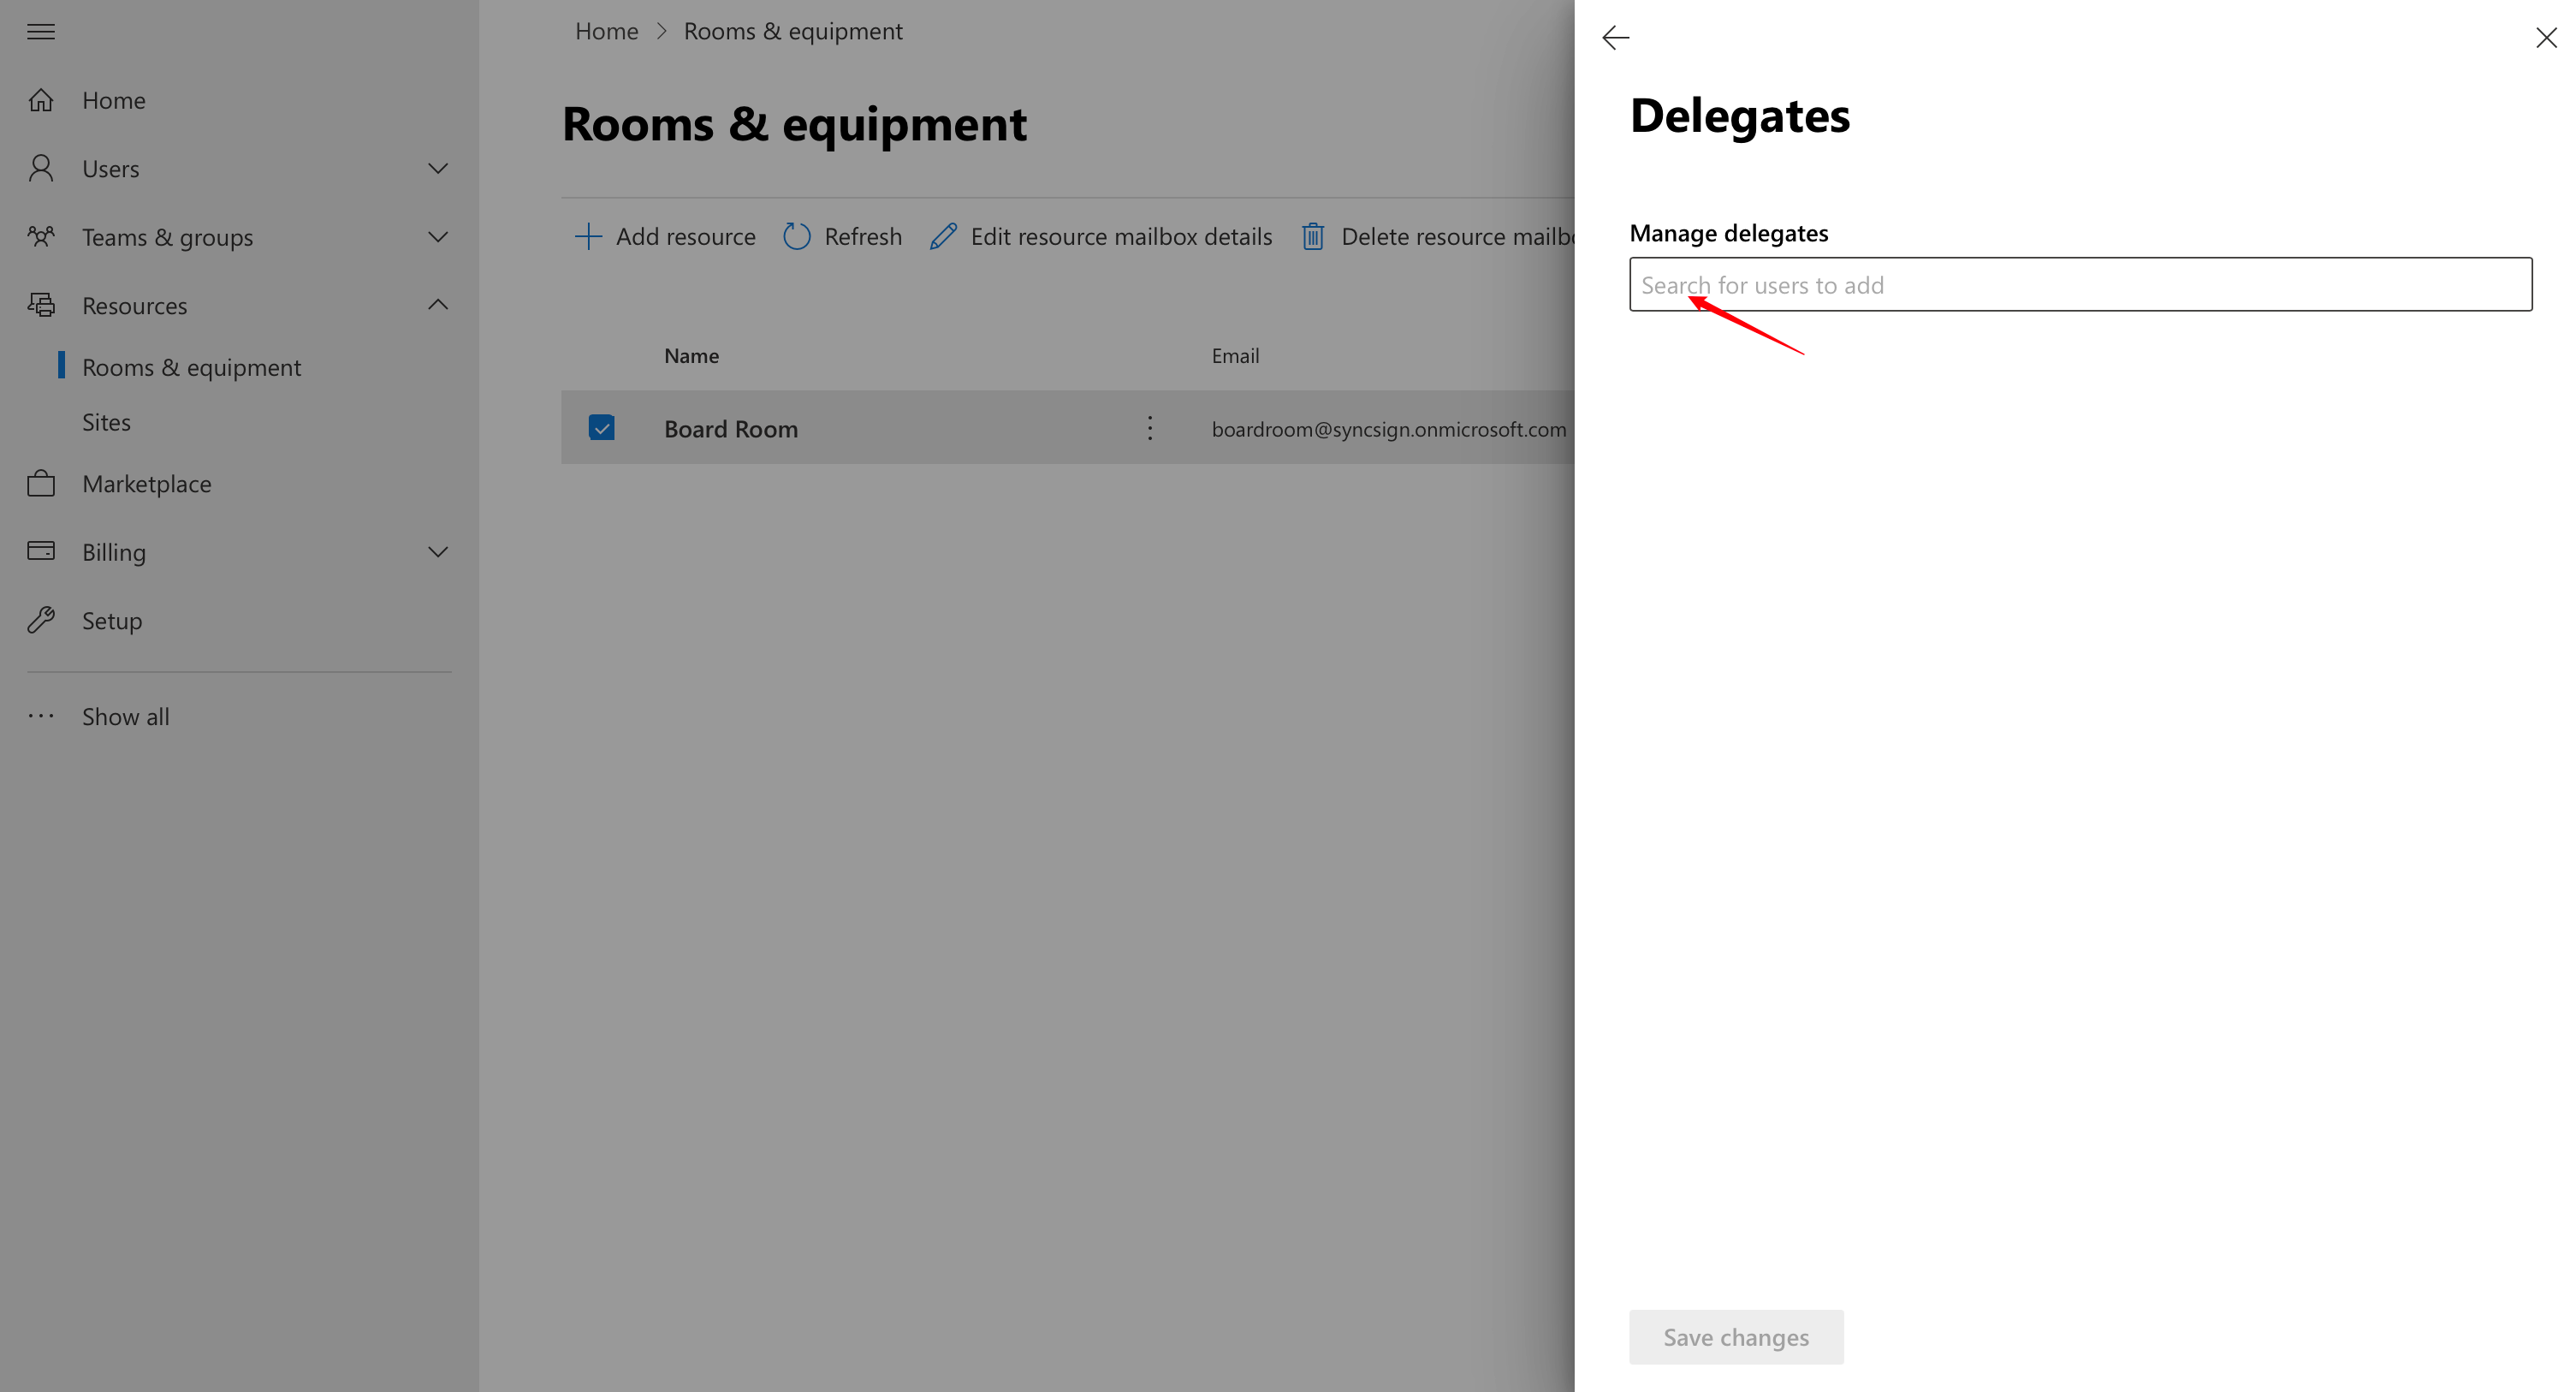
Under Delegates, click on edit and add the Office 365 user you wish for calendar access.
Warning
If you cannot find the user you want to delegate to or if the authorization fails when following the above steps, you can use PowerShell to perform the delegation settings.
The permissions need some time to be assigned in Office 365; therefore, we recommend waiting for 24 hours.
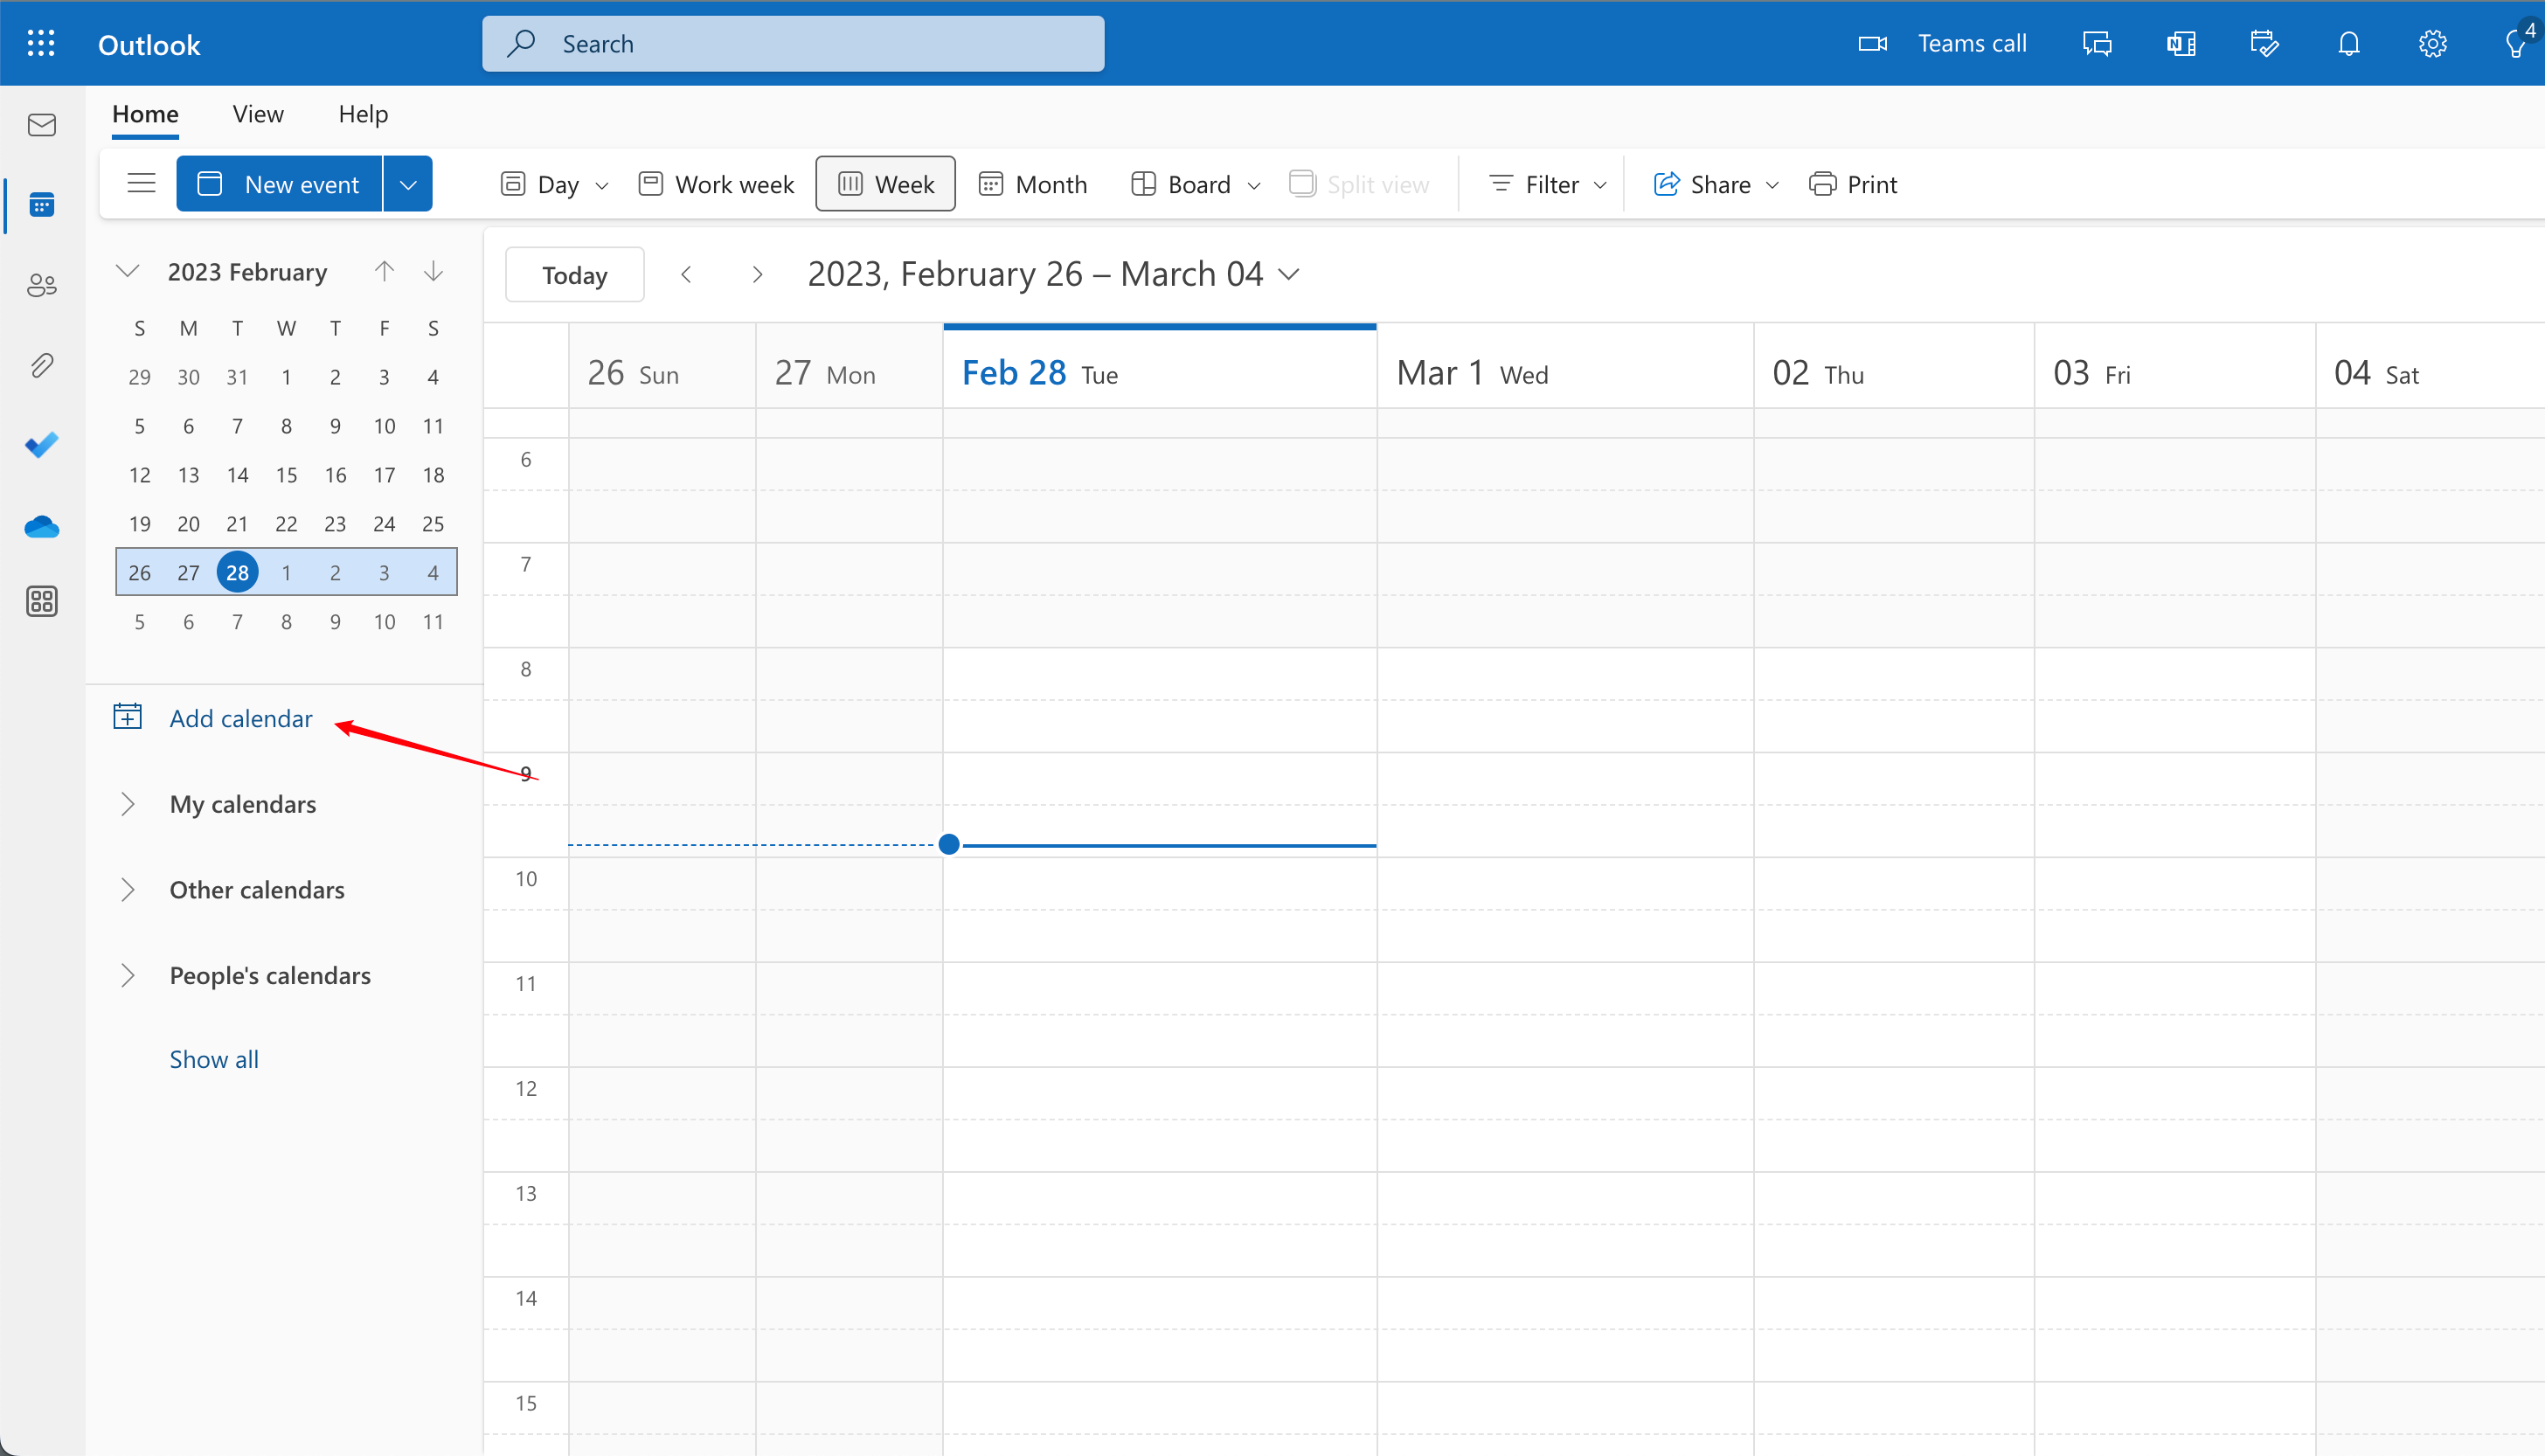
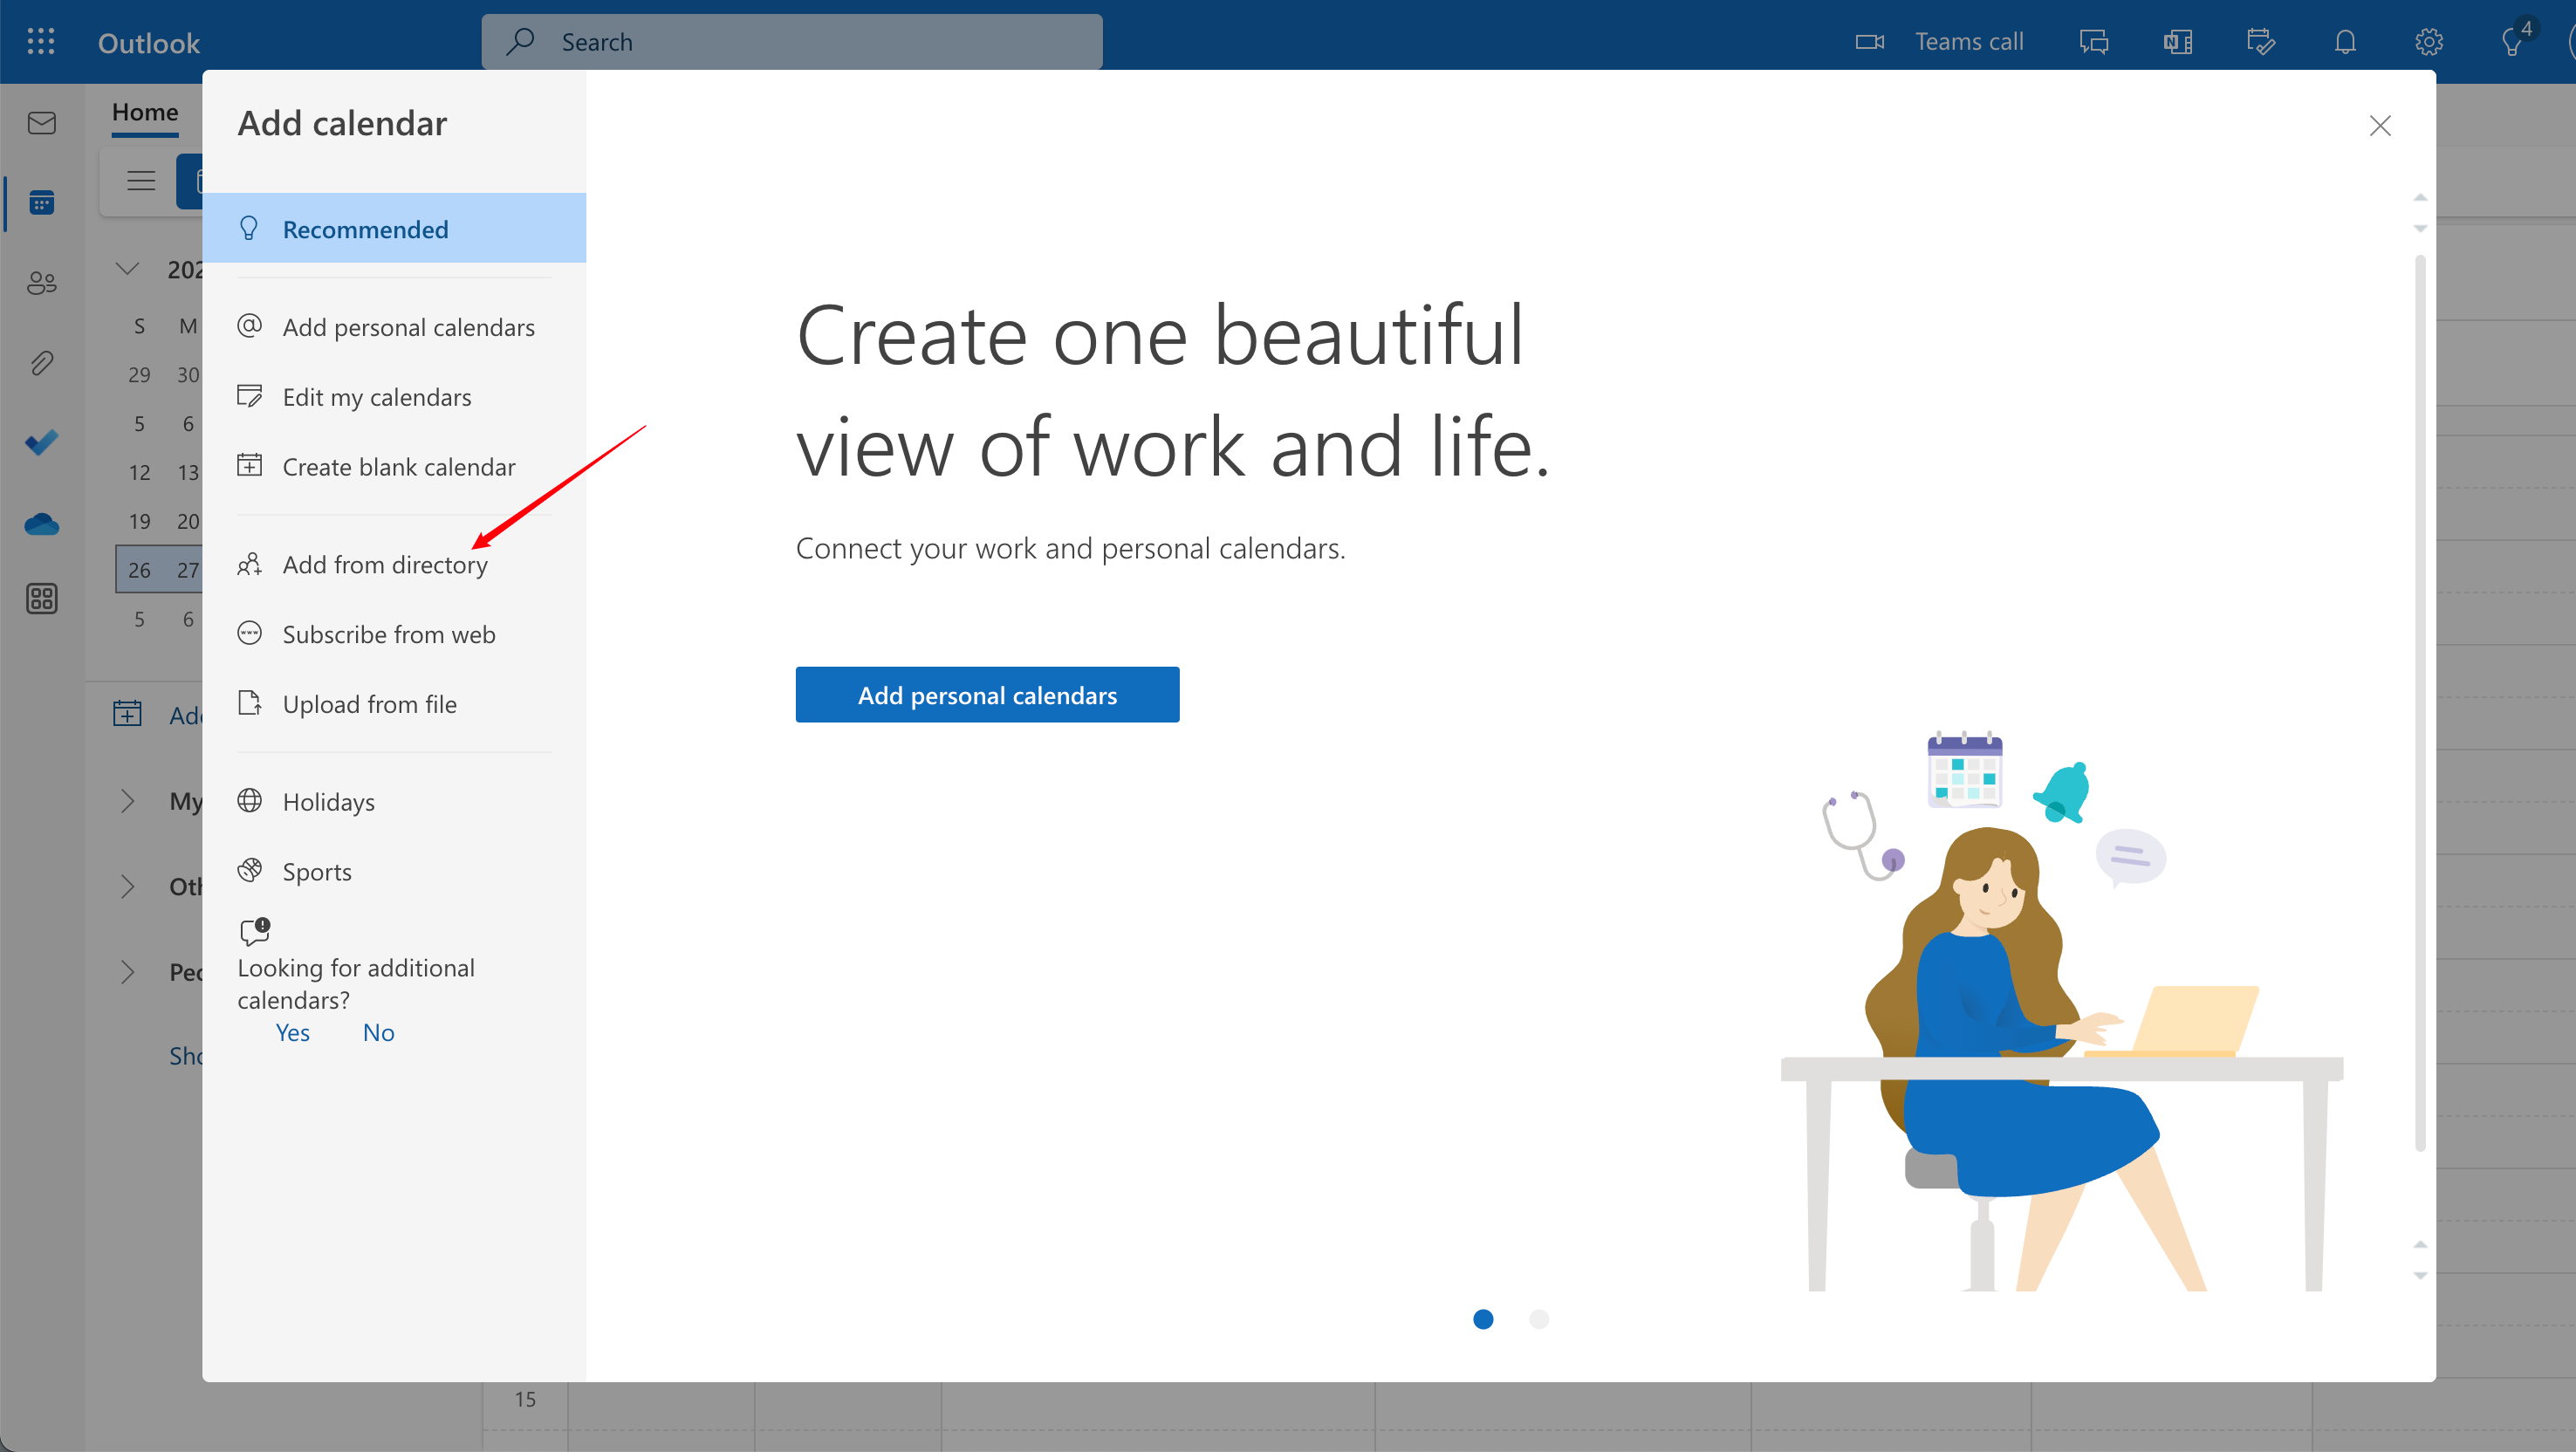
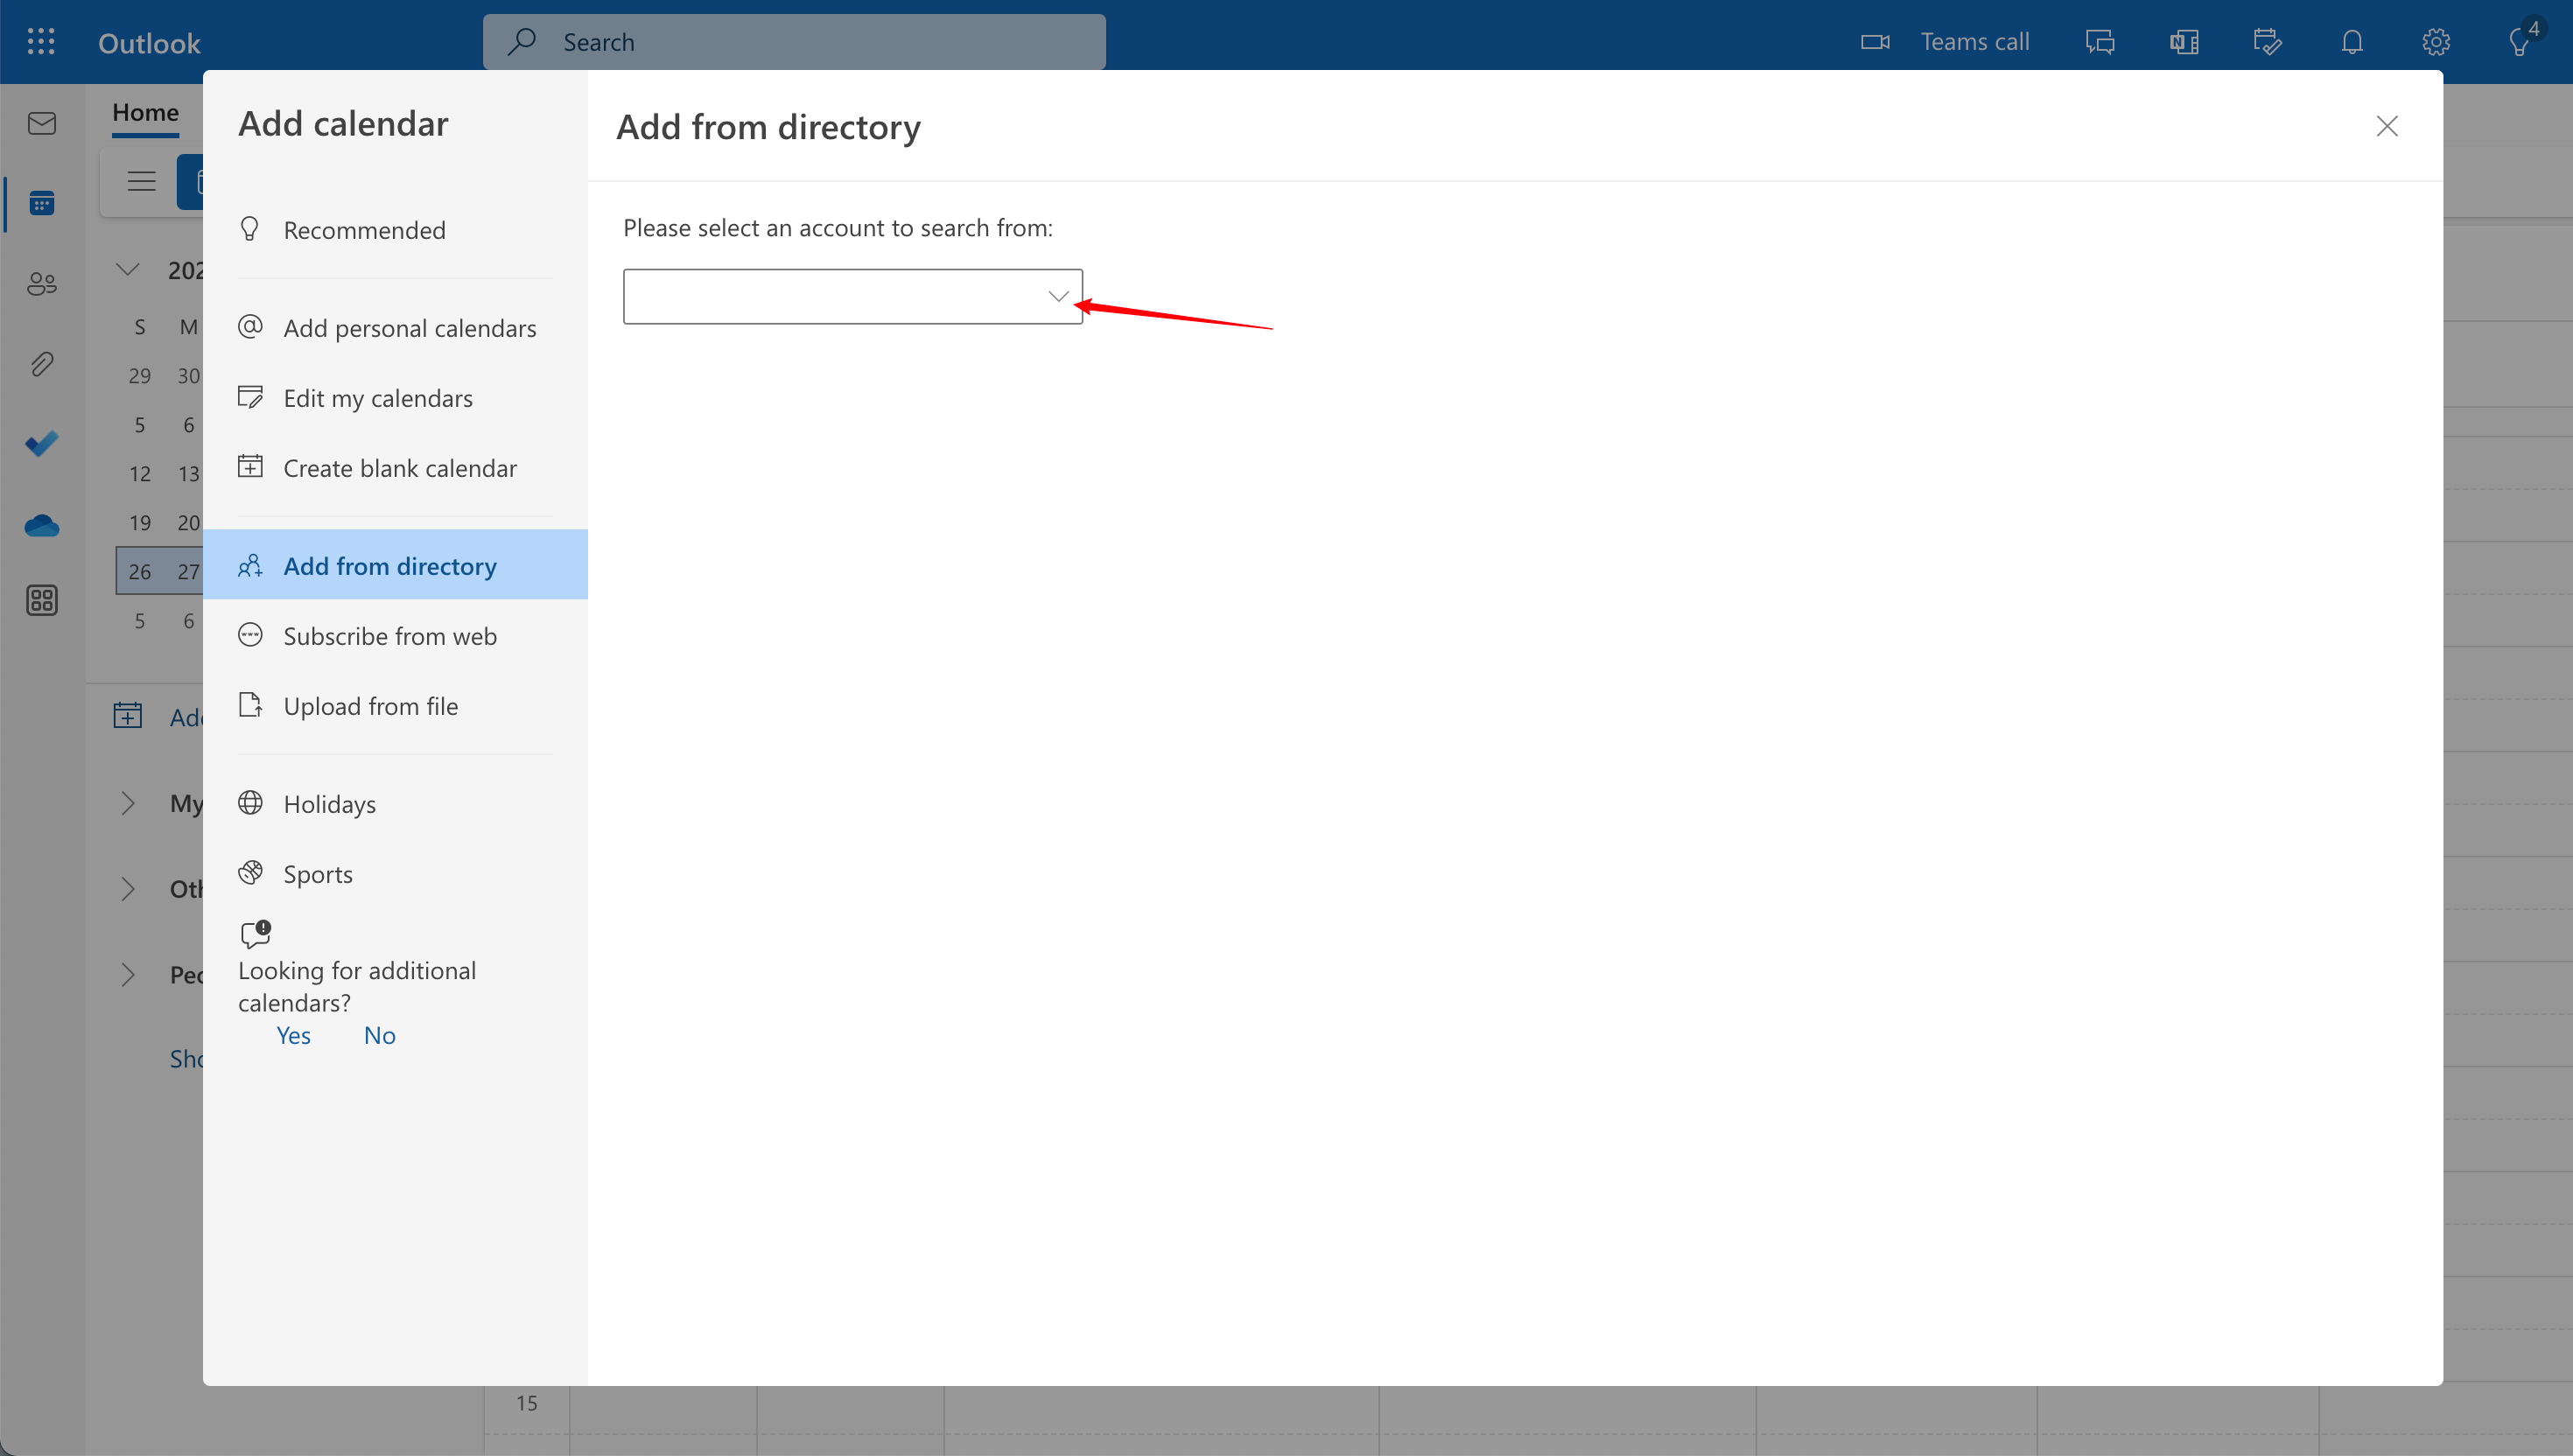
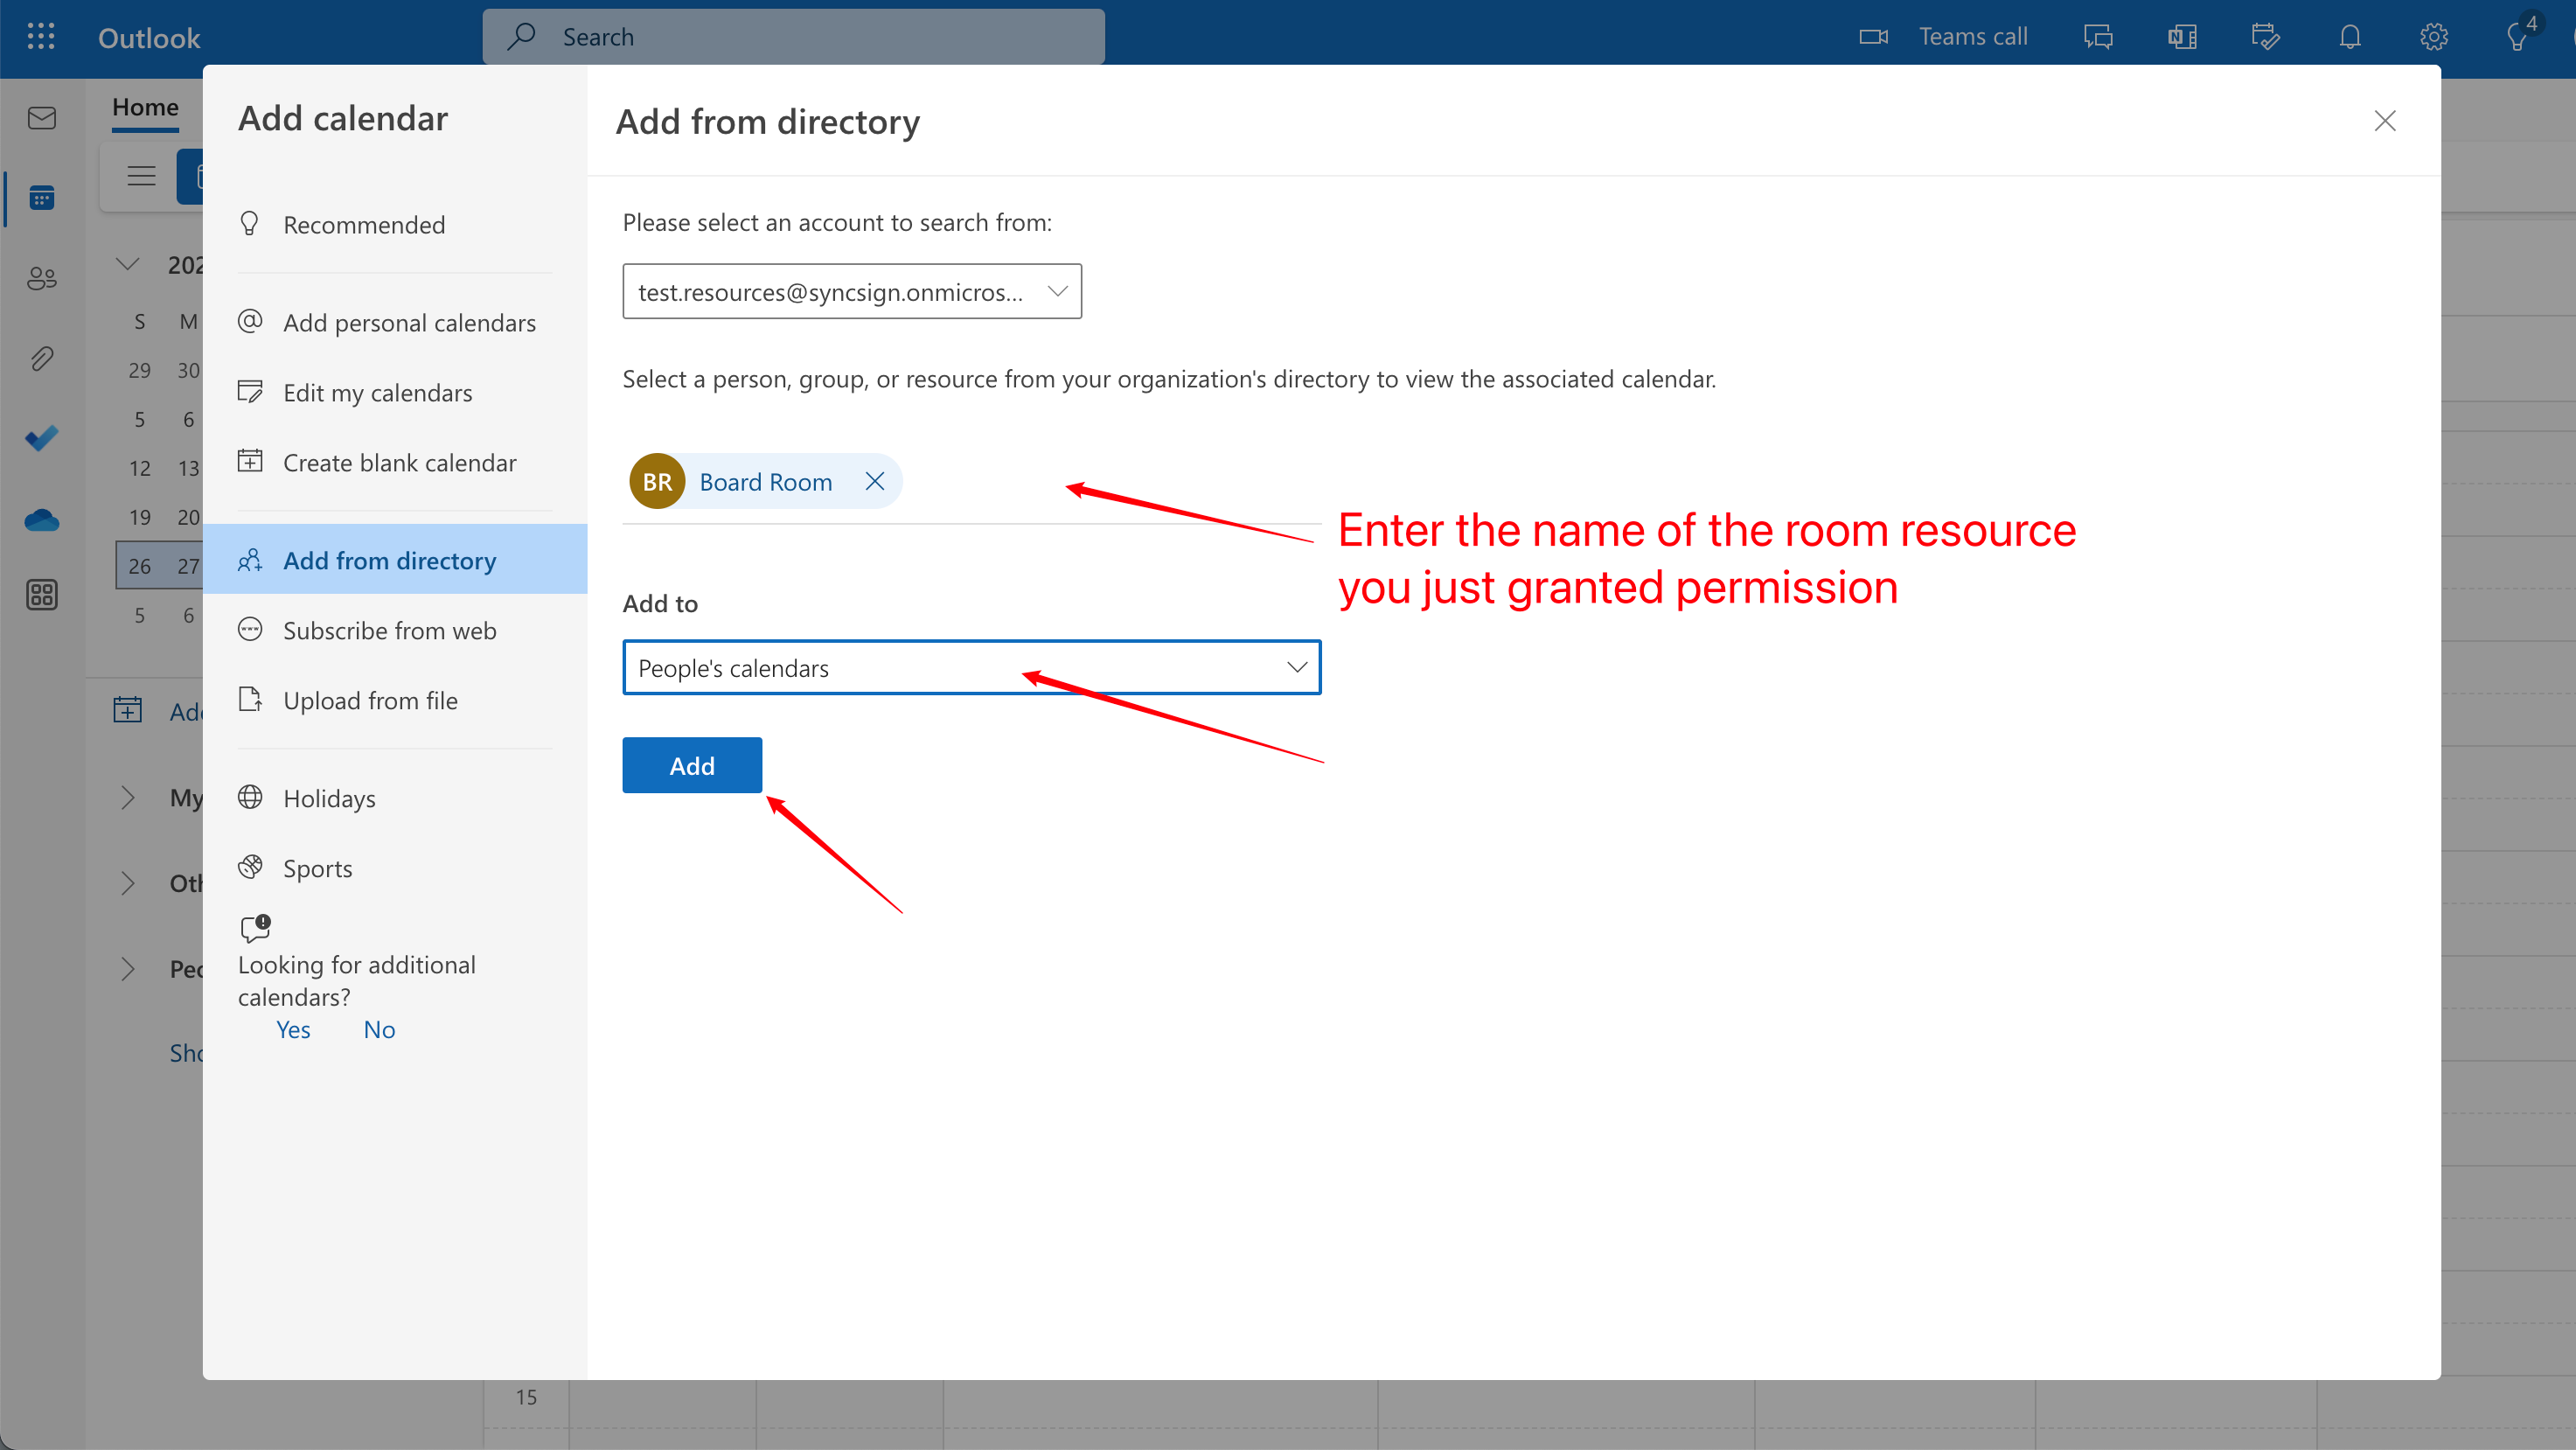
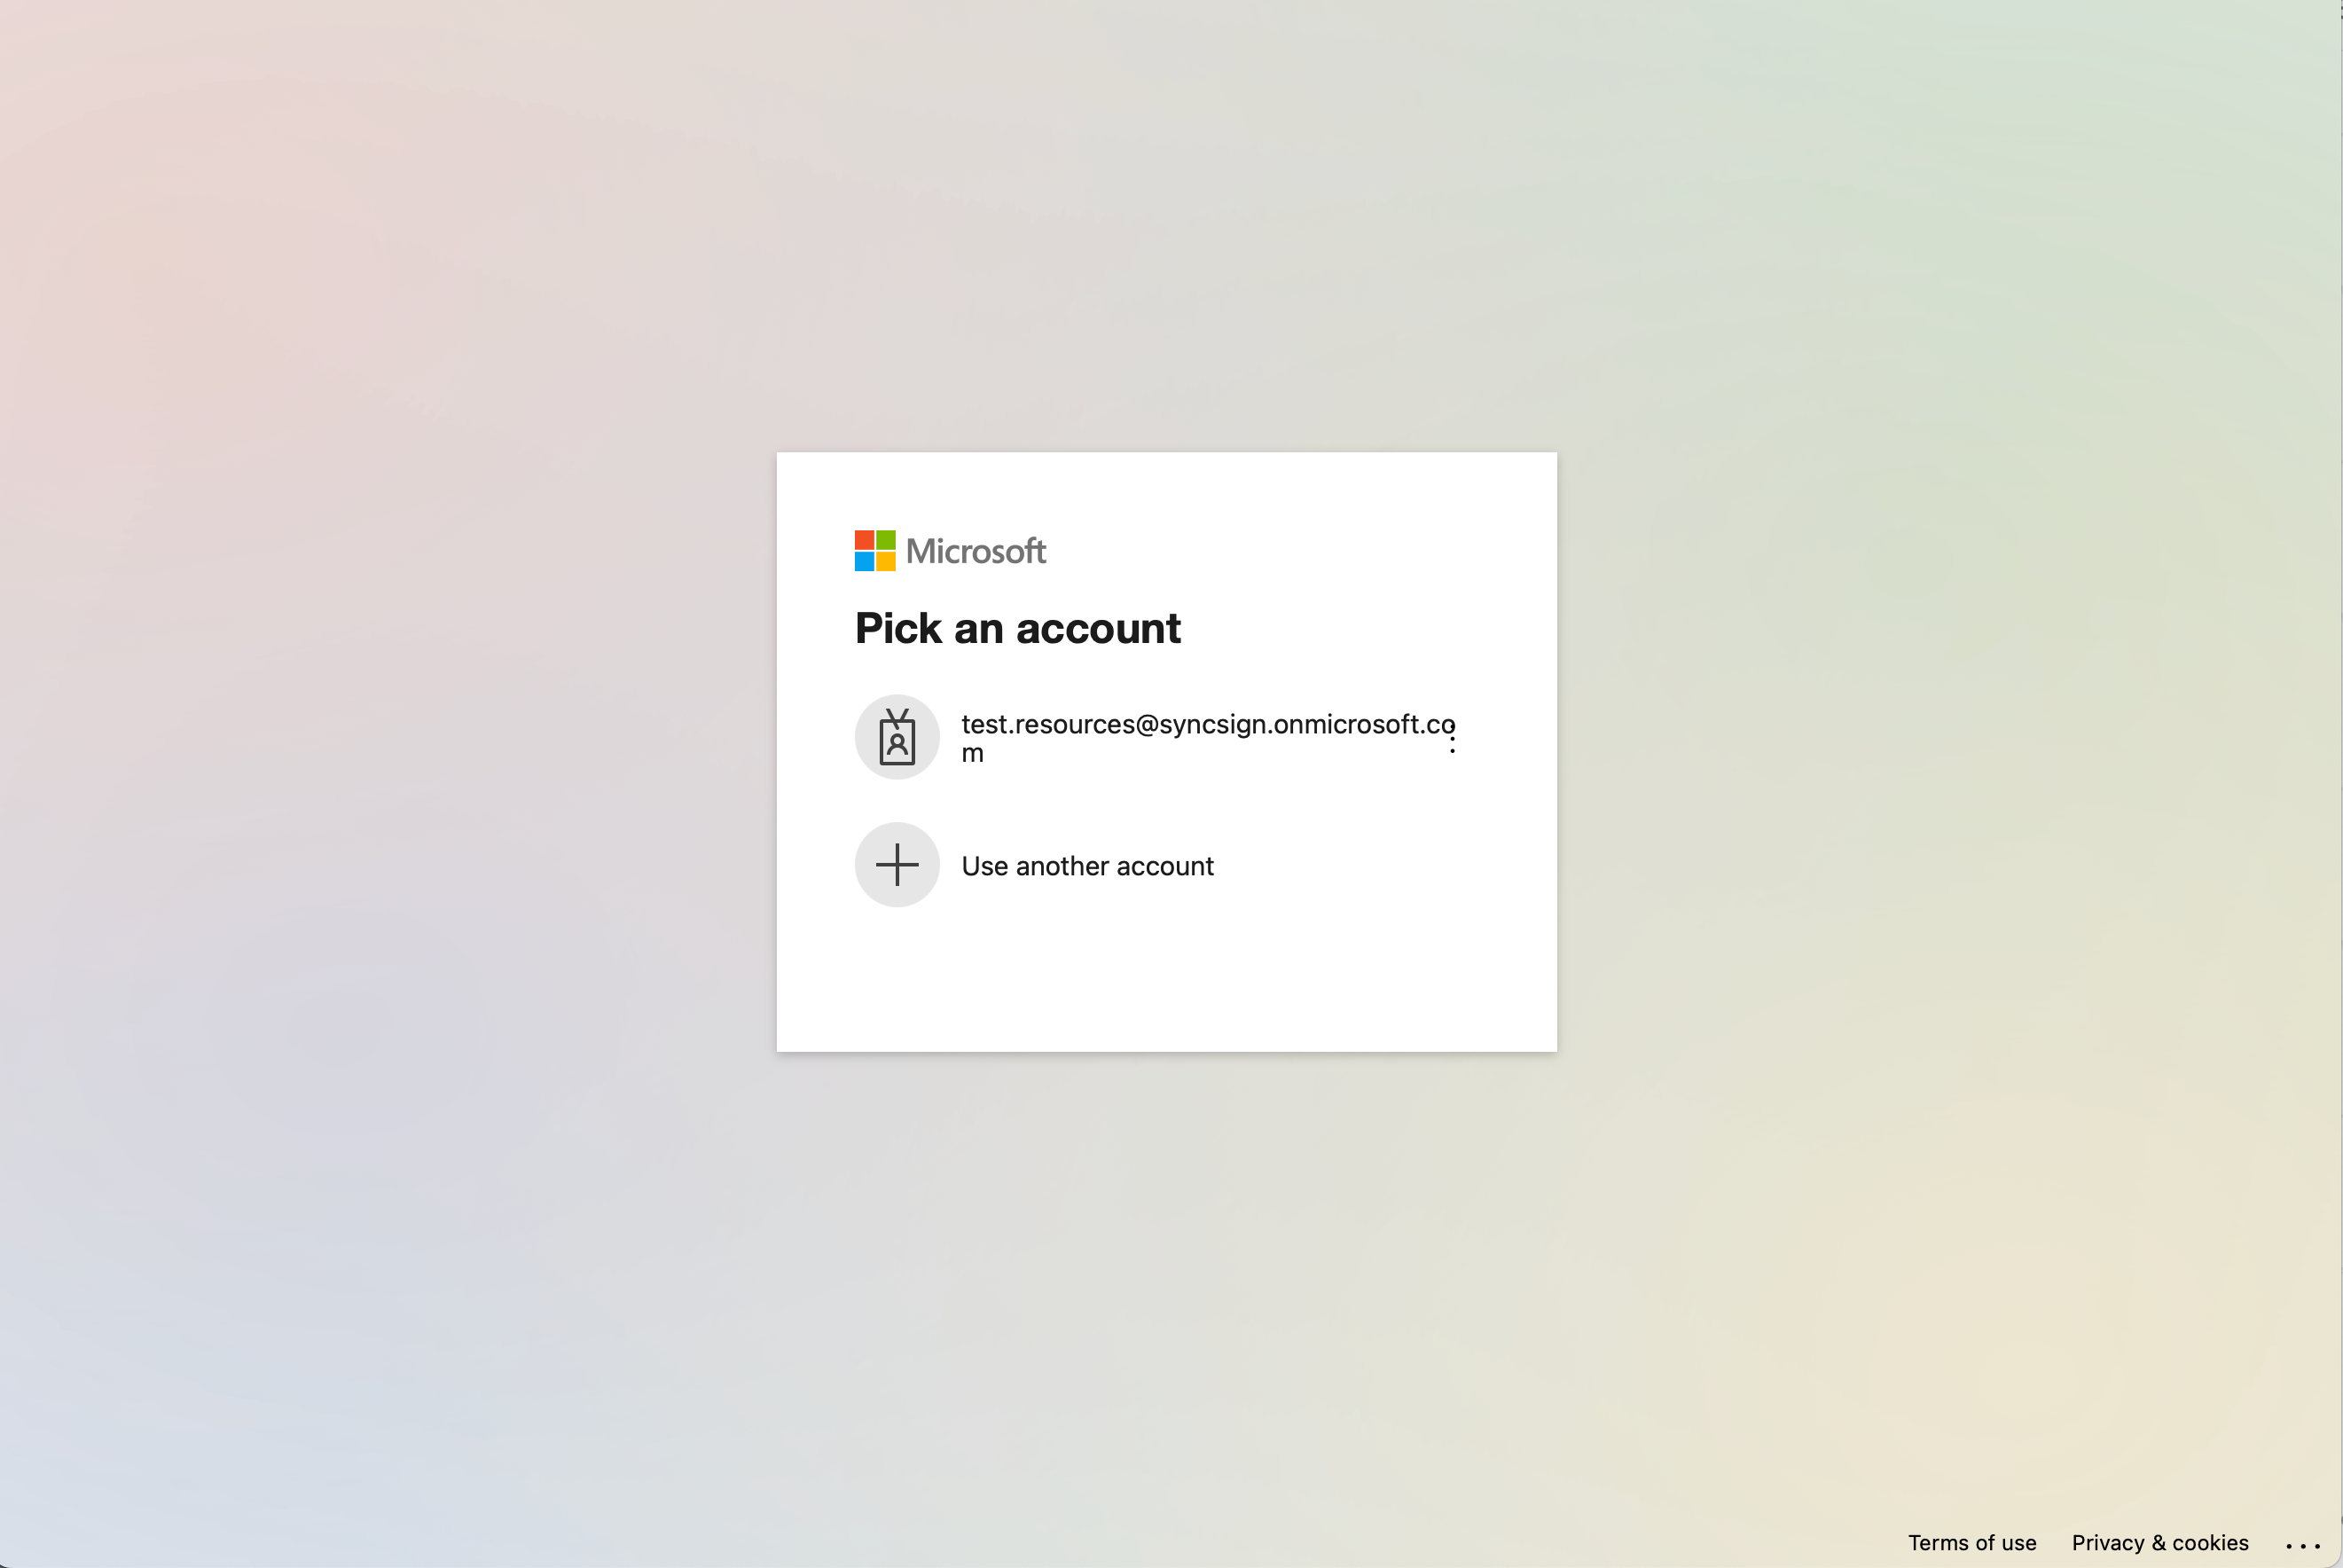
Log in to the Outlook of the delegated user, and add the room resource that has just been granted permission.
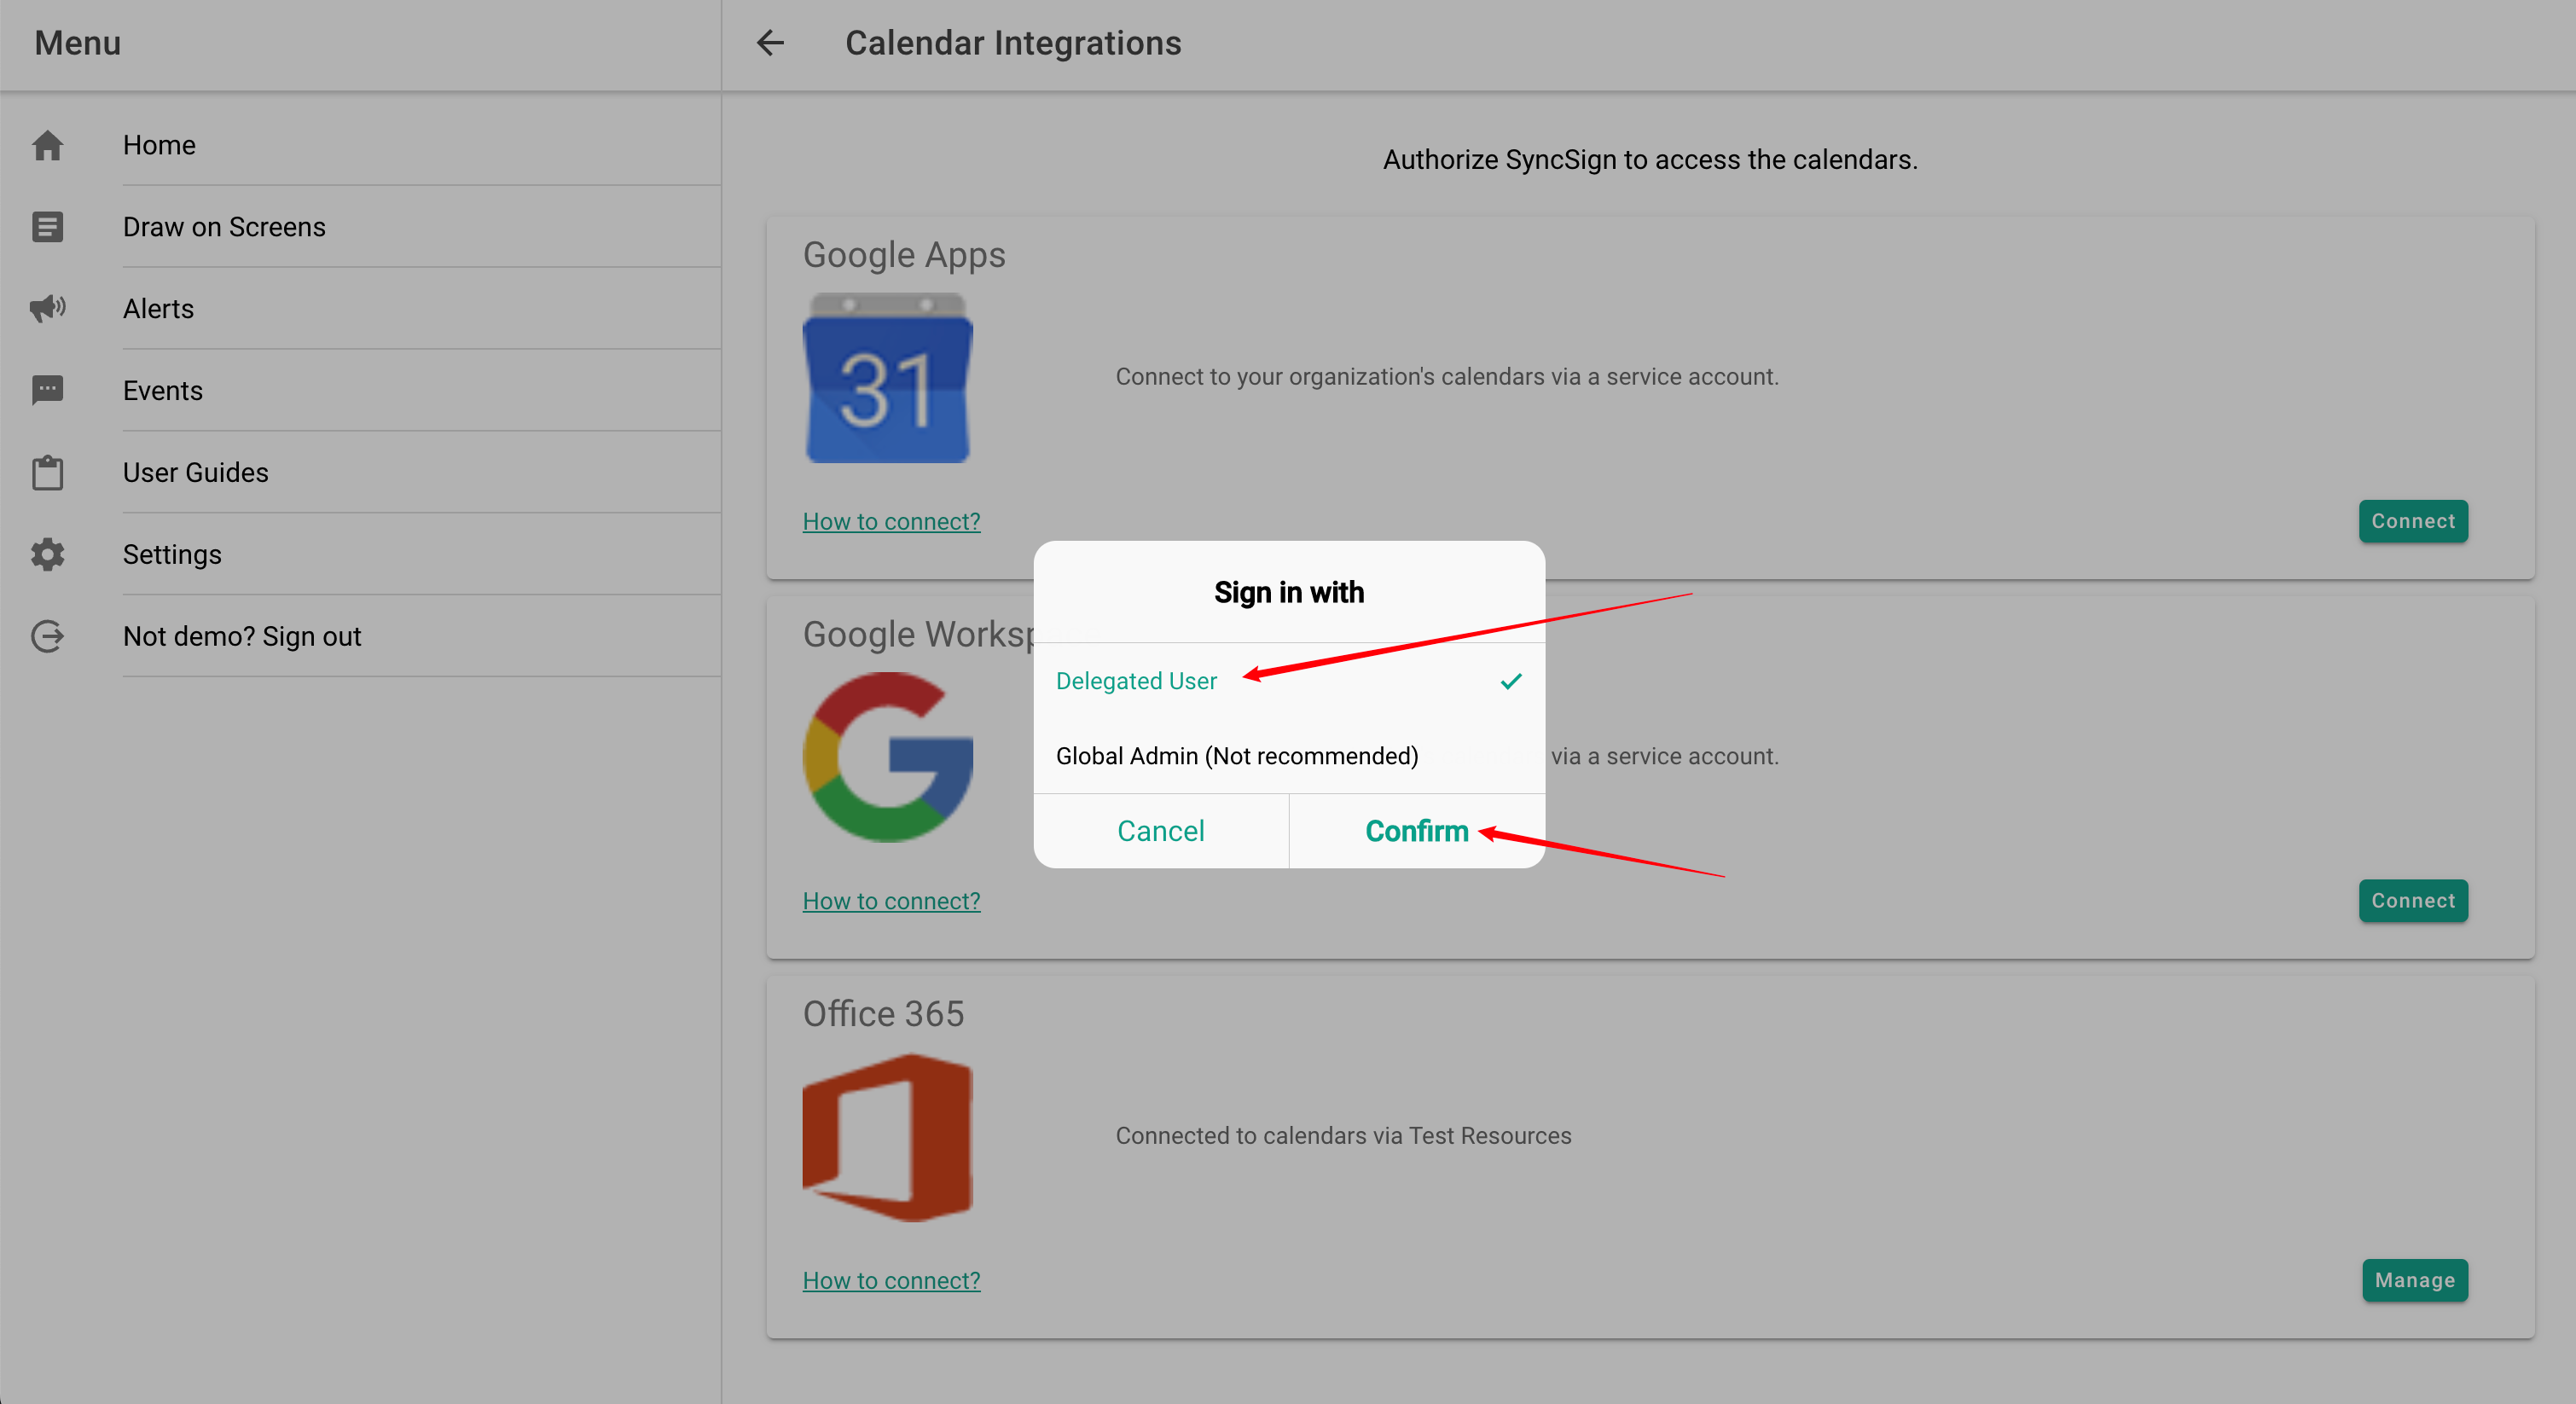
To add the assigned user to SyncSign by moving to the SyncSign门户 go to Settings -> Integration -> Select Delegated User, and log in as an Office 365 user.
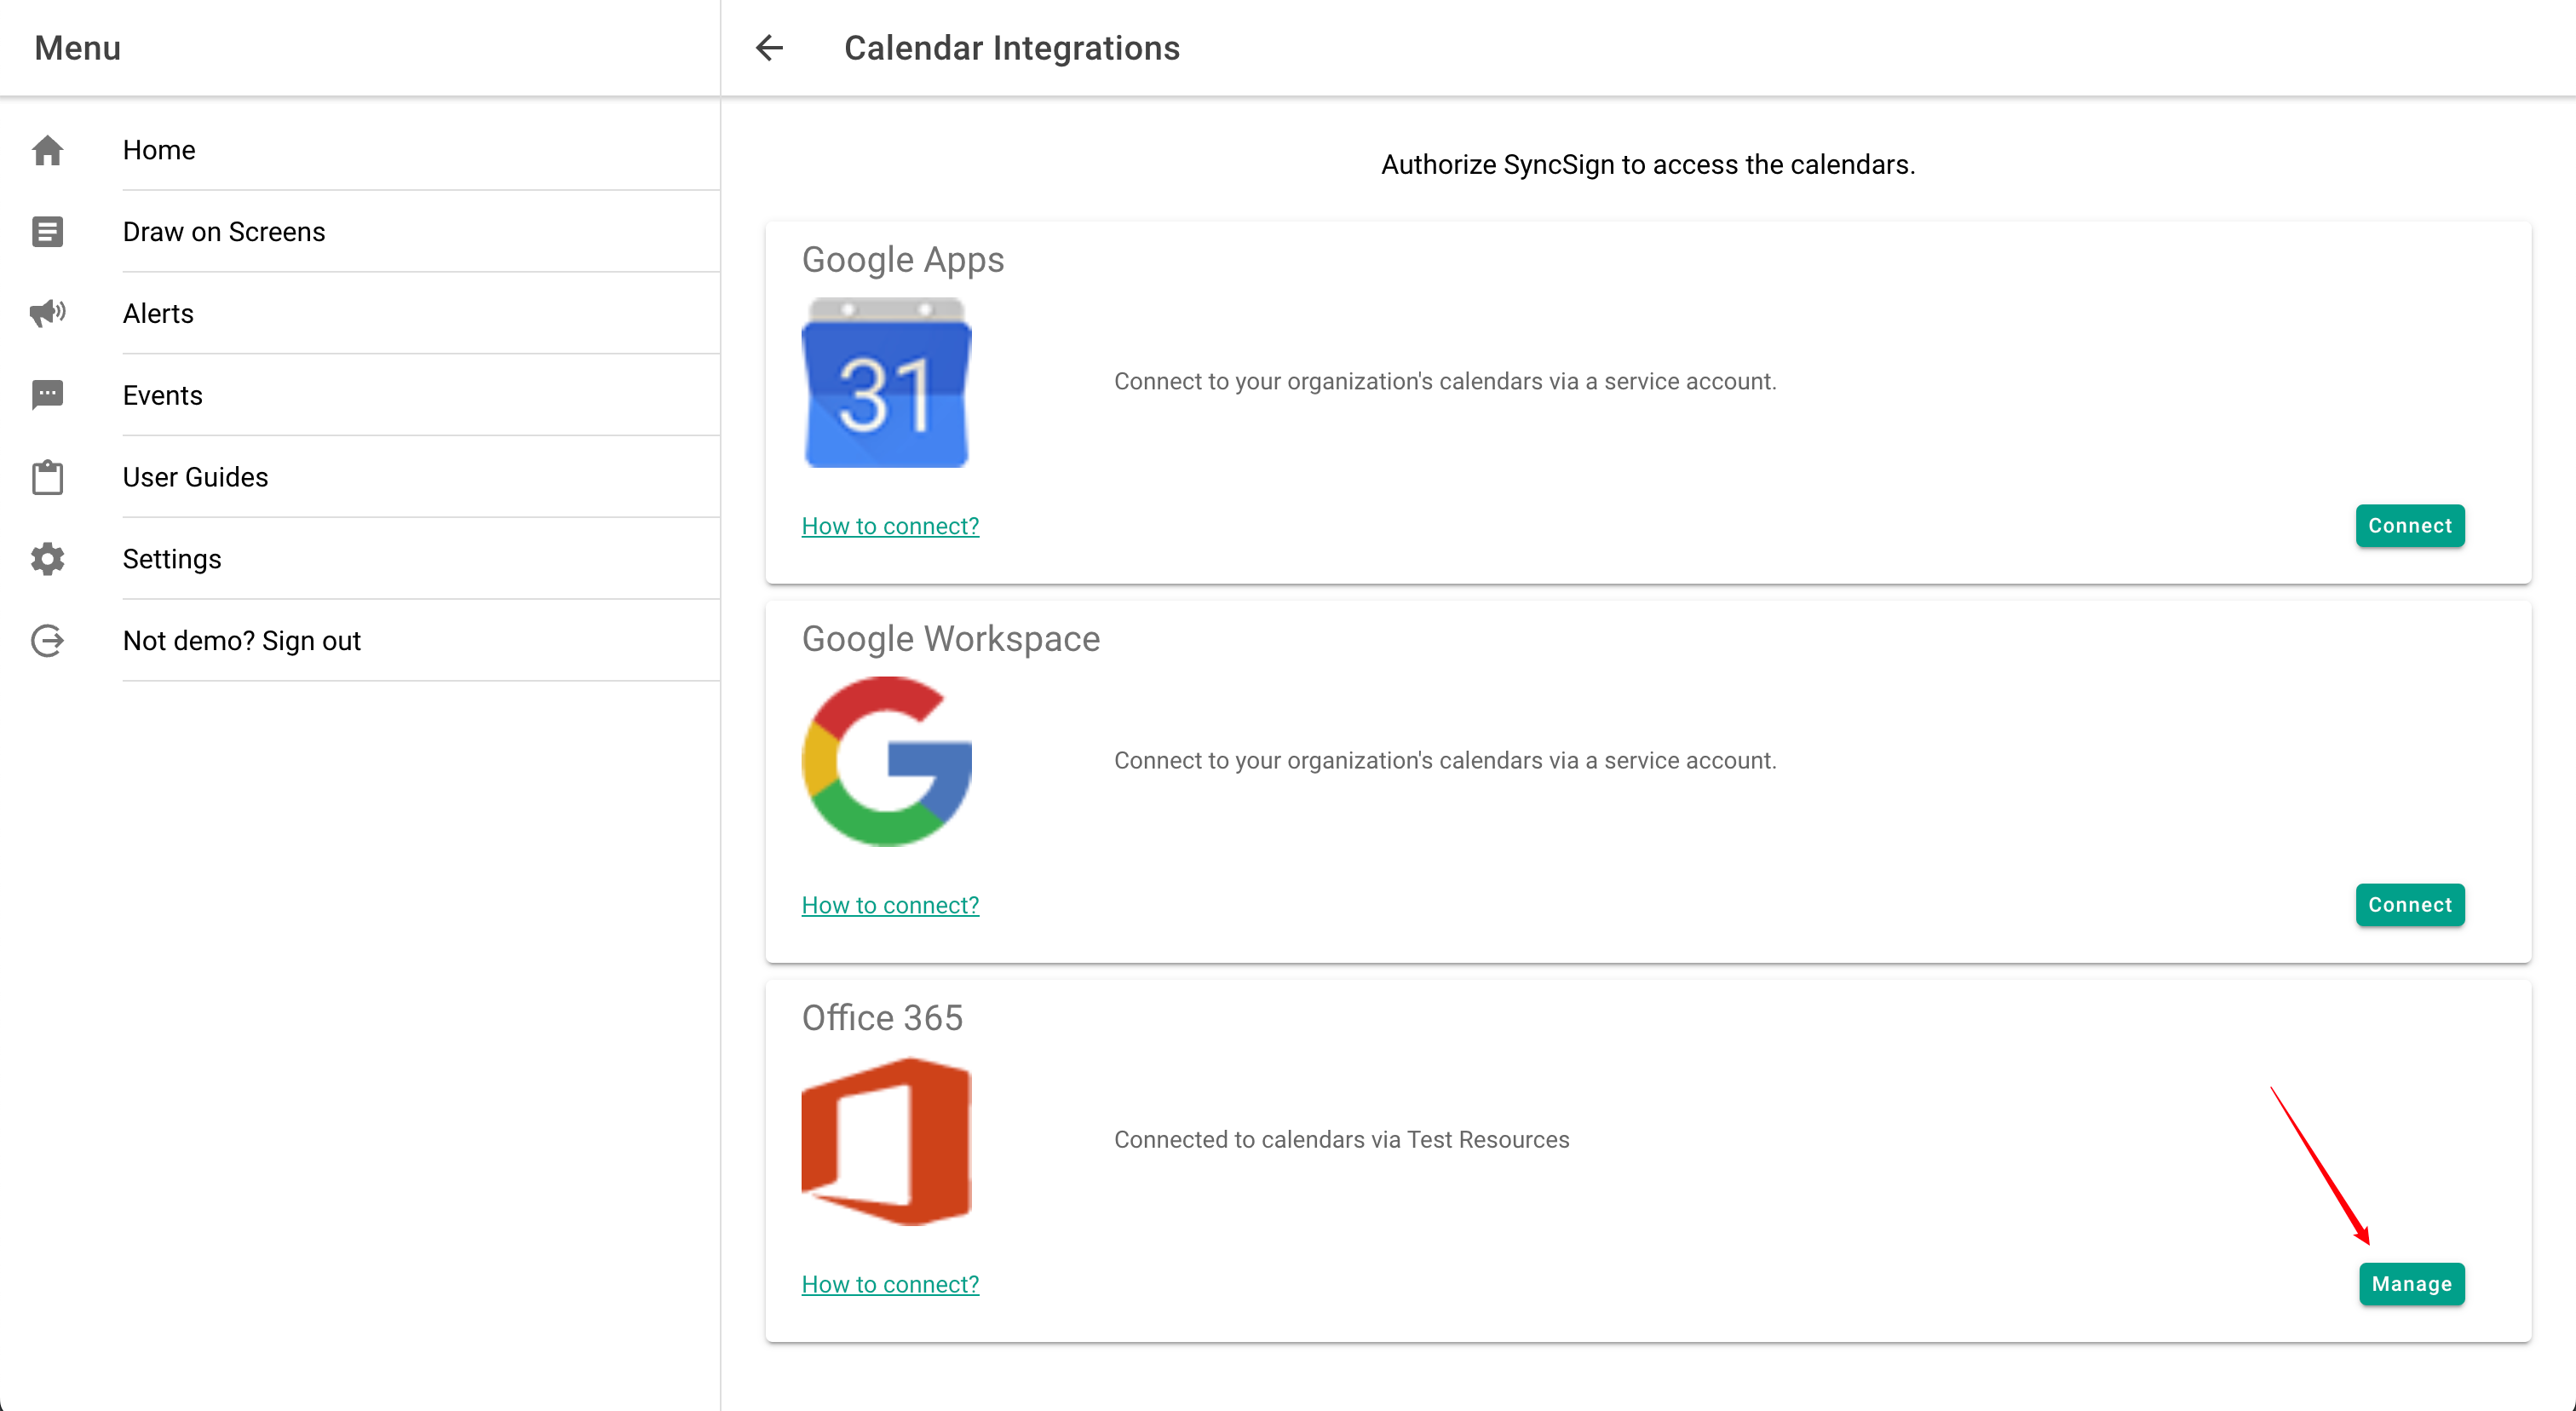
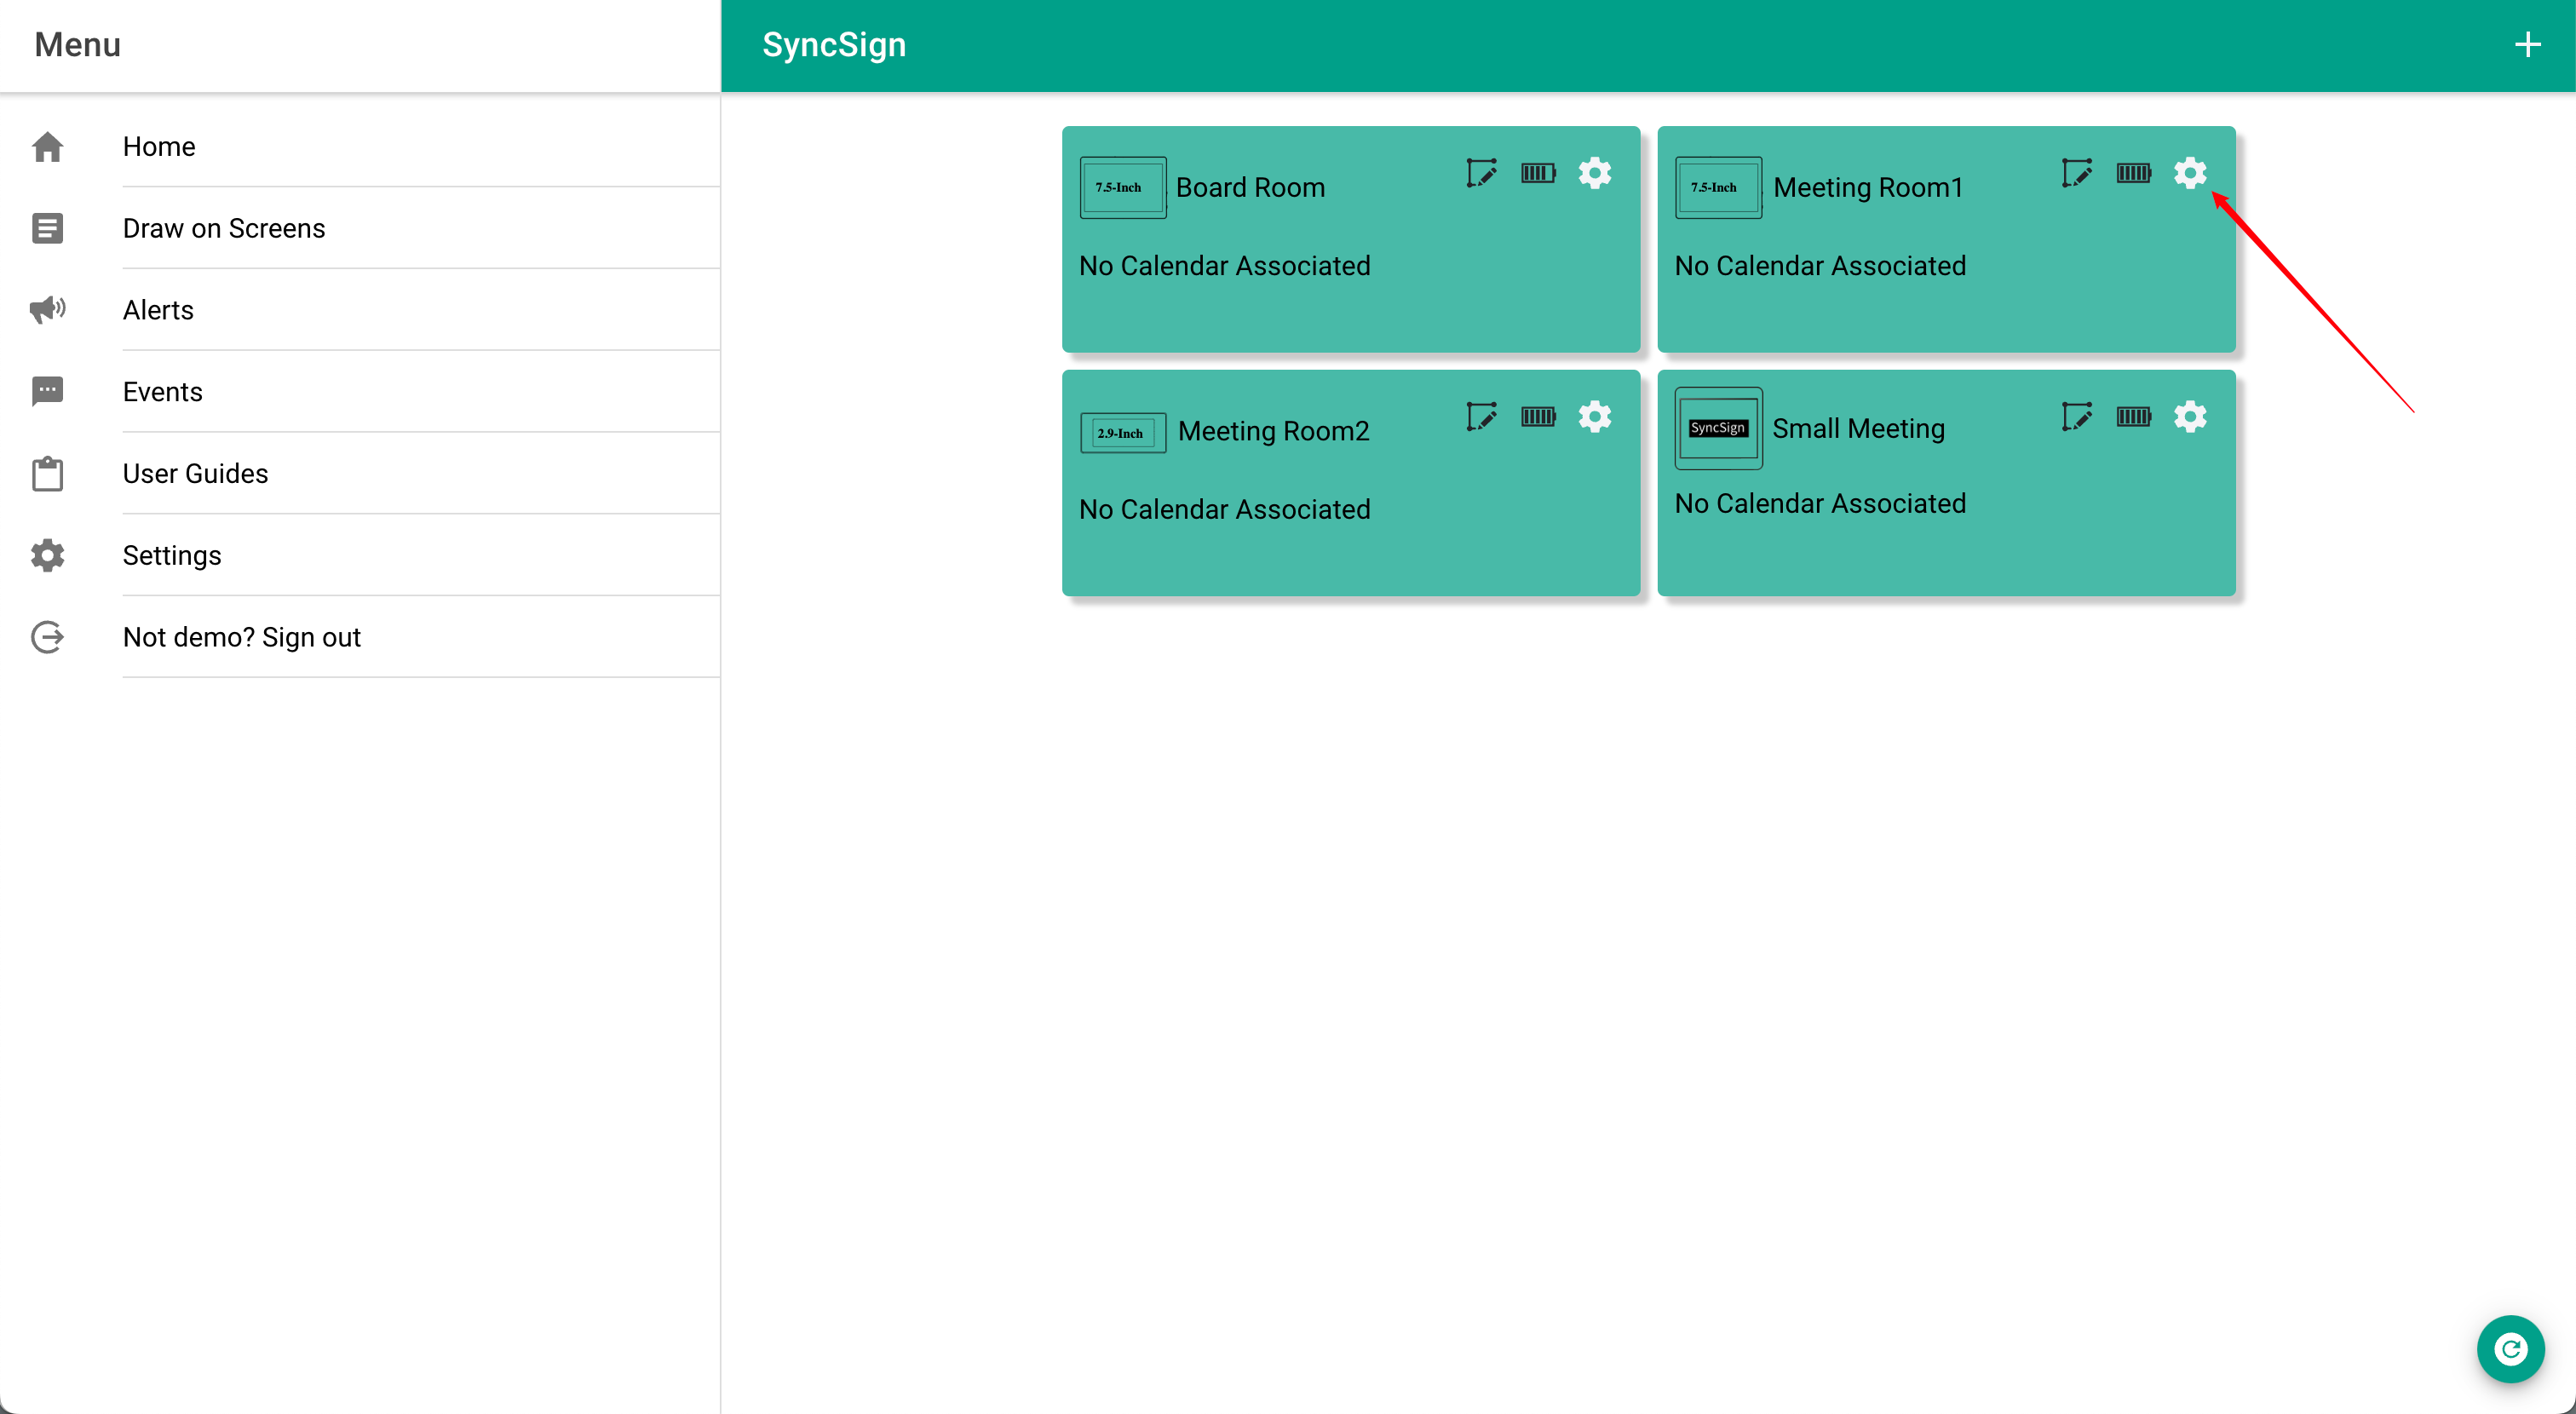
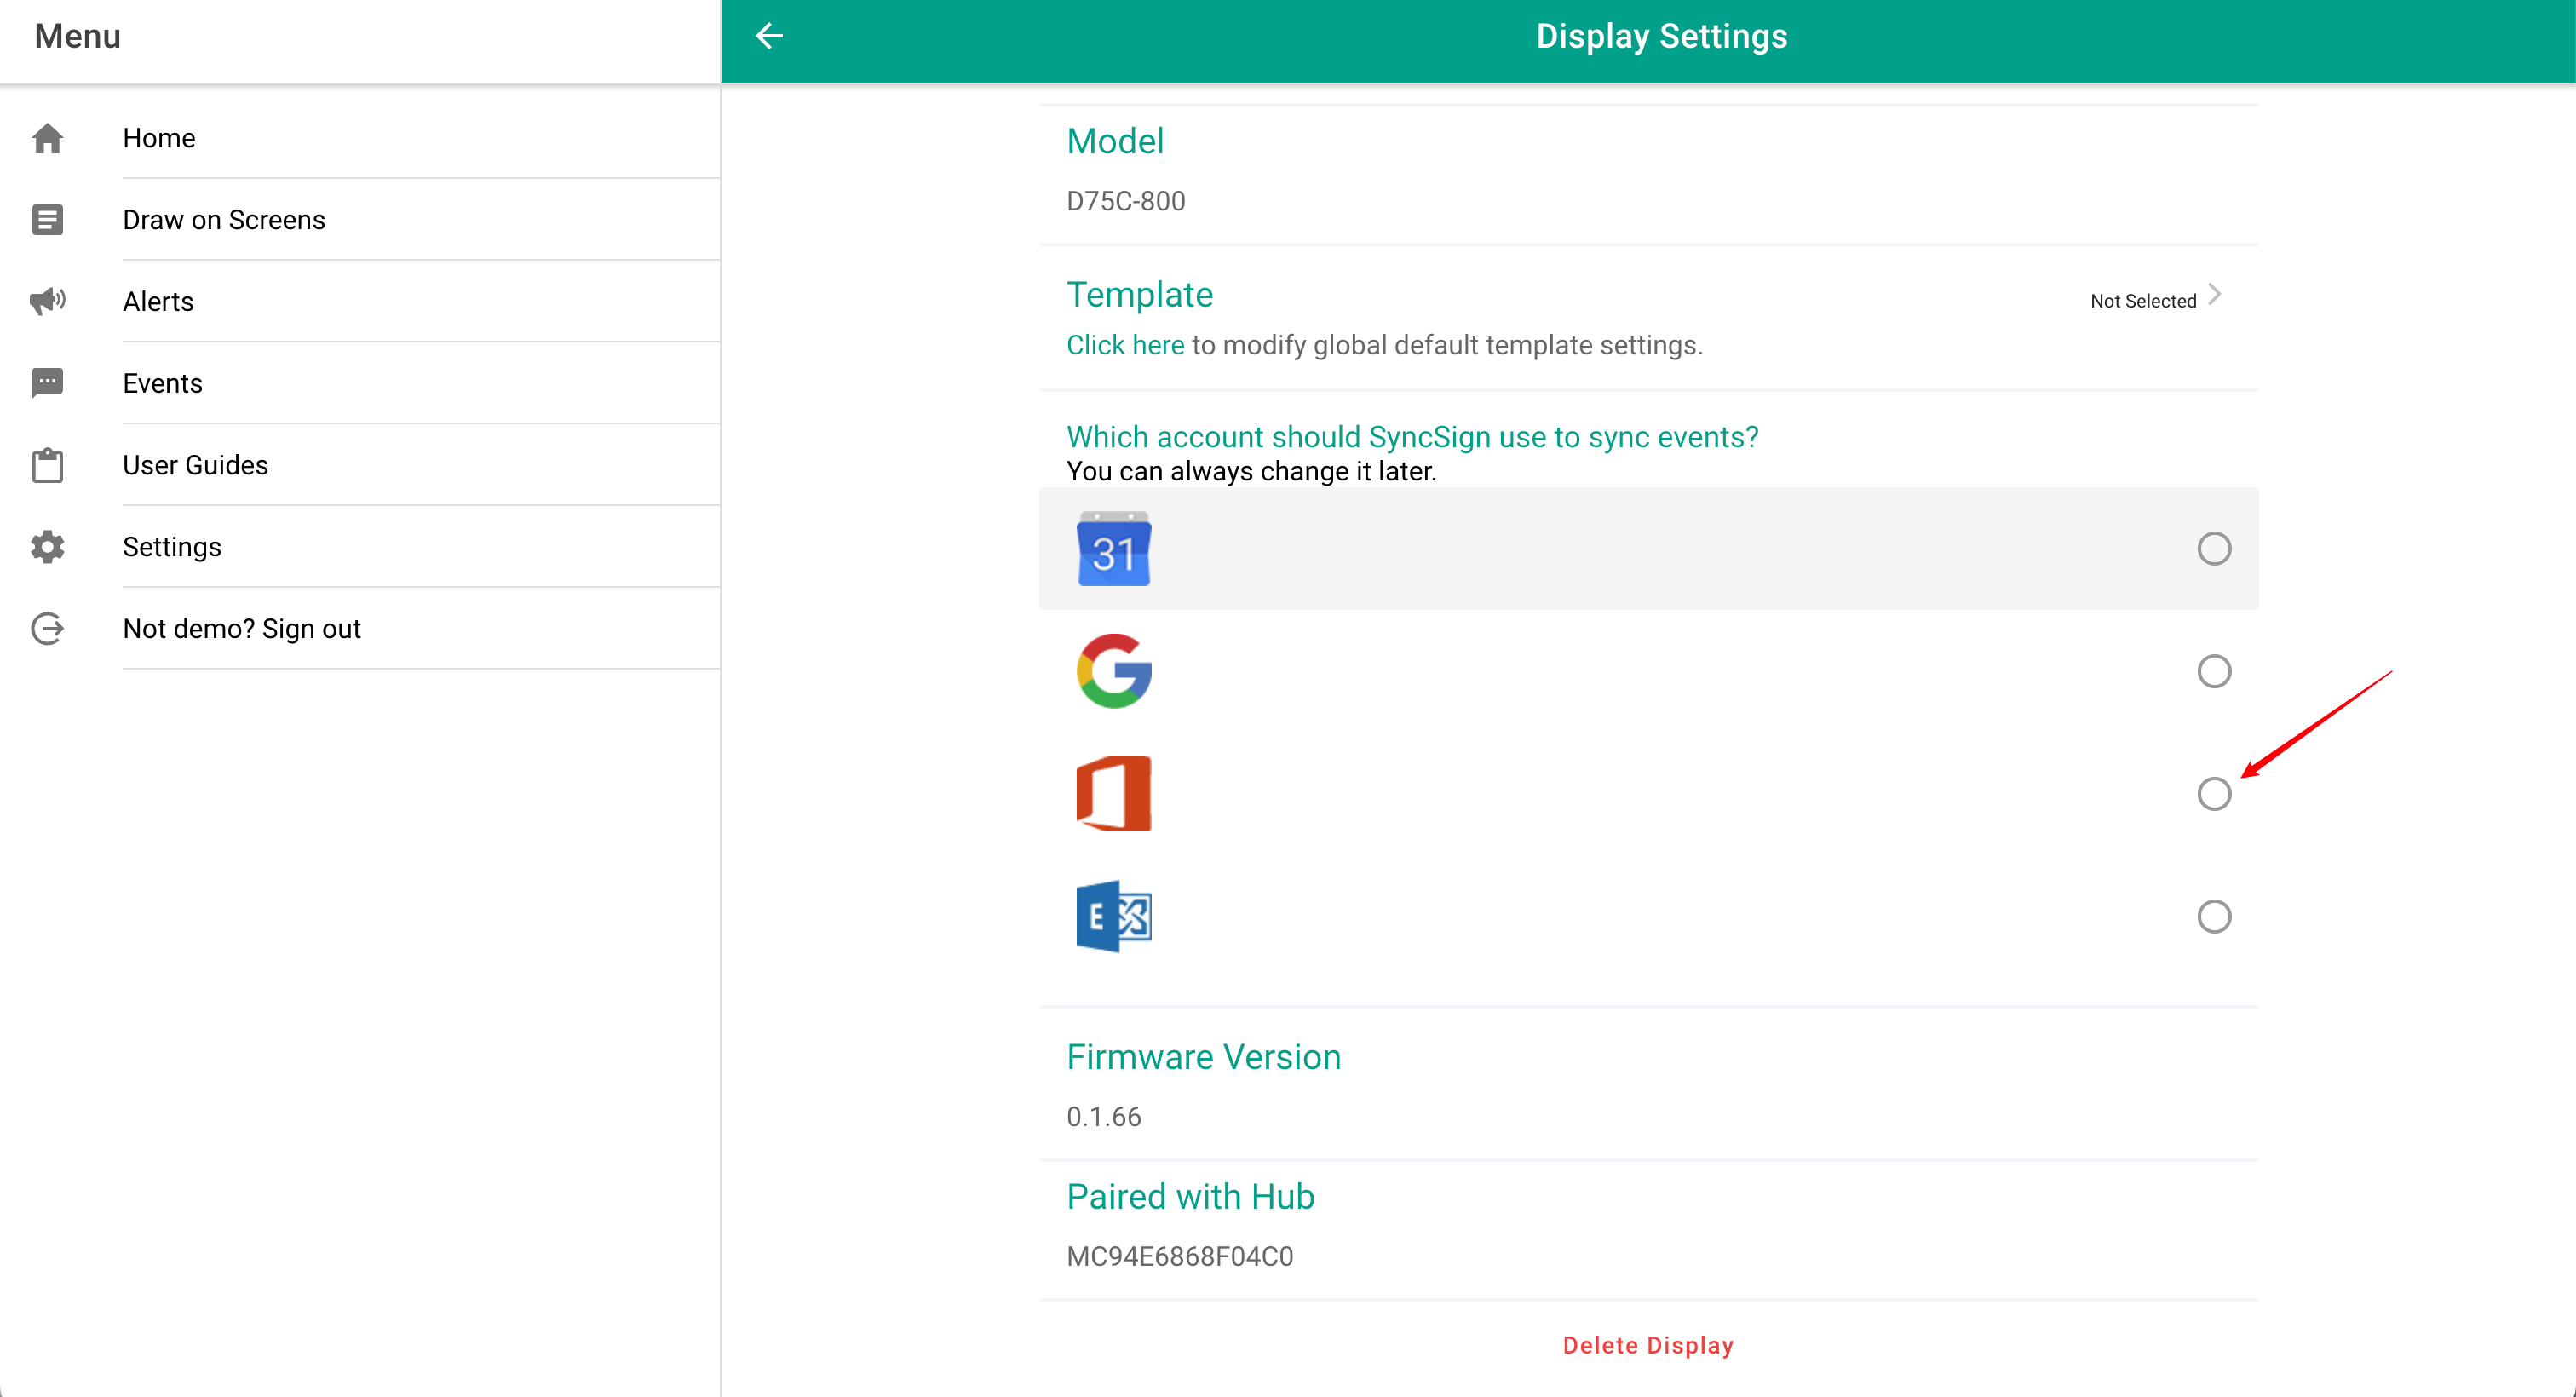
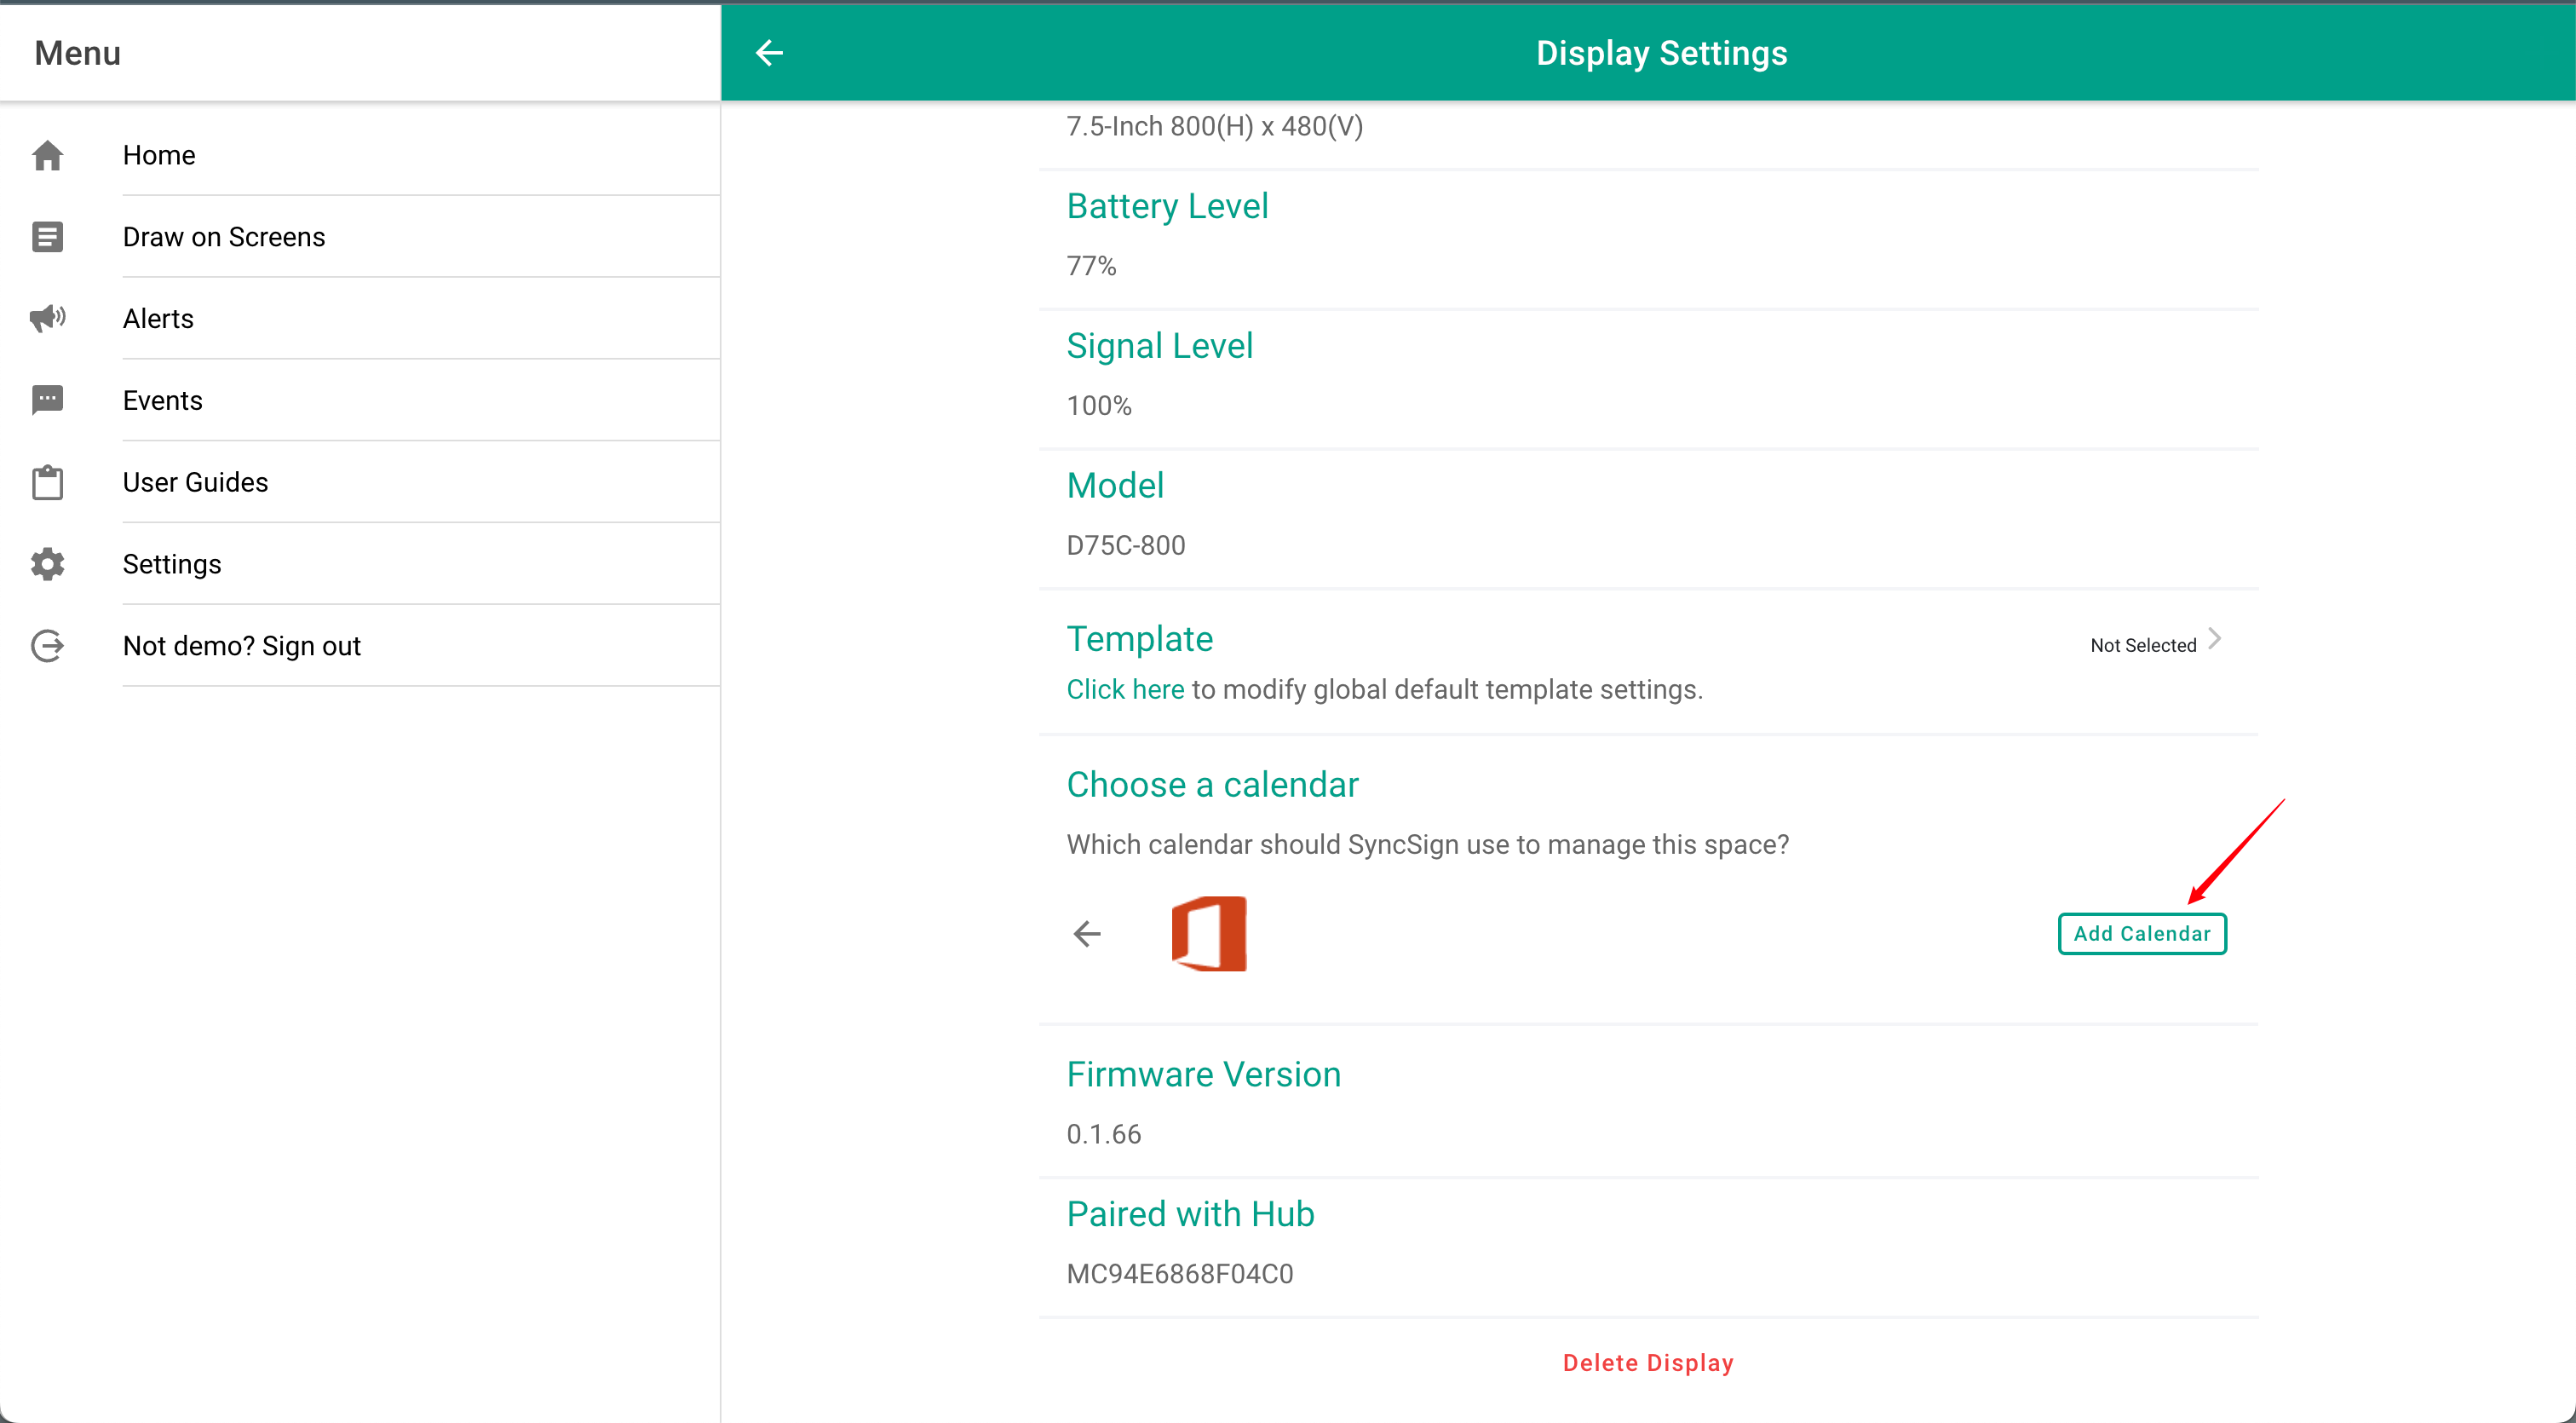
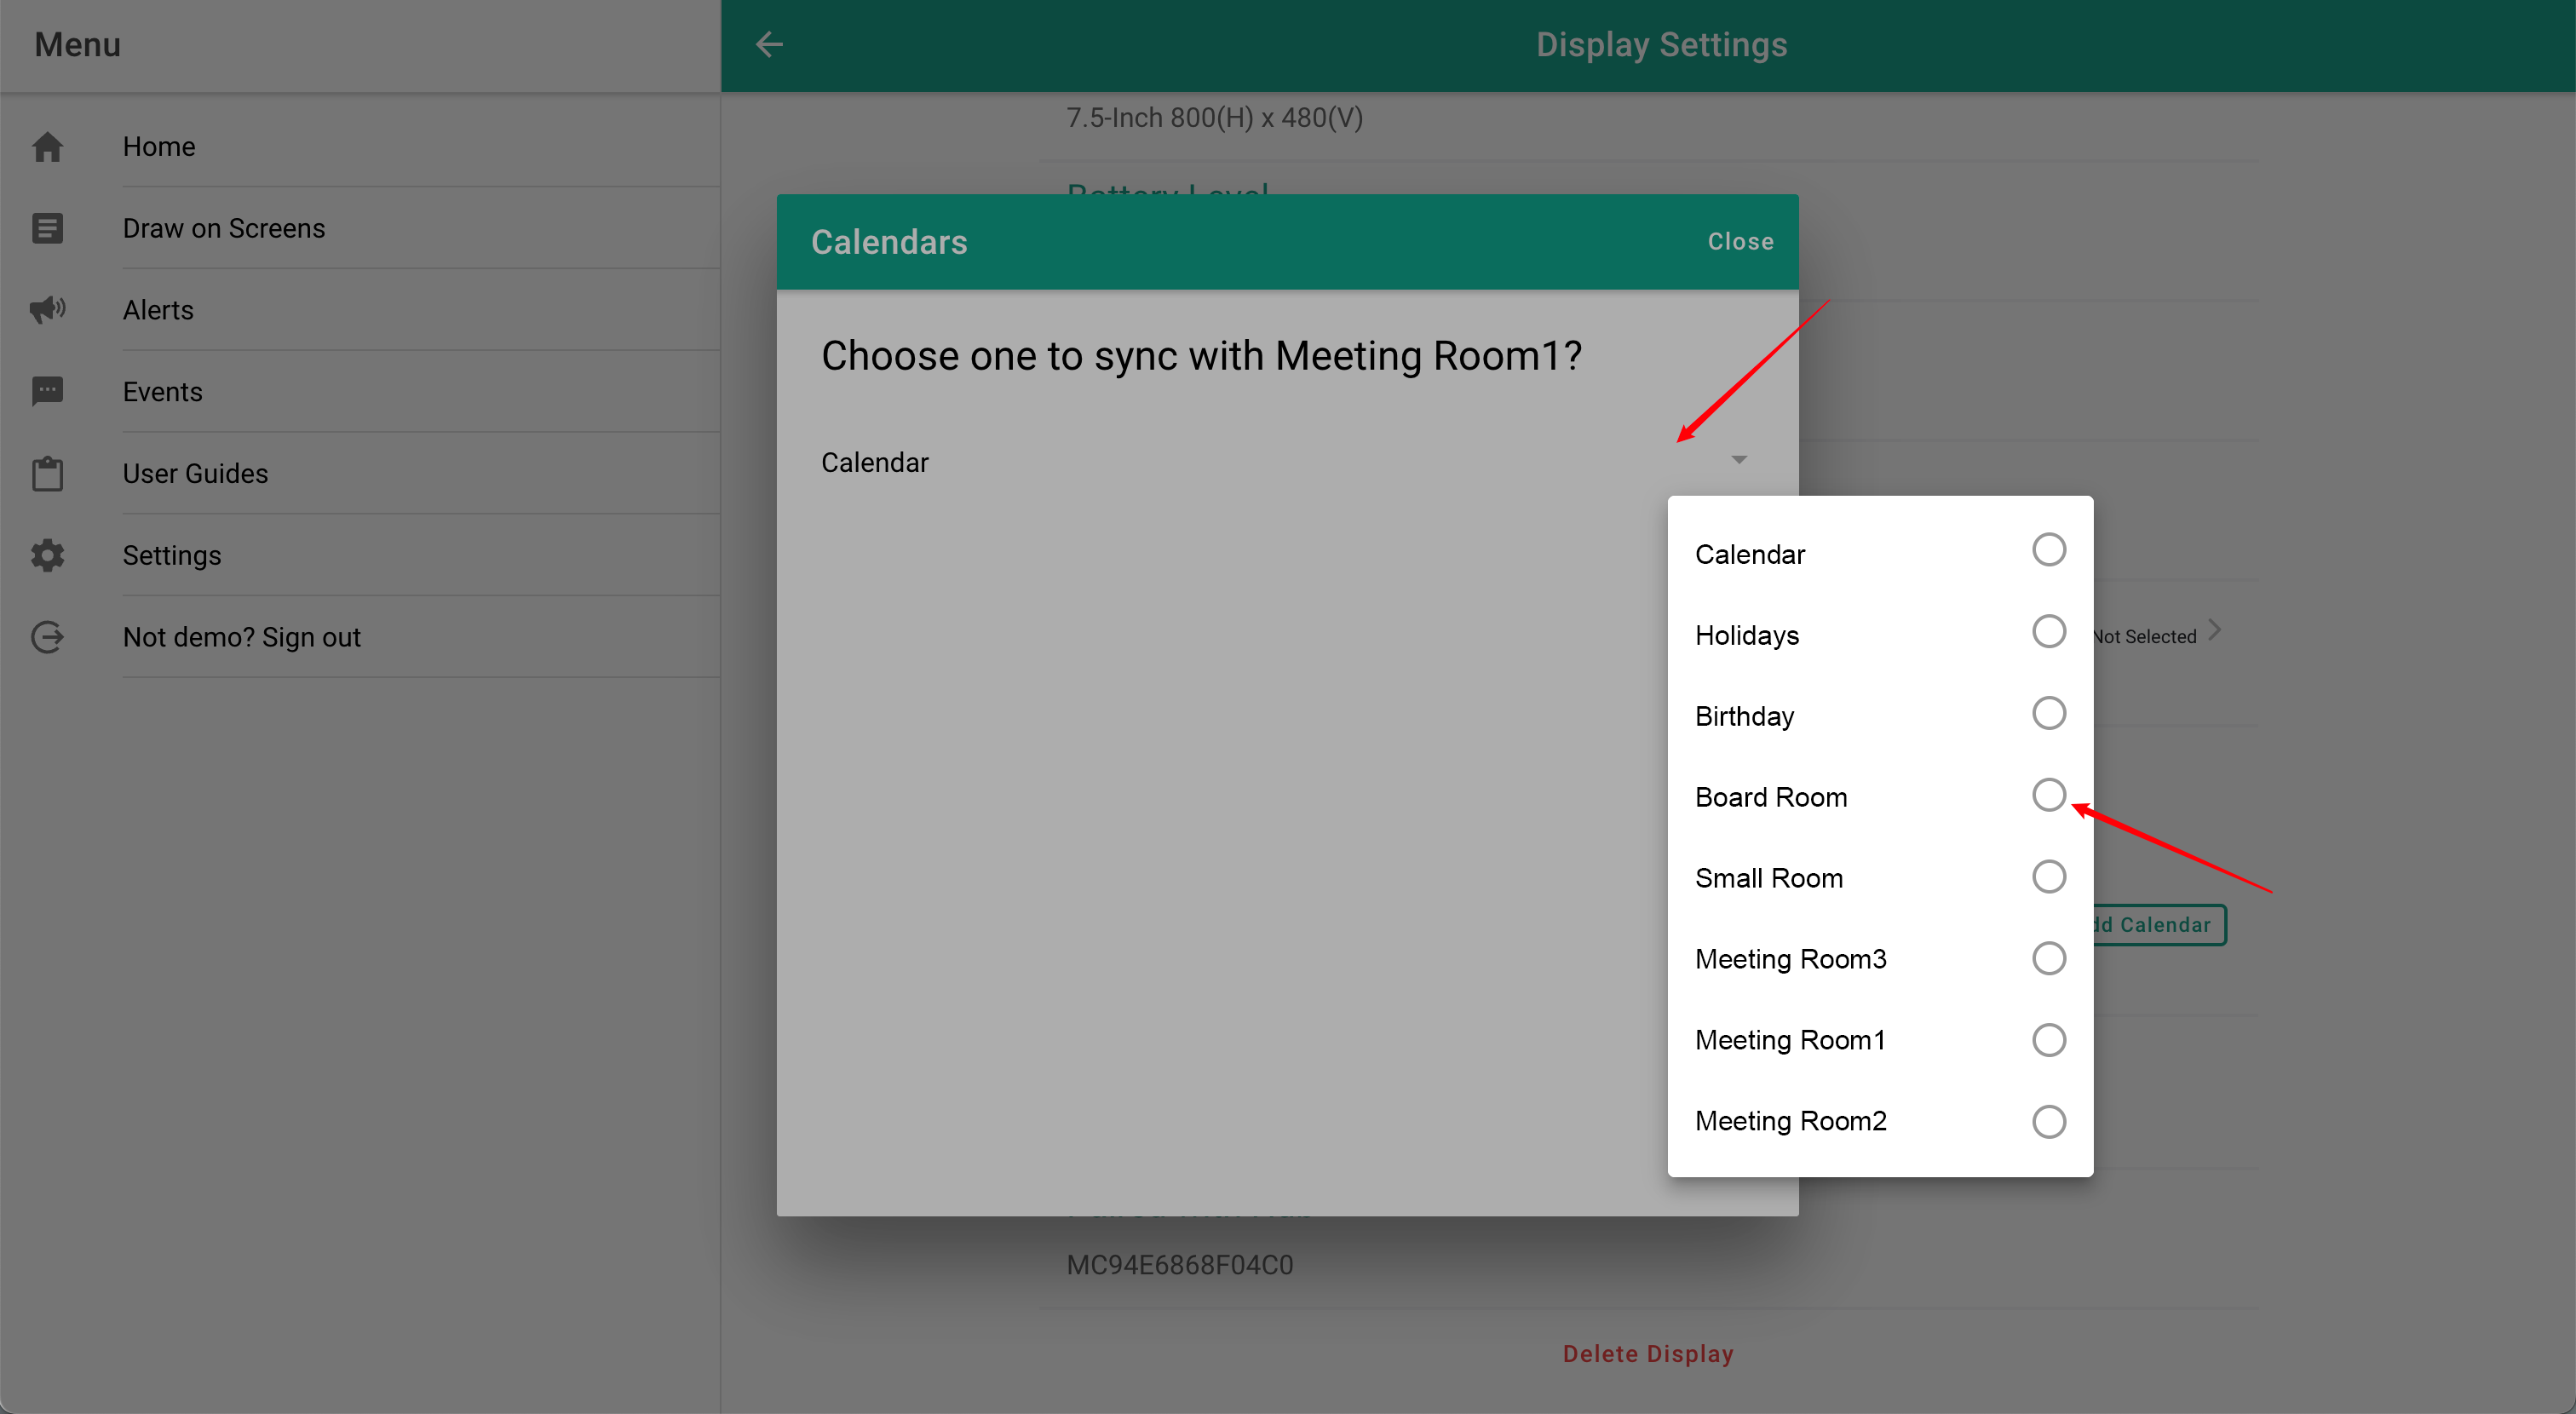
After 24 hours, you can add room resources in the SyncSign portal. To add a resource, navigate to “Home” -> “Display Settings” -> “Select Office 365,” and then click “Add Calendar” to manually add the room resource.
If you receive the error message “You don’t have permission to read and write to this room resource,” then you may not have waited long enough or have not set up delegation correctly.
If you encounter any issues, please feel free to contact us at (help@sync-sign.com).