How to create a room resource
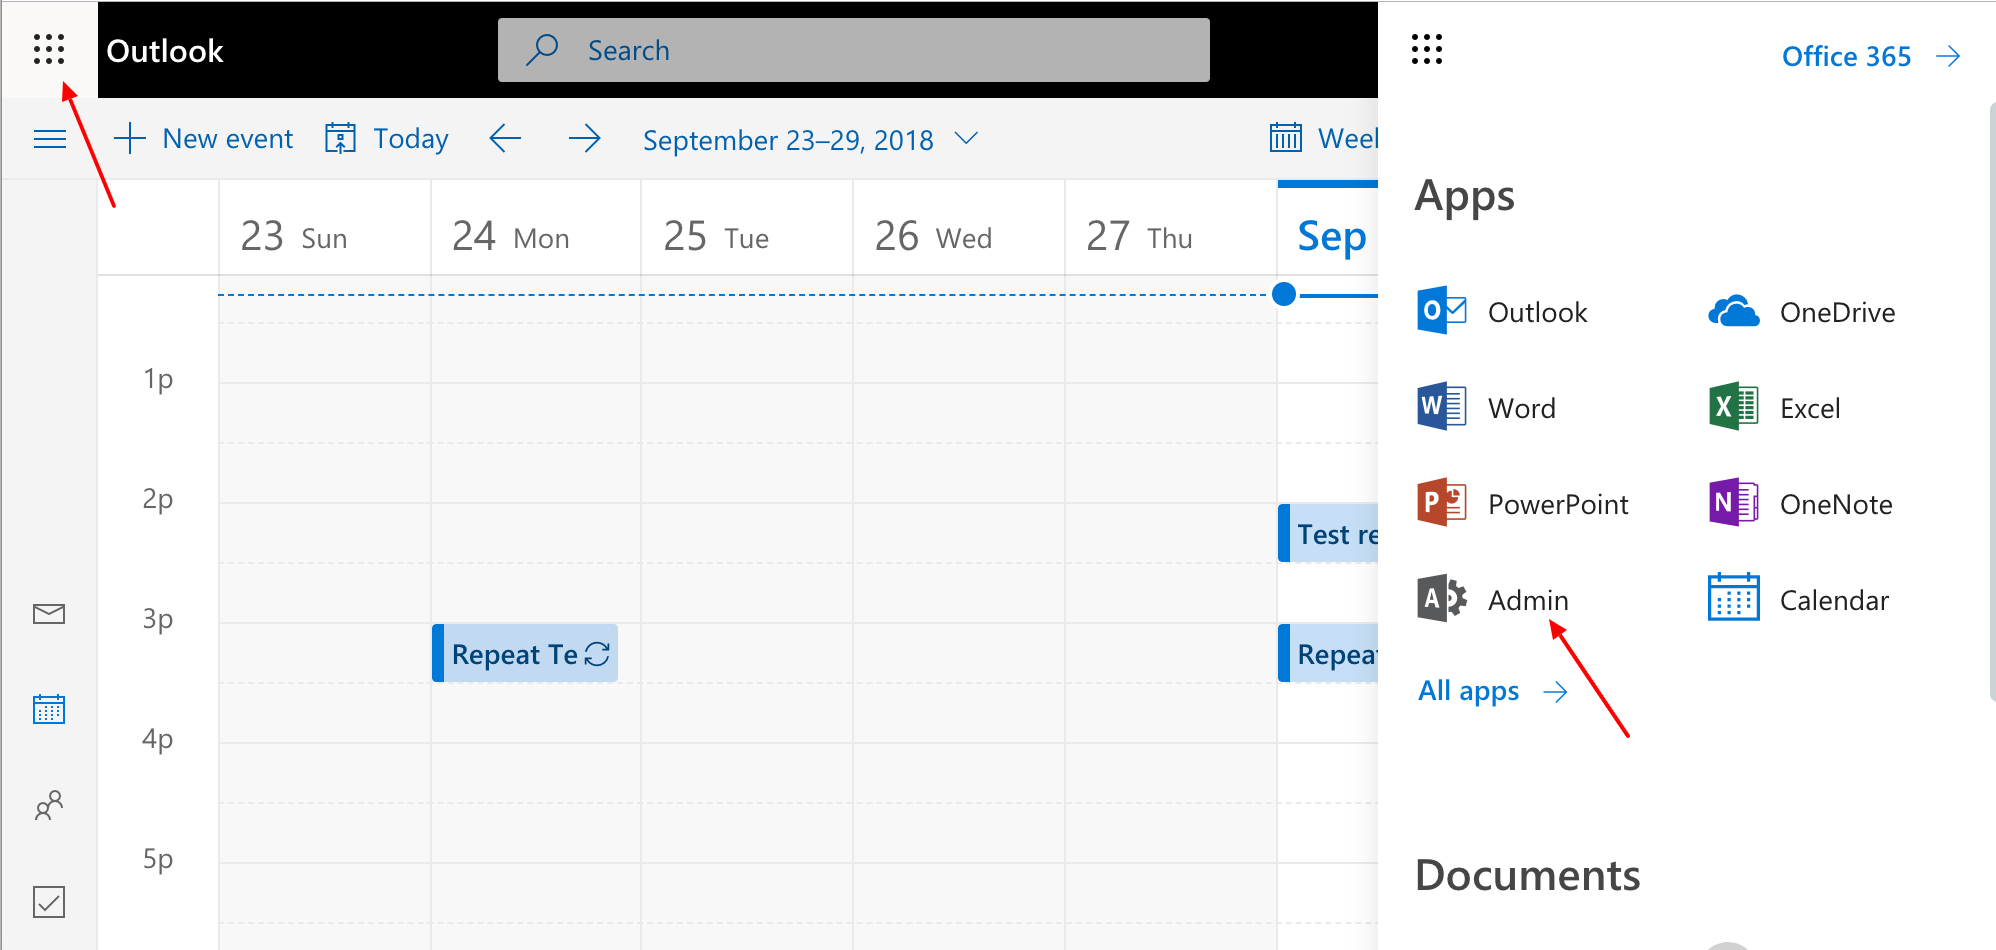
Navigate to [ Admin ] from the available apps menu.
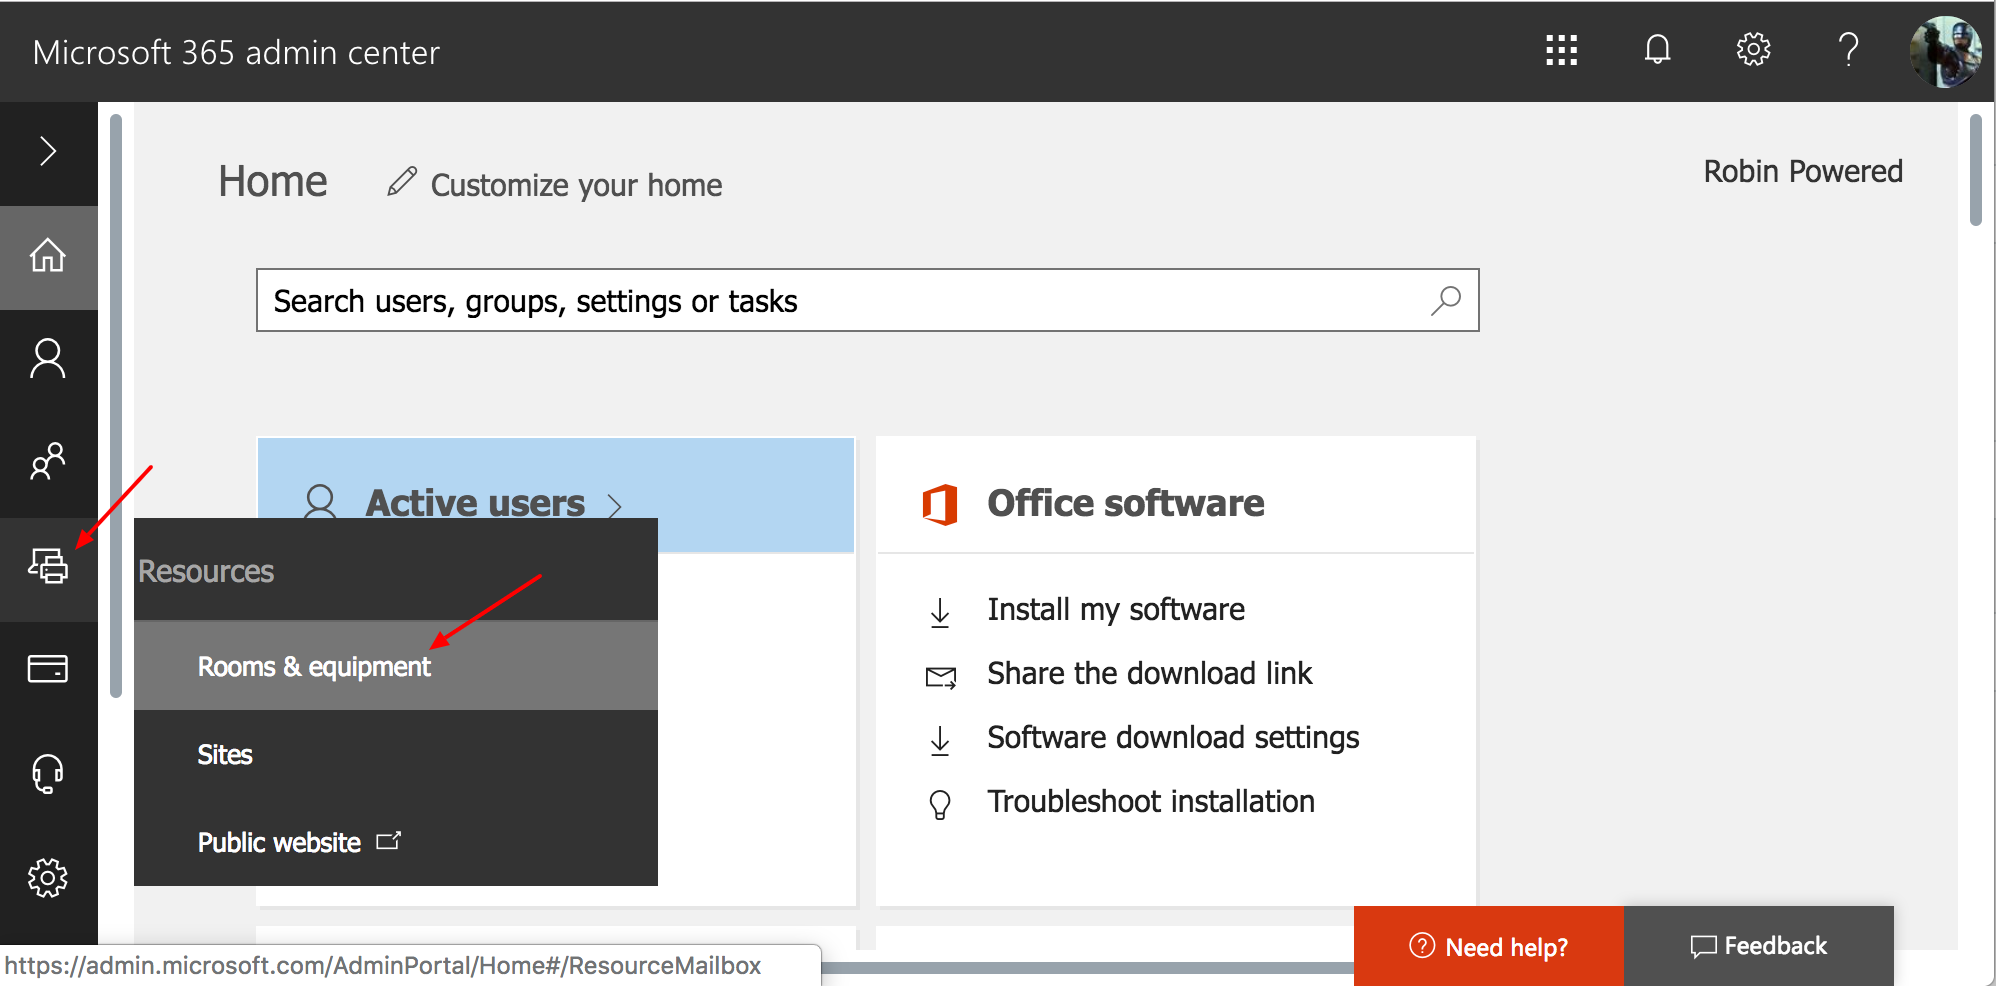
On the left side, select [ Resources ] > [ Rooms & equipment ].
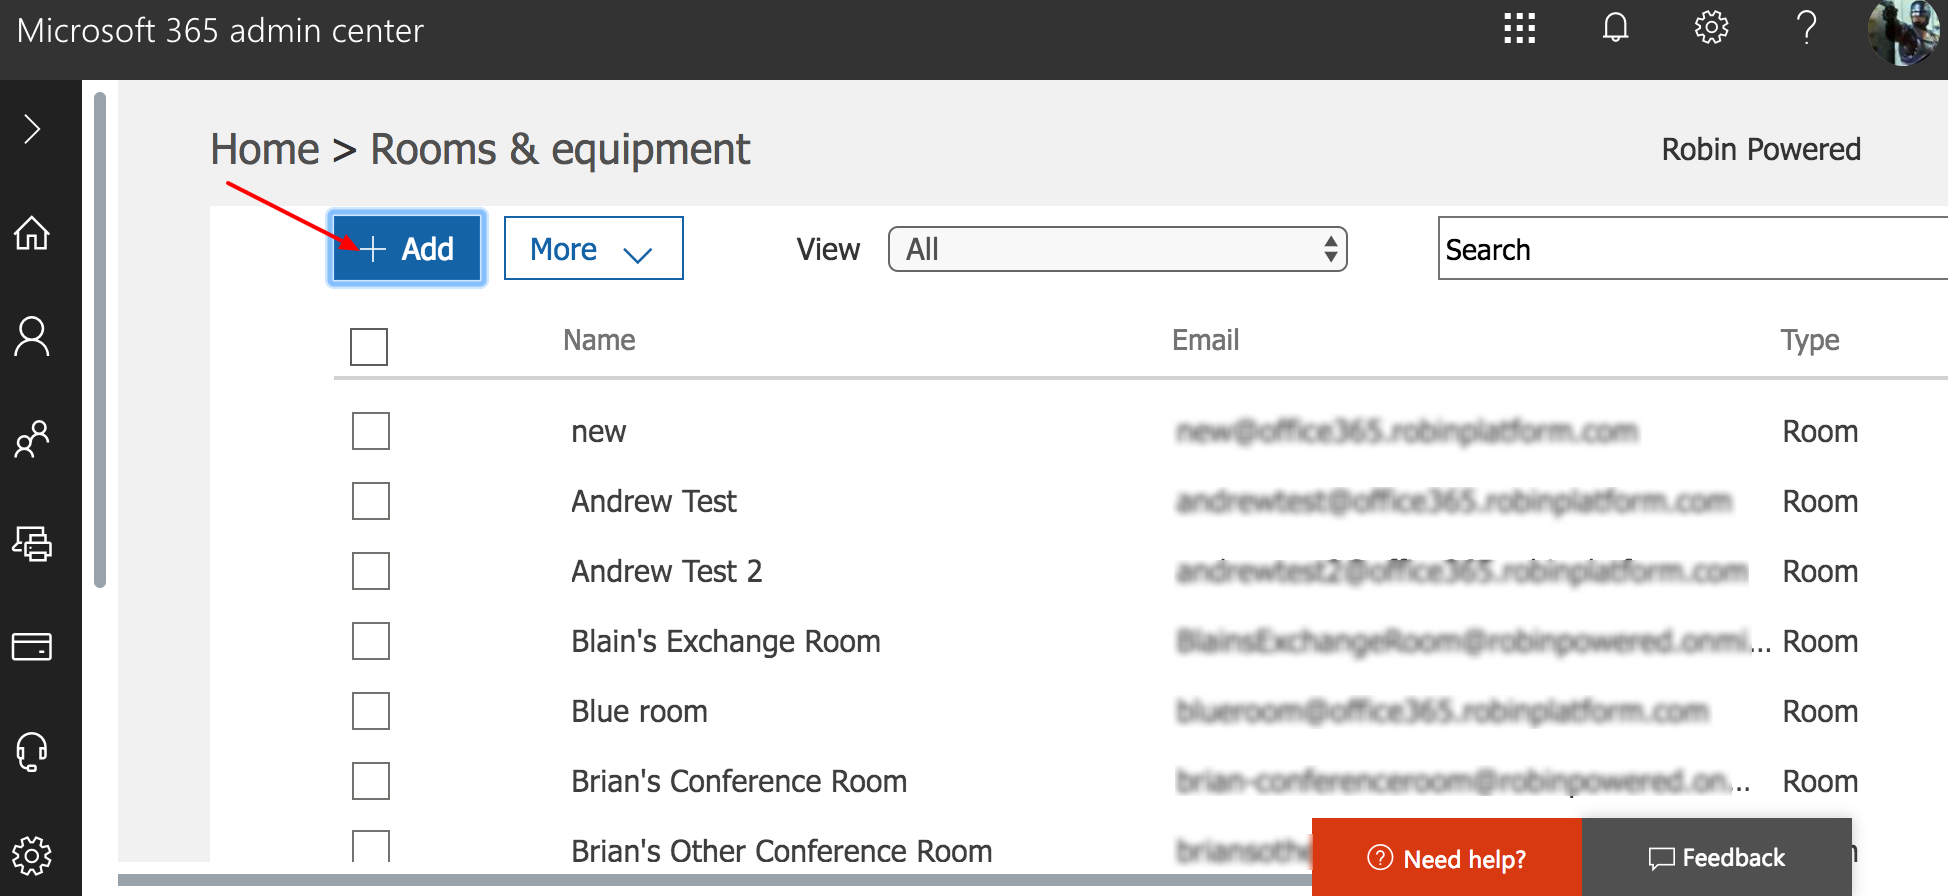
To add a new resource, click the [ + Add ] button.
If a meeting room calendar has already been set up by someone in your organization, you’ll see a list of room names and their associated email addresses. Meeting room calendars in Office 365 are similar to users rather than shared calendars, and each has its own email address for invitations.
Note
Variations in the Admin Panel in Office 365
If you don’t see the Equipment icon on the left-side menu, you might be using Office 365 for Small Business or another variant. The setup process might be slightly different. This Microsoft guide has more information.
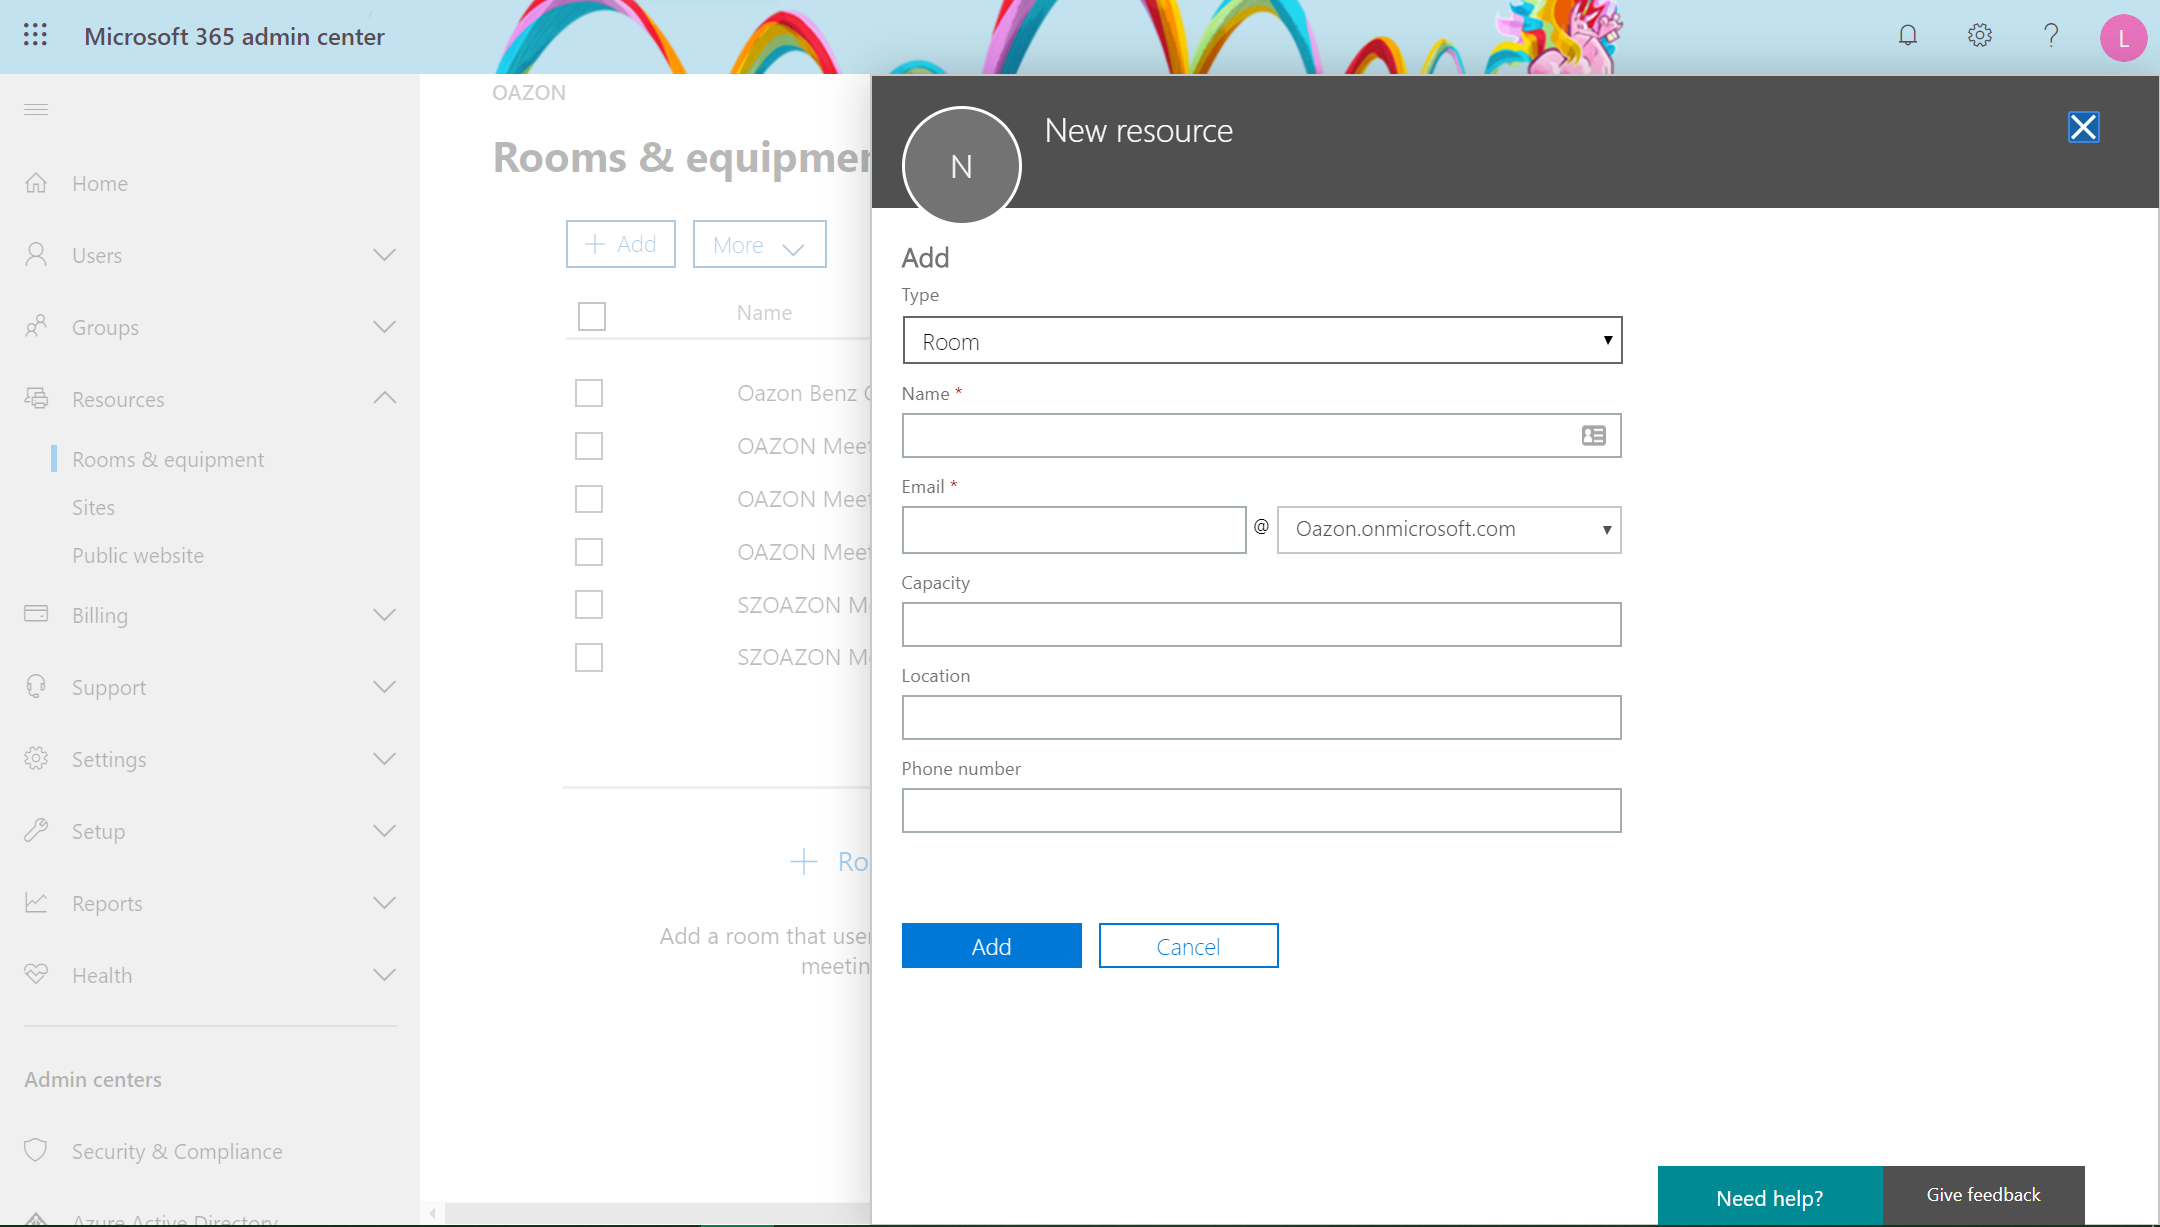
Fill out the details of your meeting room resource. You can include the name of the meeting room you’re adding, your email (or the person who will be associated with the space), the maximum capacity for meeting attendees, the location, and phone number (if applicable). We recommend creating a room resource for each meeting room. Once you finish, click [ Add ] to save your changes.
Click [ Set scheduling options ] to ensure the room will automatically accept meeting invitations when available (this is the default).

Repeat the process to create resources for each bookable space in your office.